In this post I want to talk a little about the BSides Cape Town 2017 RFCat challenge and how I went about trying to build a challenge for it. Unfortunately I was not able to able to attend the conference itself, but still had the privilege to contribute in some way!
The first question you may have could be: “But why RFCat?”. Truthfully, some people that are way better at this hacking thing than me (and that were also primarily responsible for this years BSides badge hardware) came up with this idea: “Wouldn’t it be cool to have a cc1111 chip on the badges?”. The cc1111 chip is RFCat compatible, so naturally this would be the goto firmware to use for the chip. With this in mind, I got invited by @elasticninja to see if I would be interested in building an RFCat based challenge and without hesitation agreed! So there we were.
the hardware
Taking a quick look at the actual hardware used, the badge itself was composed of two separate physical badges which included a black “flux capacitor” badge and a red “rf badge”. The flux capacitor badge sported an 2AL3B ESP chip that gave the badge wifi capabilities amongst others cool things.
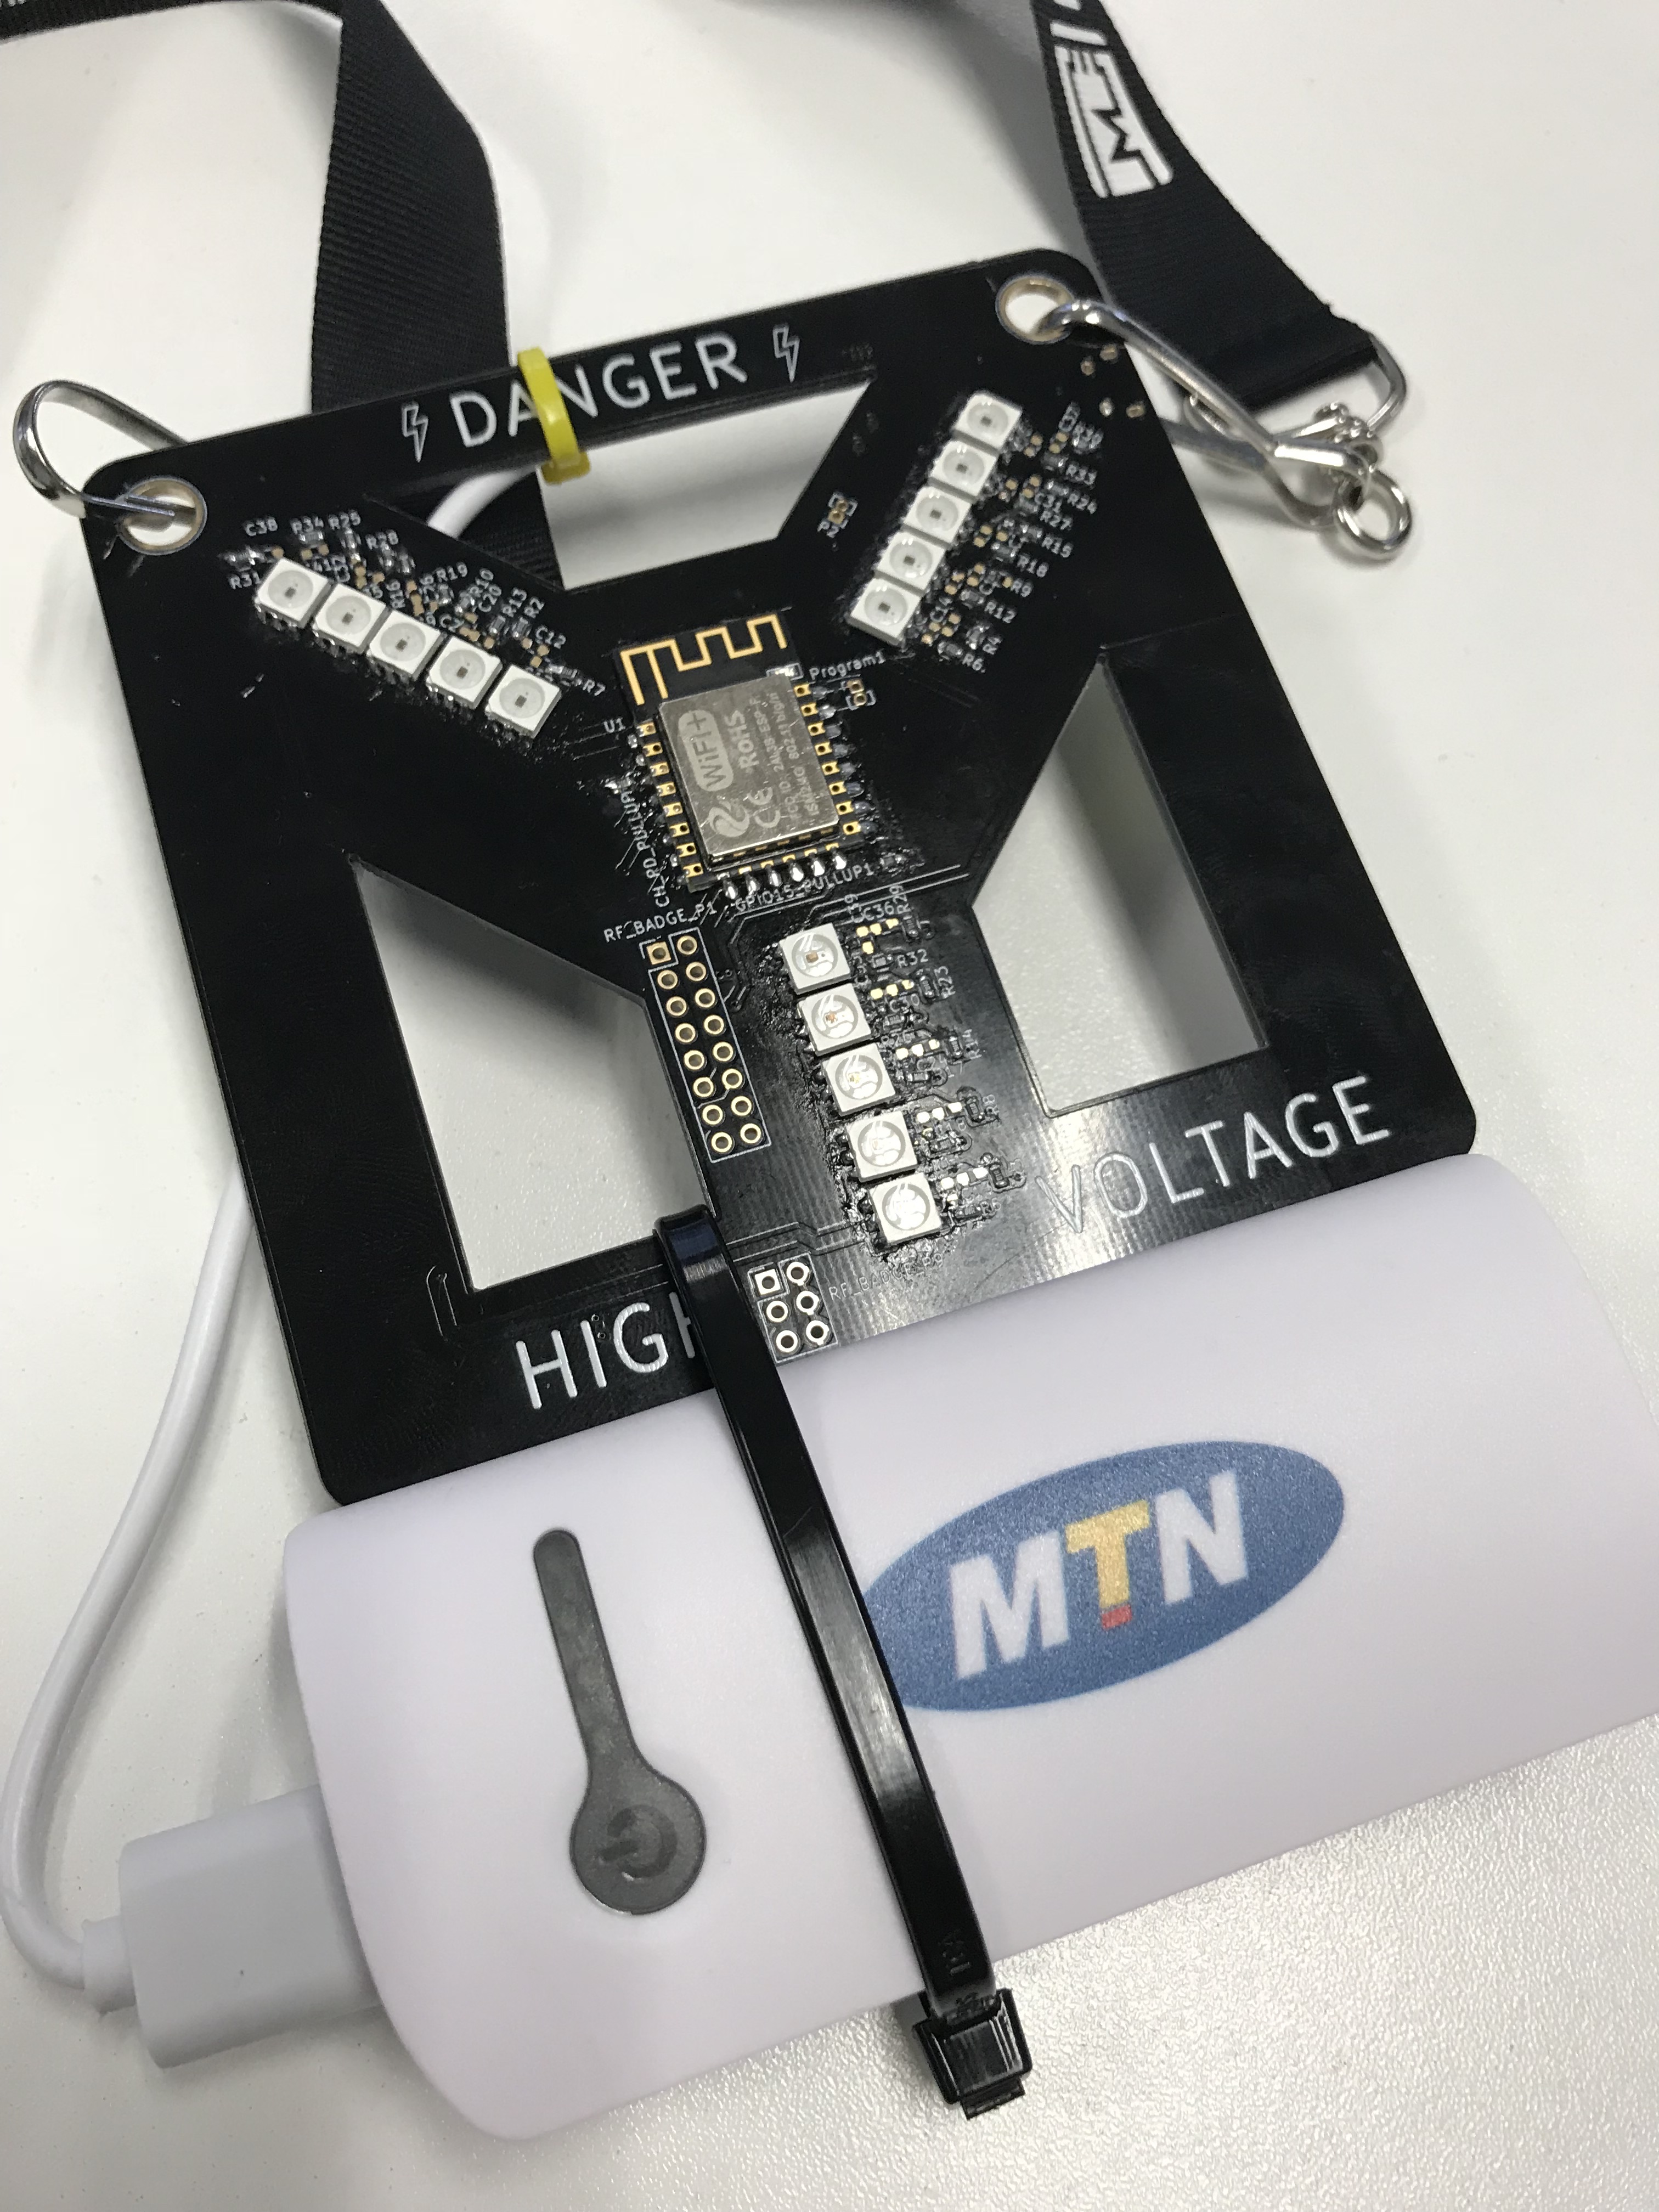
The power bank used was estimated to give at least a full days power to the badge allowing for people to play with and hack away without needing a recharge too often.
The power bank itself was wired to a USB cable, letting you unplug it and charge the power bank easily. There were also two buttons soldered on to the back of the badge.
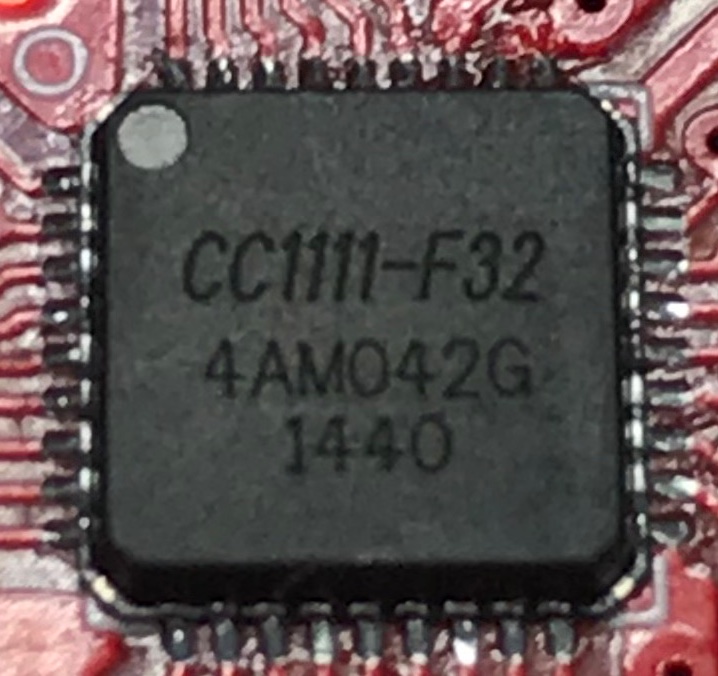
For the purposes of this post though, we will only focus on the red RF badge with the cc1111 chip soldered on.
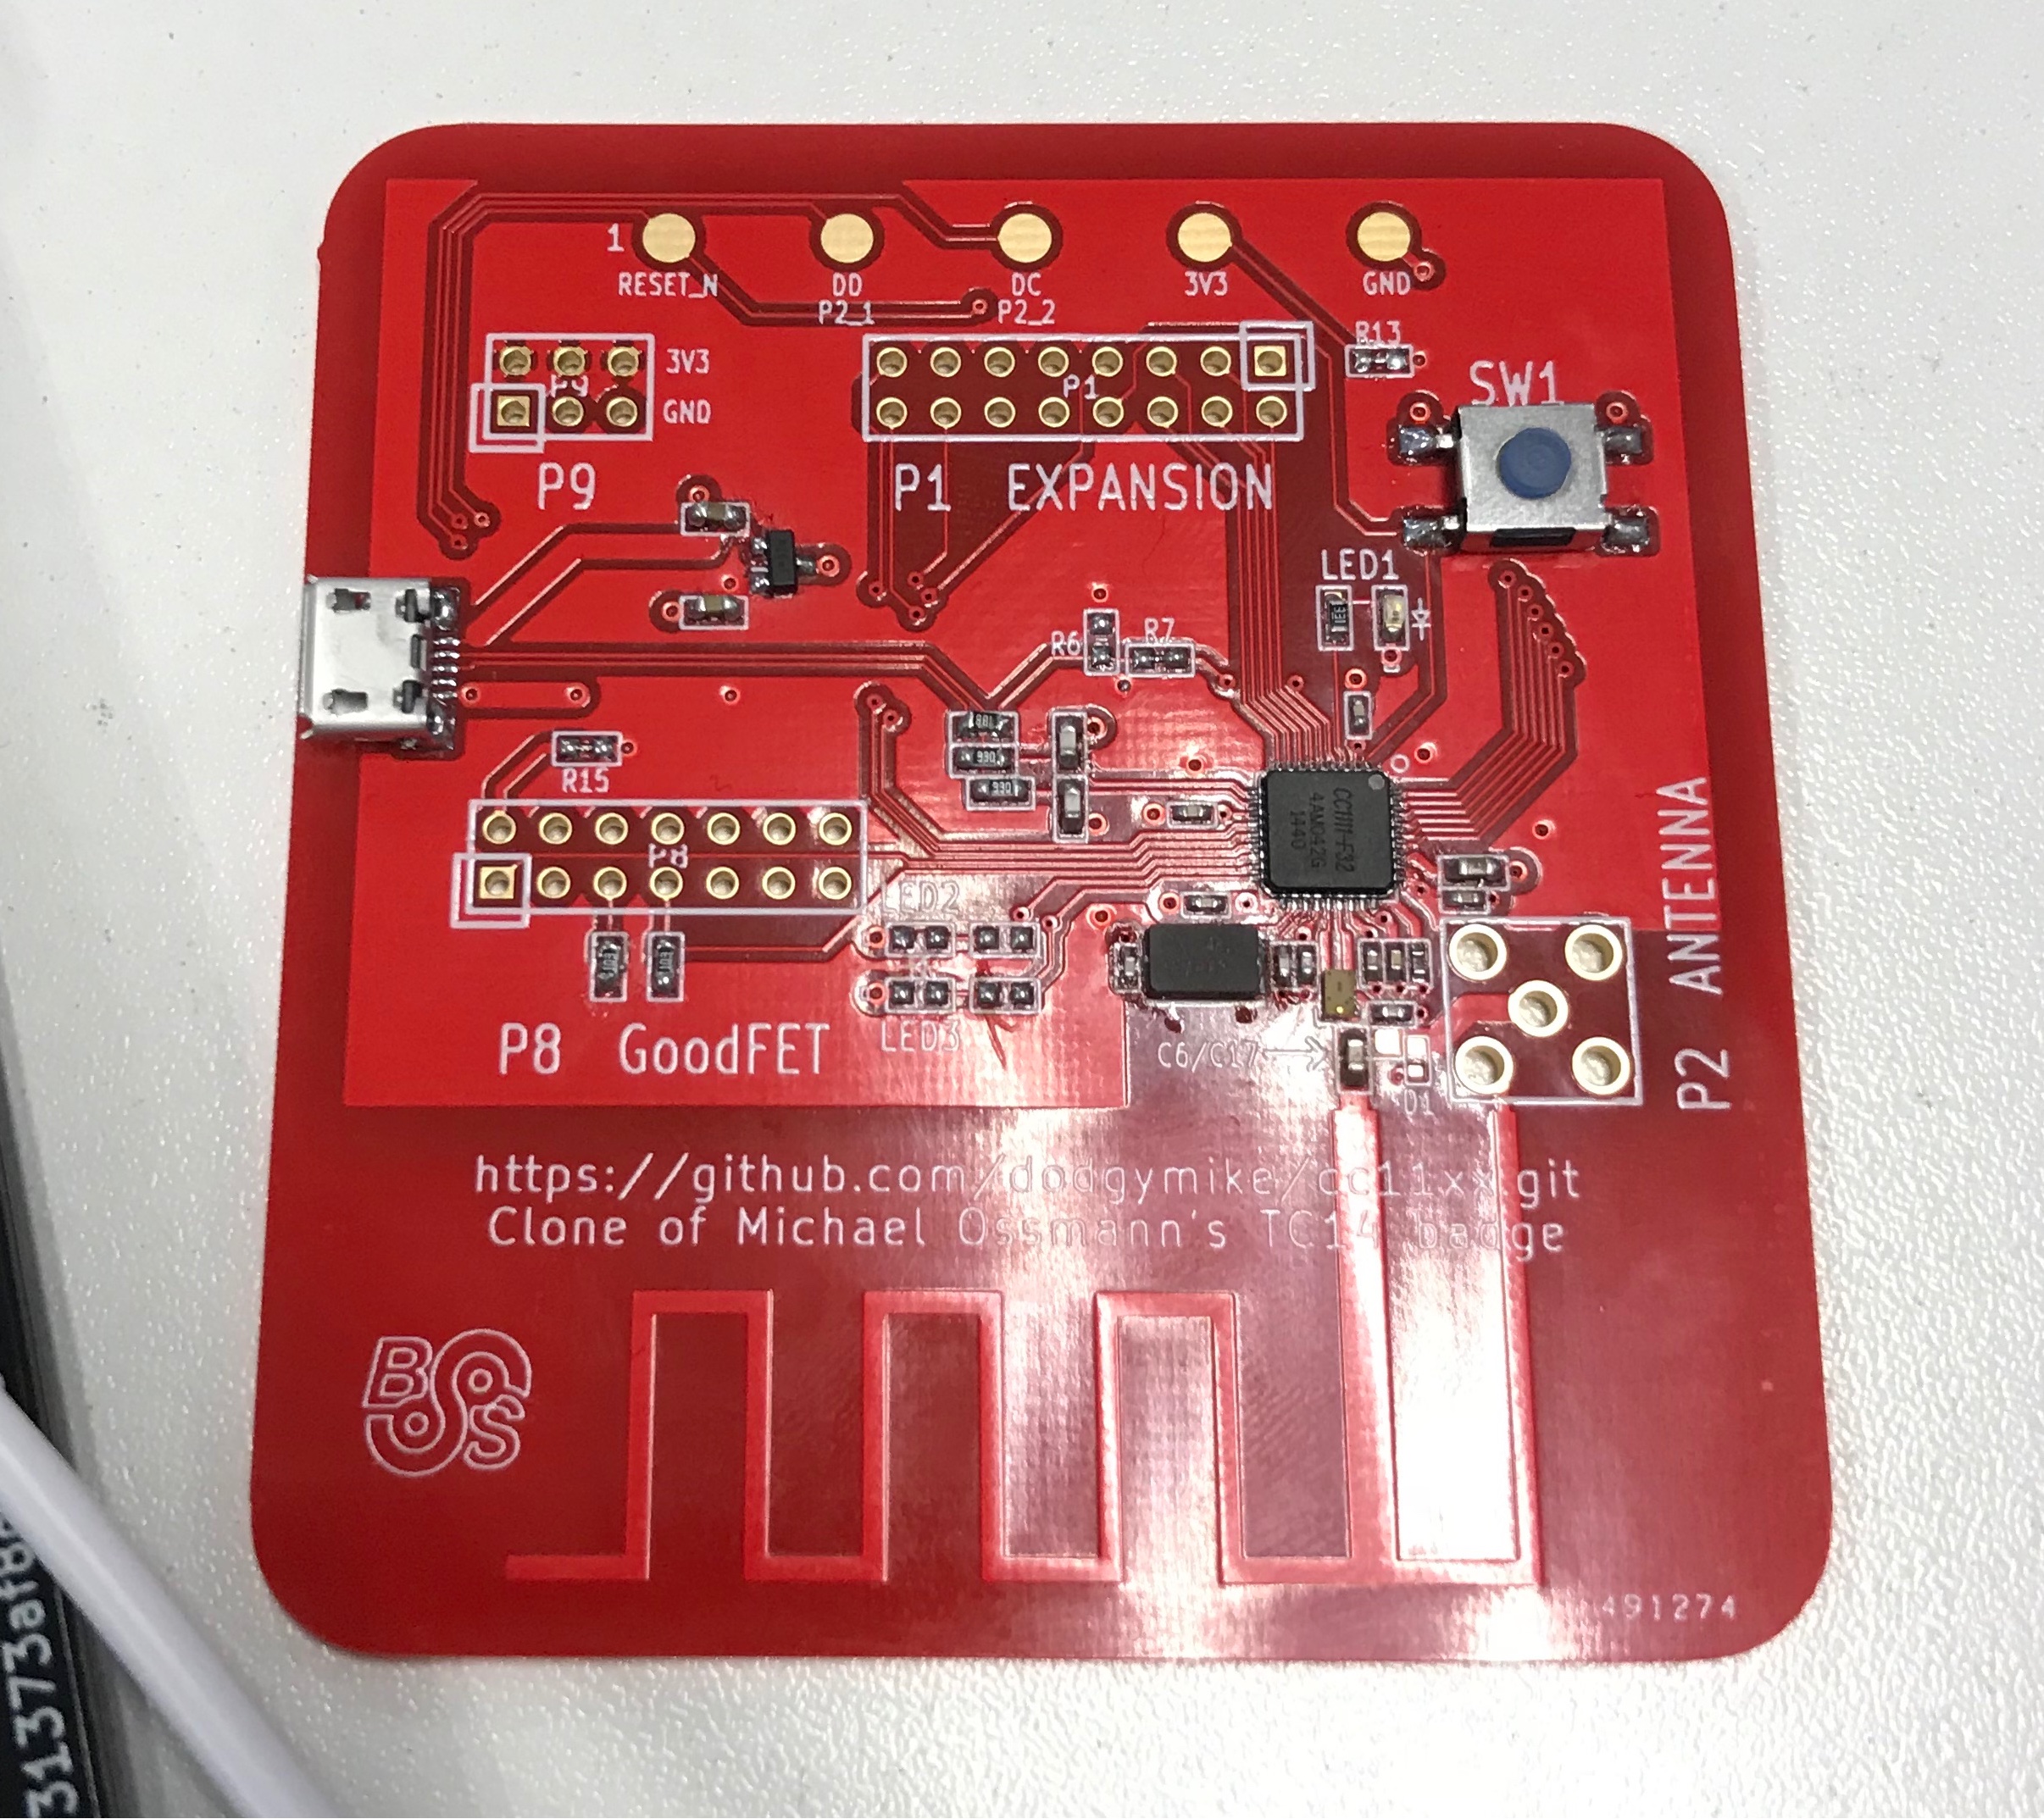
The RF badge (as already mentioned previously) had a cc1111, RFCat compatible chip, a USB port and a button (no idea what that did haha).
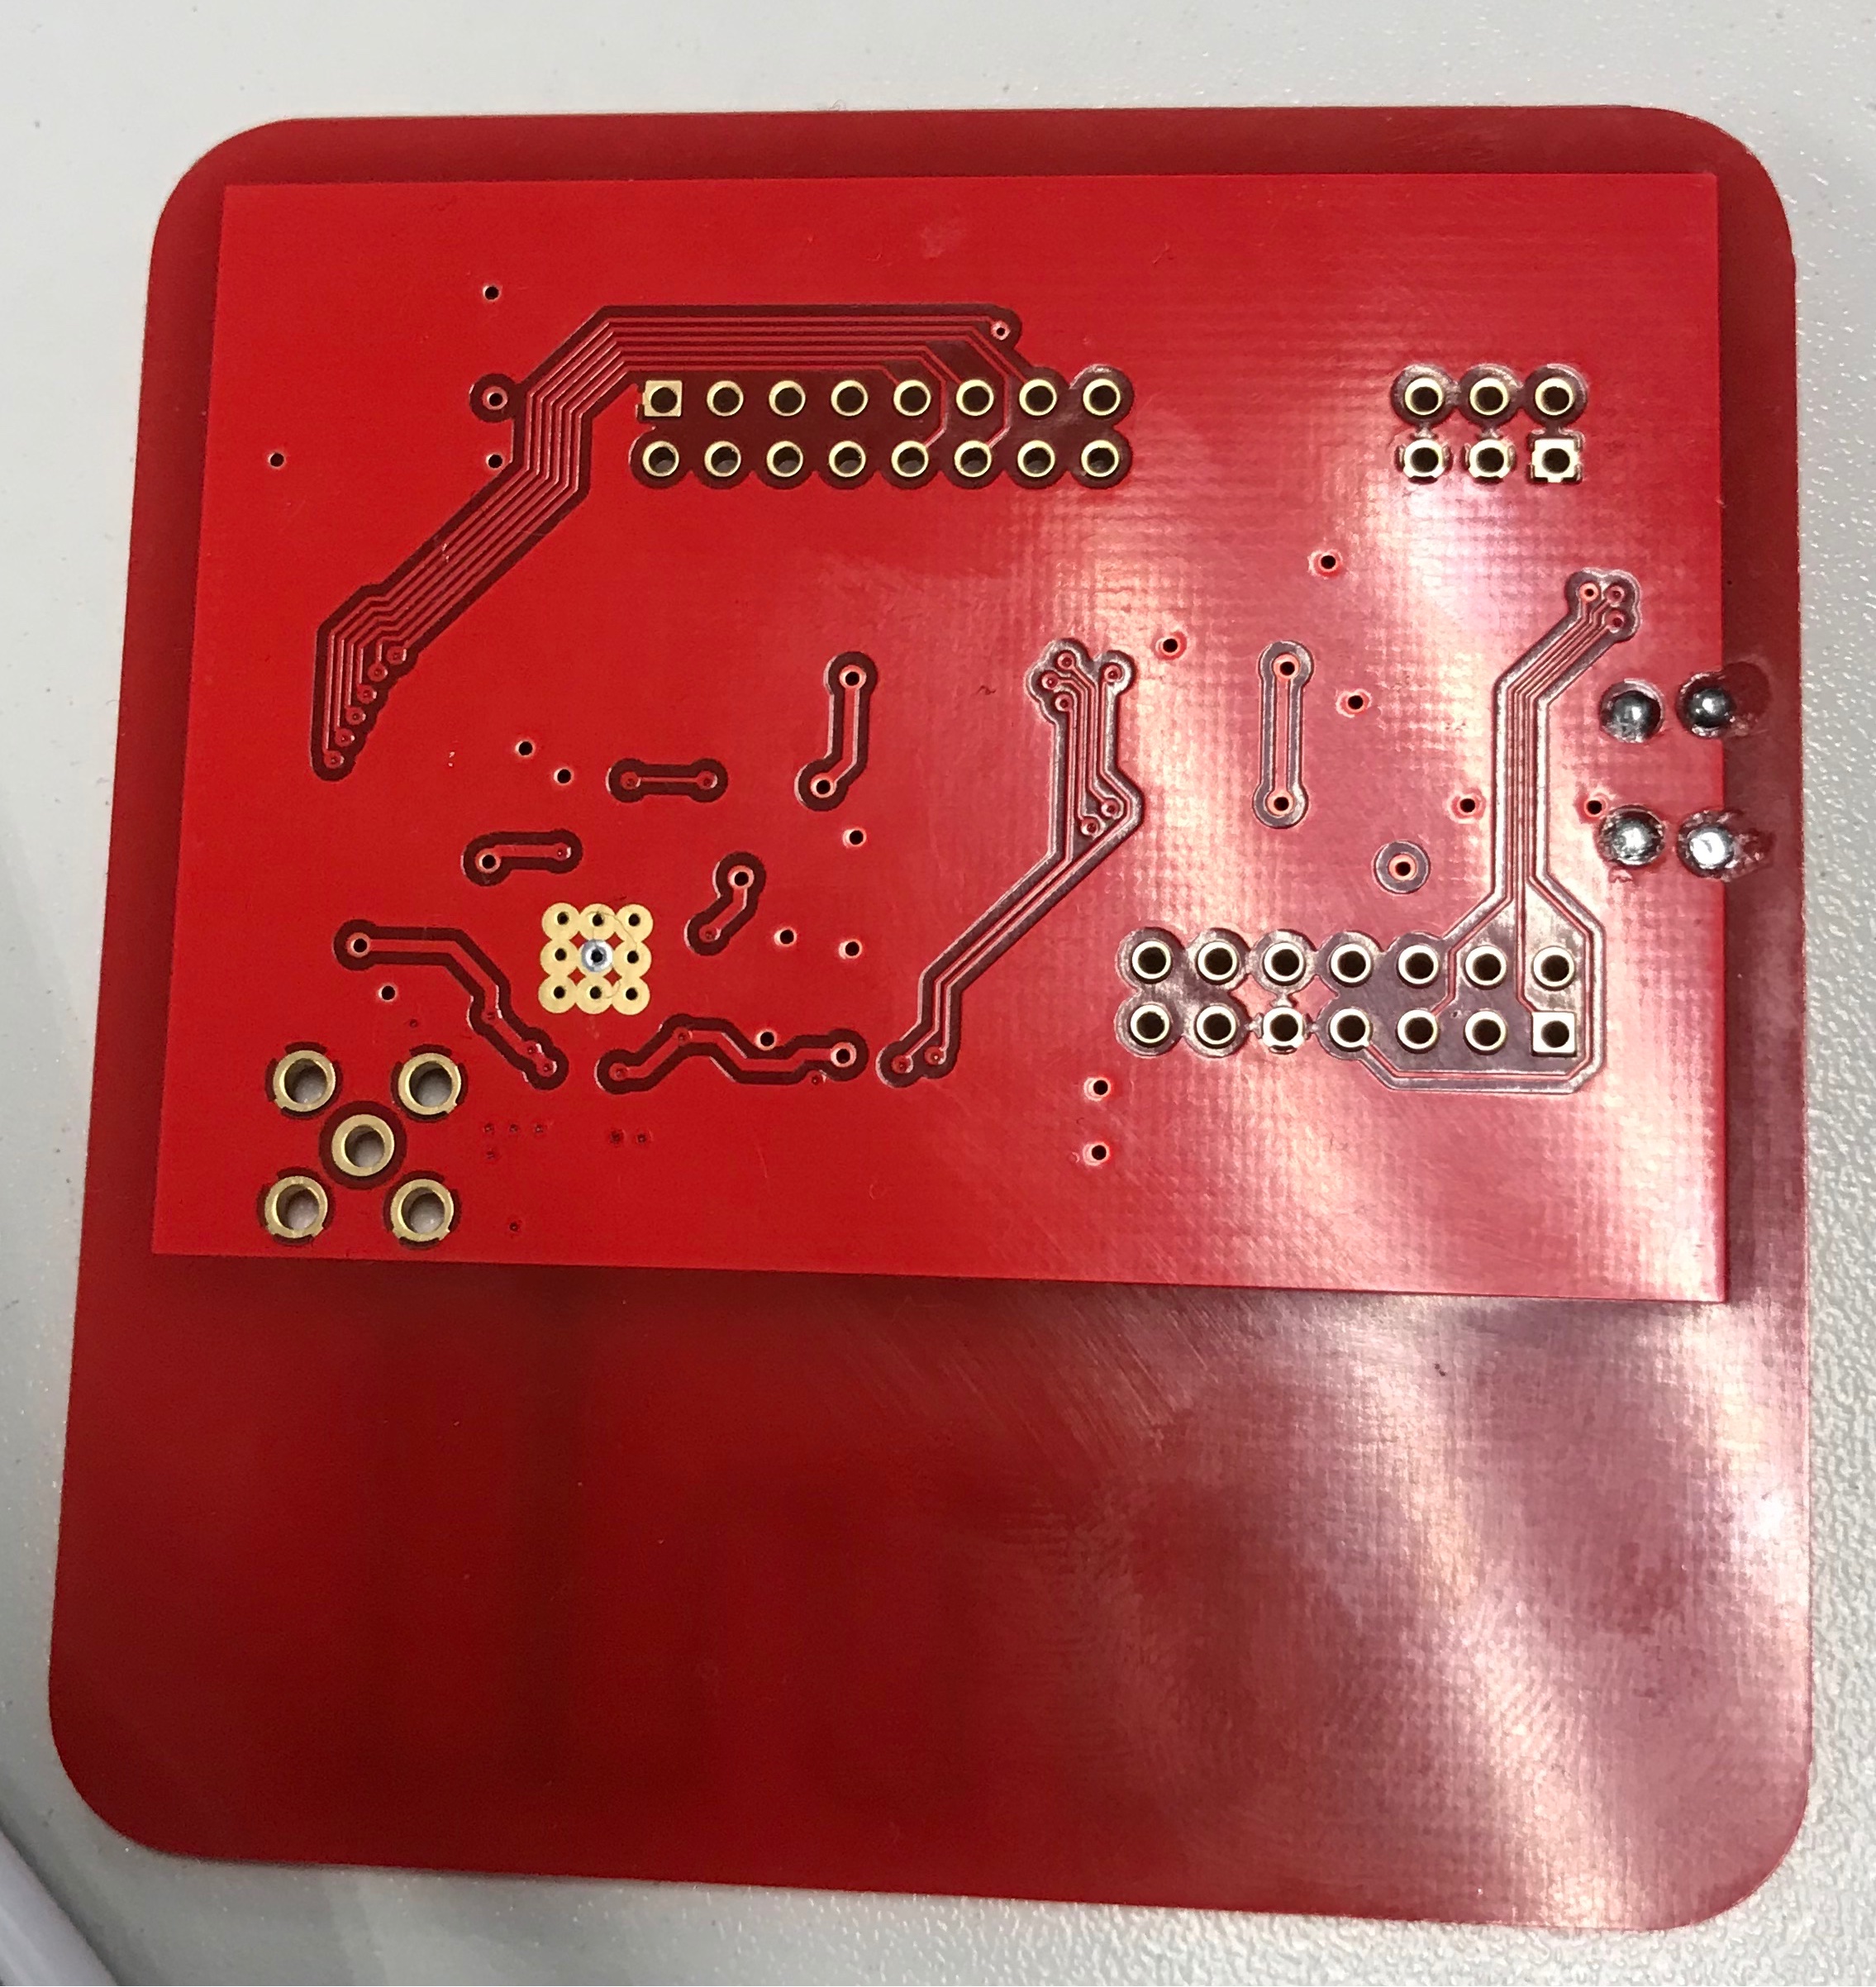
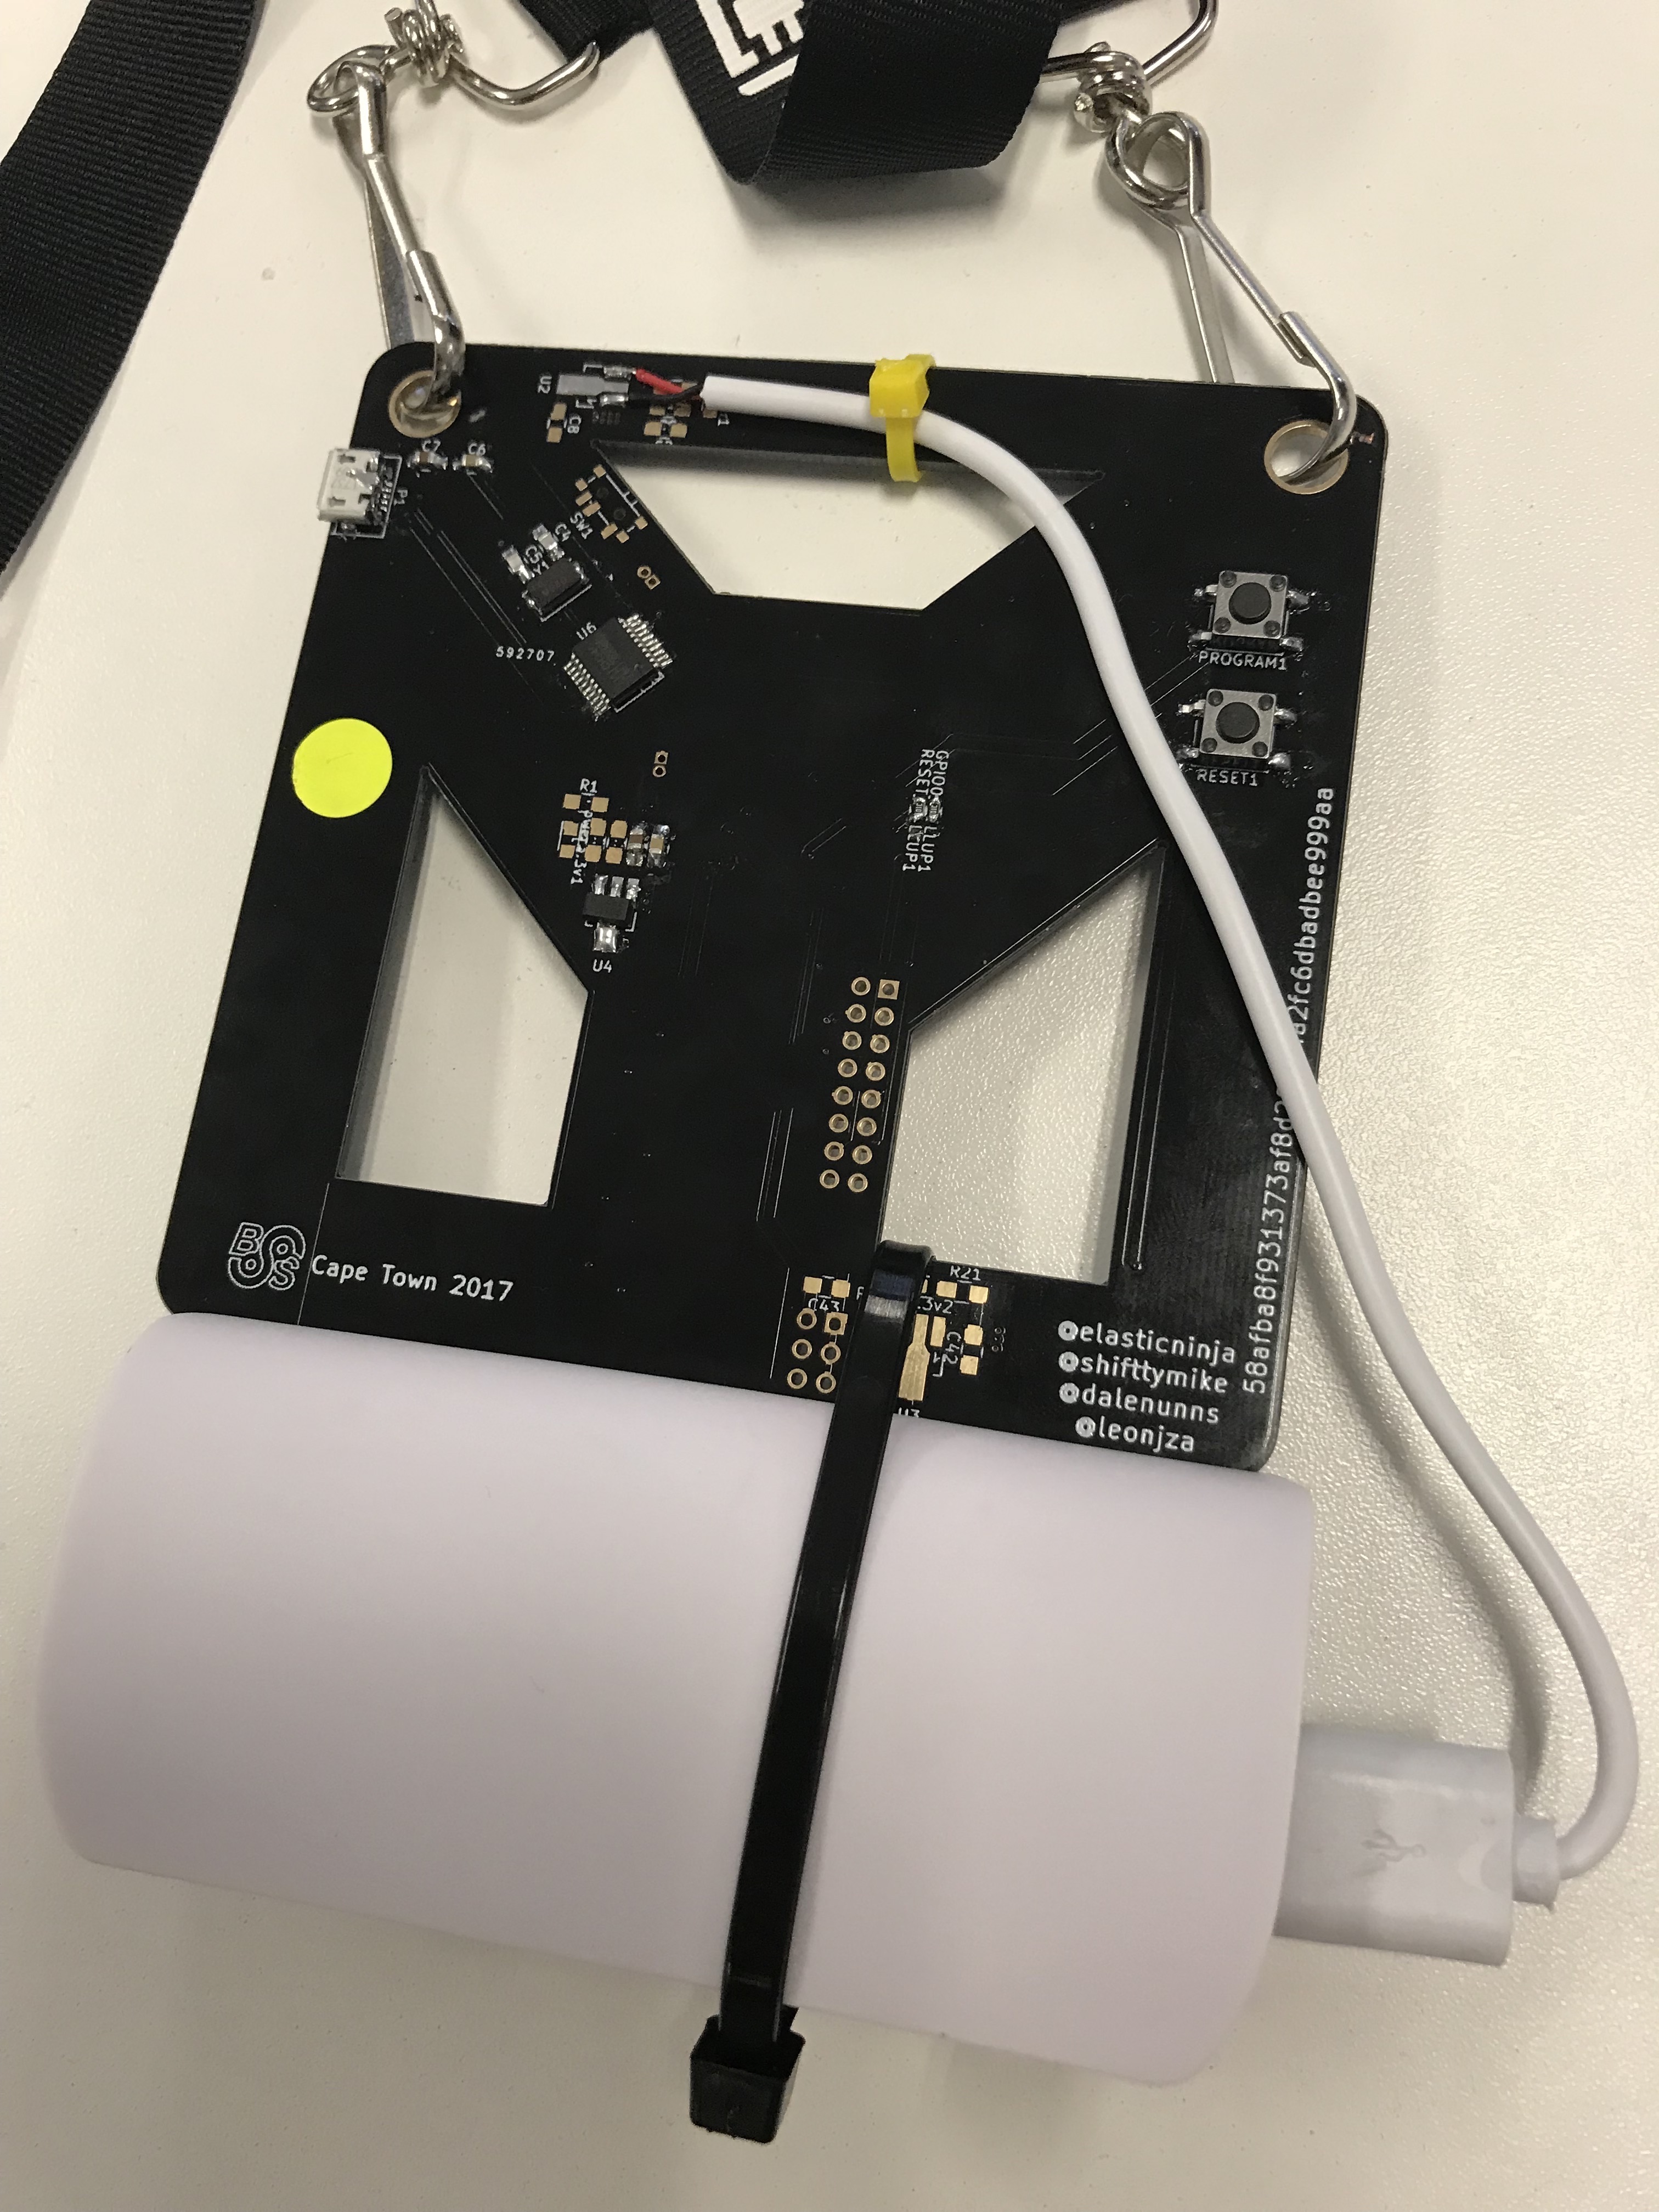
The back of the badge was not that interesting.
Now, unfortunately due to time constraints I was not able to get my hands on one of these badges before the conference and as such had to make another plan to get an environment up and running that would mimic the badge hardware as close as possible. Thankfully, sourcing some Yardstick One’s was relatively easy due to awesome hacker friends ;)
challenge ideas
Getting to the point where you want to build a challenge, in my limited experience anyways, I believe that it is important for oneself to set out some high level goals to help you first of all, actually achieve your goals and secondly, keep you focussed in a direction without falling victim to the squirrel effect. In my case, I settled on the following goals:
- Low barrier of entry. Not knowing everything there is to know about RF should not hinder your ability to play (and win) the challenge.
- When you get a badge, you must have something working already. Even if crippled in its “factory default” state, it should be enough to at least have some fun.
- It should be possible to replicate, adapt and hack at later even after the con is over.
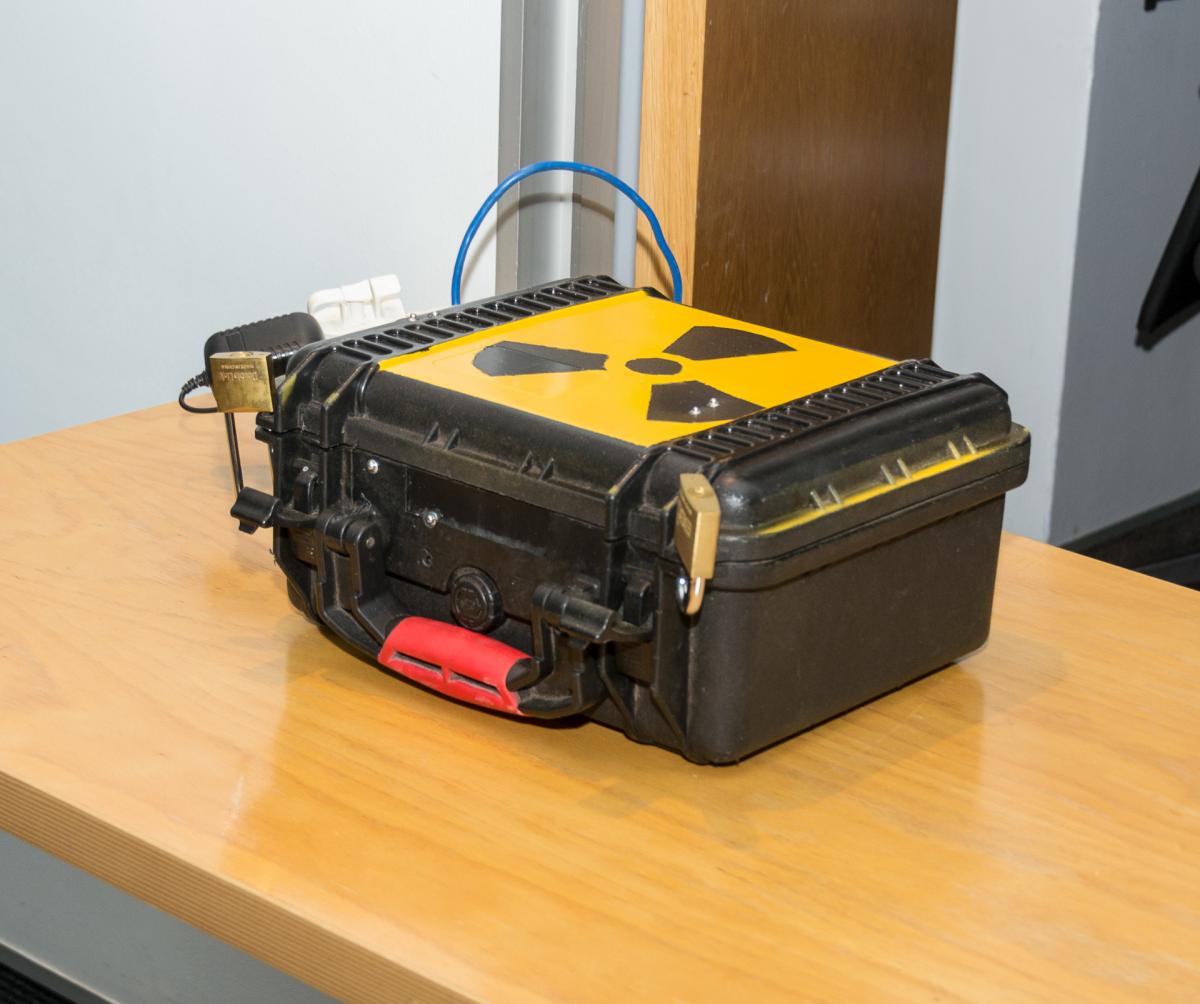
As you can see, these are very high level goals without much details, but it was enough for me to get started and reflect on should I lose track of what I am trying to do. When talking to Mike about what he had in mind in terms of the challenge and the logistics thereof, it was explained that a hardware box would be used as the goal to unlock using the RFCat based challenge. In essence, once a player “wins”, a small bit of python code would be used to unlock a magnetic lock or something similar, thereby allowing you to retrieve the prize. At the conference, this box also included a lock picking challenge!
After some time pondering ideas, I figured that for the challenge itself, it may be necessary for clients to talk to a “server”. The server needs the ability to receive messages from clients, process them and be authoritative in terms of who has progressed to which state of the game. At the same time I realised that it might be cool for the badges to be able to talk to each other using a similar medium. An idea that has been discussed at the office a few times now (albeit in a slightly different form).
So, I settled on the idea of having a broadcast-like chat system for the RF badges, and a server using a similar communications medium to be used for challenges. In order to “reveal” this challenge though, I figured it might be cool to have a working implementation of this broadcast-like chat system, whereby badge owners could partake in this RF based chat network by simply starting the client and being in range. The implementation given with the badge would say use a different modulation/syncword to the challenge server, there in lies some exploratory/clue finding to finally “connect” to the challenge server.
building blocks for the broadcast-like chat system
Before I could do anything interesting with the broadcast idea though, I had to step back a few steps and get the two Yardstick One’s I had to “talk to each other”. Something that sounds super simple in theory (and it actually is), but when trying it gave me a few hours of grey hairs. Previously I have only been able to send messages and receive/replay other messages.
Using my host workstation, I had a Yardstick One & RFCat fired up in research mode, and another similar setup in a VMWare based virtual machine with another Yardstick One connected using USB passthrough mode to the VM. This setup allowed me to easily play with the send/receive ideas between the Yardsticks and test various things.

I tried quite a few things to be honest. Making sure I use the same frequency, modulation and baud rate on both ends of the transmission seemed obvious but just didn’t get me a way to reliably transfer data between the two Yardsticks. I would prepare hex encoded bytes to send with RFsend() on the one end, and try and receive them again using RFRecv() on the other end but just couldn’t reliably get transmissions to flow. In fact, all I got was noise. Using the discover() method, one could remove some of the noise filtering automatically applied by RFCat (lowball mode) to try and discover more signals, but this too failed me. Eventually I toggled the IdentSyncWord flag in the discover() method and realised that I never set a sync word to begin with. Well… one call to setMdmSyncWord() later and could finally reliably transfer frames between the two Yardstick Ones!
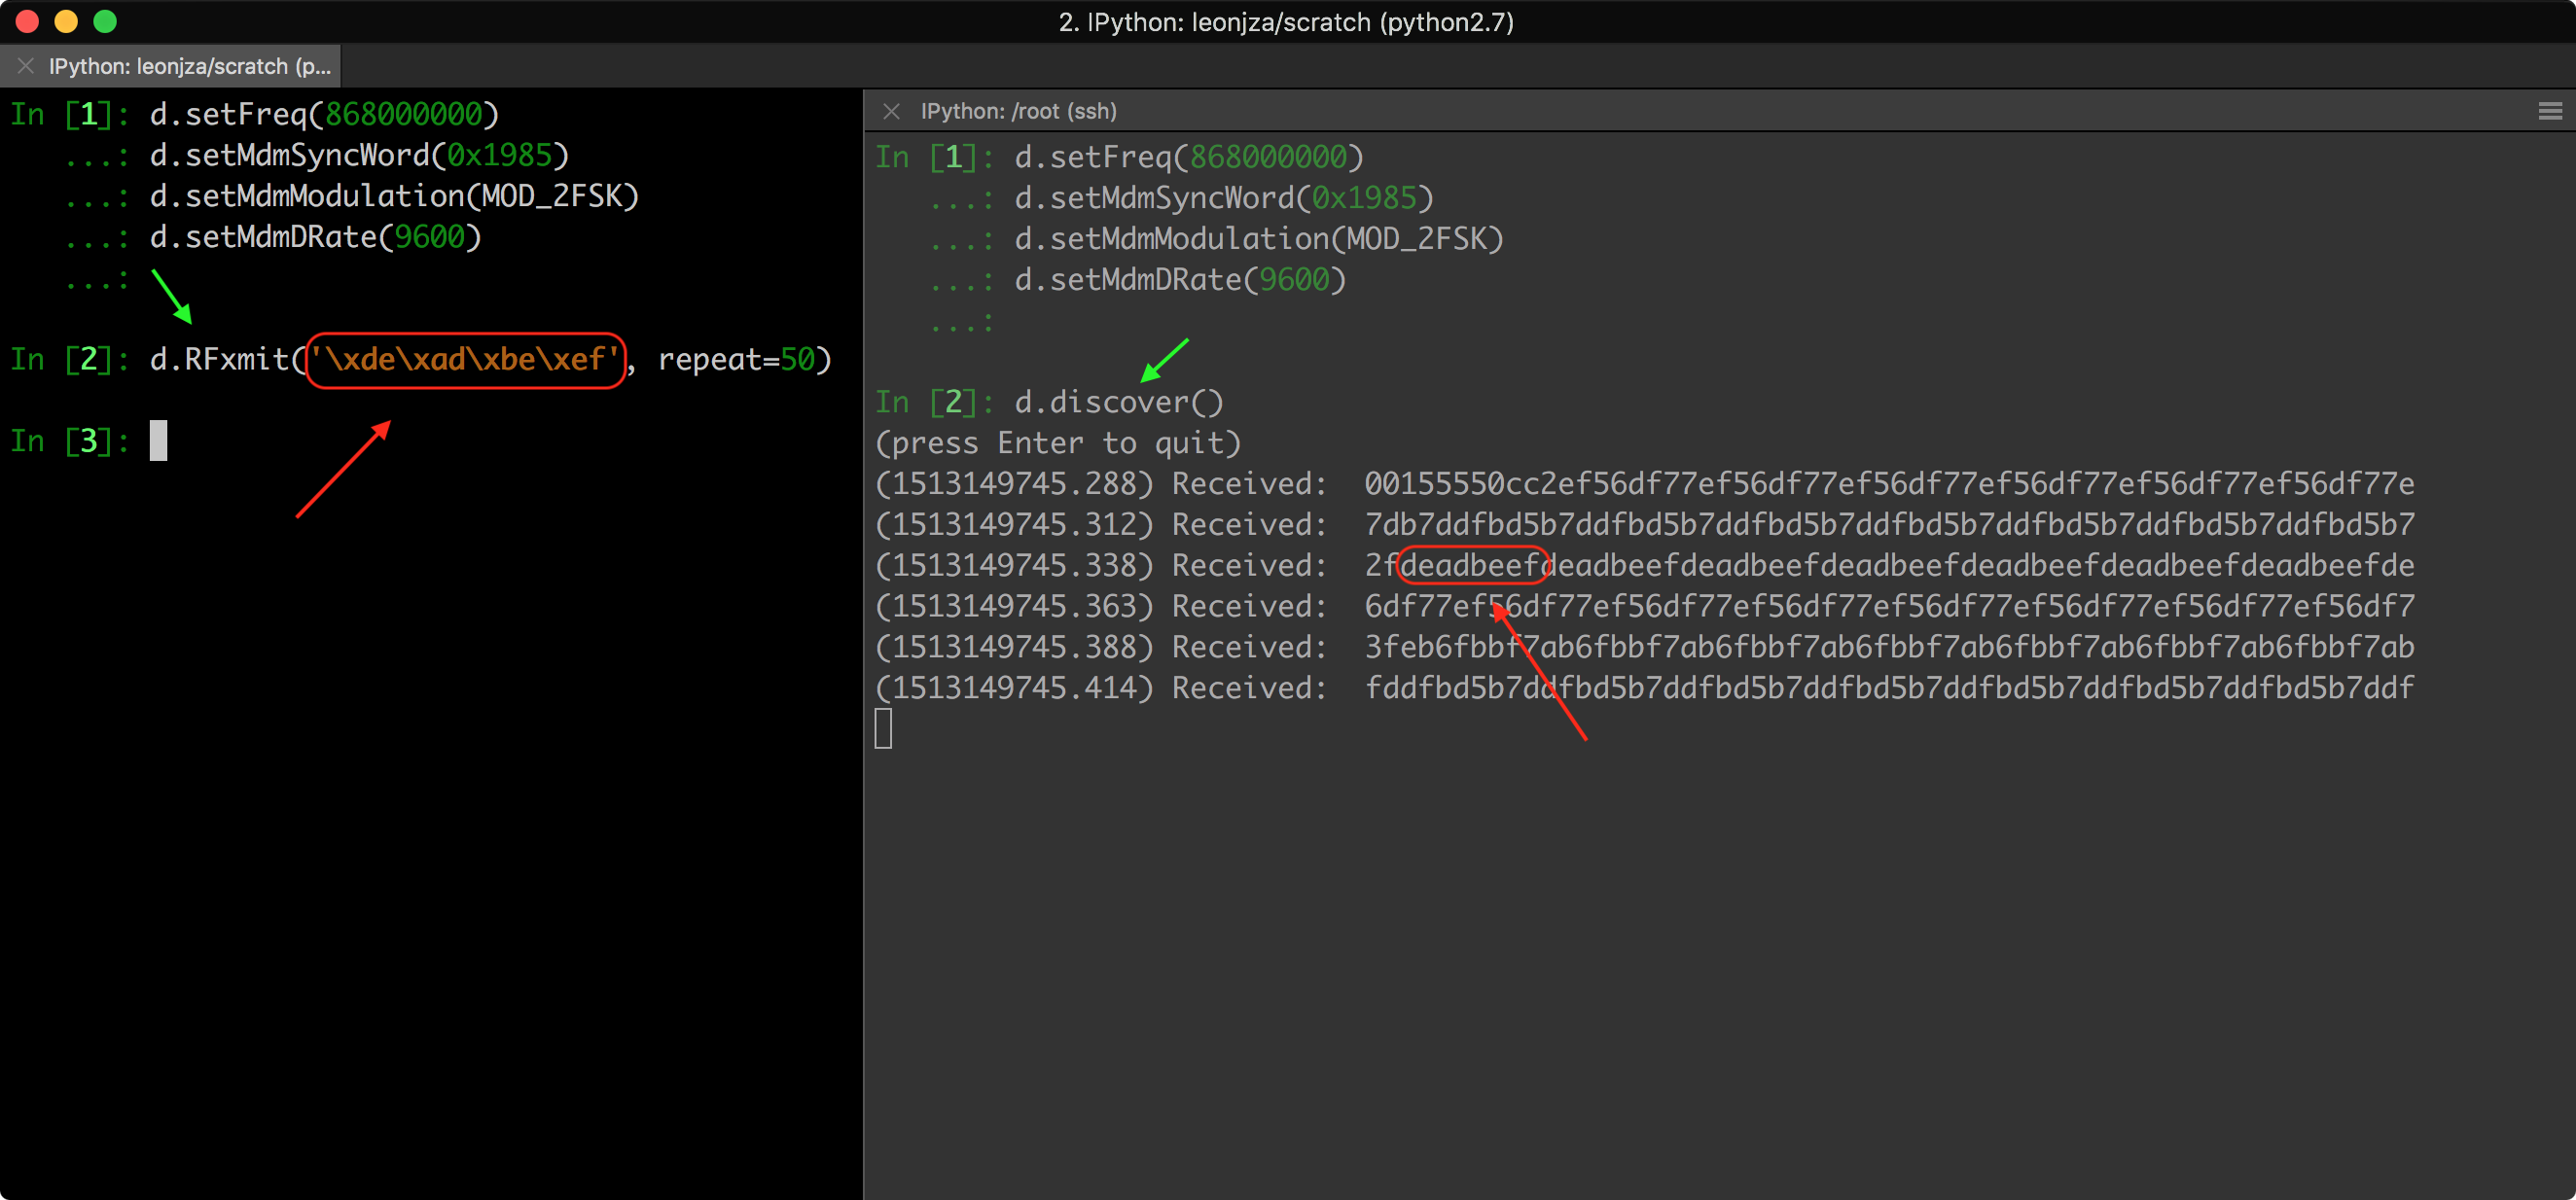
With the ability to transfer frames reliably, it was time to write some scripts to make this easier. A simple send.py and receive.py would suffice. All they need to do is setup the radios by configuring the frequency, sync word, baud rate and modulation in use. Then, simply encode and send / decode on receive.

Those scripts looked as follows:
# send.py

import binascii
import sys
import rflib

# get the message from the command line
message = ' '.join(sys.argv[1:])
print('Sending: {0}'.format(message))
message = binascii.hexlify(message)
print('Message hex encoded: {0}'.format(message))

# setup the radio
d = rflib.RfCat()
d.setFreq(868000000)
d.setMdmSyncWord(0x1985)
d.setMdmModulation(rflib.MOD_2FSK)
d.setMdmDRate(9600)

print('Sending...')
d.RFxmit(data=message, repeat=50)
print('Done!')
# receive.py

import binascii
import sys
import rflib

# setup the radio
d = rflib.RfCat()
d.setFreq(868000000)
d.setMdmSyncWord(0x1985)
d.setMdmModulation(rflib.MOD_2FSK)
d.setMdmDRate(9600)

print('Waiting for new messages...')

while not rflib.keystop():
    try:
        pkt, _ = d.RFrecv(timeout=1000)
        decoded_pkt = binascii.unhexlify(pkt)

        print(decoded_pkt)

    except (rflib.ChipconUsbTimeoutException, TypeError):
        pass
transitioning to a working chat system
The next challenge was to translate this into something that could be used as a chat client. I would like to start a script, and have the script accept input to send using RFCat. The chat client must be able to send and receive from the same script, using a single cc1111. A key thing to remember is that the cc1111 only works in half-duplex mode. That means that you can either be transmitting or receiving, not both at the same time. Before building something, I considered that the chat client would have a few interesting problems to solve:
- As we know, a client can’t send and receive at the same time so the default should be to always be in a receiving mode and only change when something should be sent.
- It is possible for frames to go missing or be incomplete so a retransmission strategy should be implemented.
- Anyone that uses the same frequency, syncword and modulation would be able to ‘tune’ into the chat, so no privacy should be expected :P
With these challenges in mind, the first thing I tried to solve was the fact that the radios were half-duplex and required a way to change state when messages were to be sent. After some testing, I settled on having a singleton class instance that would be shared between two threads. One thread responsible for sending data and another responsible for receiving, both monitoring the state of the radio. The state class (aptly called RadioState) would have a state property indicating the radios current state which could either be “send” or “receive”. From a threading perspective, the logic flowed something like this:
- Both threads would have an infinite loop checking the current state of the radio.
- Both threads would only continue with their respective logic (send/receive) if the radio was in the state required for that specific thread.
- The receiving thread would basically have a blocking call to
RFrecv()that would wait for 1 second for a frame. - Once the timeout is reached (or a valid frame is received) a check is done using the
RadioStateclass to see if a state change is required. - If a state change is required, change the actual state and return to the start of the infinite loop within the thread.
- The sending thread should now detect that the state has changed and proceed to transmit frames. Once done, return the state to “receive” causing the listening thread to resume frame captures.
- Rinse and repeat.
Implementing this was relatively easy given the time I spent considering ways to handle the half-duplex problem. In the end, an abstract of the chat client logic based on the class methods was as follows:
class RadioState(object):
    def __init__(self)
    def get_state(self)
    def set_receive_state(self)
    def is_receive_state(self)
    def set_send_state(self)
    def is_send_state(self)
    def want_state_change(self)
    def change_state_to(self, new_state)
    def change_state(self)
    def set_message_to_send(self, message_data)
    def get_message_to_send(self)


class ListenThread(threading.Thread):
    def __init__(self, radio_state, *args, **kwargs)
    def run(self)
    def should_stop(self)
    def listen_for_packet(self)
    def check_for_state_change(self)


class SendThread(threading.Thread):
    def __init__(self, radio_state, *args, **kwargs)
    def run(self)
    def should_stop(self)
    def reverse_state_to_receive(self)


if __name__ == '__main__':

    state = RadioState()

    # prep and start 2 threads. one to listen, and one to send
    listen_thread = ListenThread(radio_state=state)
    send_thread = SendThread(radio_state=state)
    listen_thread.start()
    send_thread.start()

    while True:
        message = raw_input('[{}] message> '.format(handle))
        message = message.strip()

        # queue a new message send!
        state.set_message_to_send(message_data=message)

    # stop the threads
    listen_thread.stop = True
    send_thread.stop = True
With the basic logic in place and working, I realised while testing that I would be sending messages (by simply typing them and hitting ENTER) much faster than the send, state-change, receive, state-change, send logic could complete. On top of that, the problem where messages would not necessarily reach the other end (or be incomplete) occurred much more than I had initially expected. So, a few more tweaks were needed.
improving the chat experience
The fact that I was sending messages too fast for the client to process was something not too hard to solve. My original implementation could only set one message that should be sent, so to improve this, I changed the logic a little to instead populate a “message queue” (basically a python list) in the RadioState class. Now, when messages are being sent, they would be popped off the queue one after the other until the queue was empty. Only then would the state change back to receive be issued. What was nice about this change was that I could pop on more message into the queue as the sending thread was processing messages, only popping off the last one that was just sent. Great!
def queue_new_message(self, message_data):
    parts = [message_data[i:i + 50] \
        for i in range(0, len(message_data), 50)]

    for part in parts:
        self.message_queue.append(
            binascii.hexlify(self.name + ': ' + part) \
            .ljust(MAX_PACKET_LEN, '0'))

def get_messages_from_queue(self):
    message_count = len(self.message_queue)

    if message_count > 0:
        return [self.message_queue.pop(0) for _ in xrange(message_count)]

    return None
This considerably improved the overall experience of the chat client. Messages would now flow a lot more fluently and be sent as expected. However, there was still one big issue. Message frames would not reliably end up on the other end. Blame interference, magic or someones mood on the other side of the globe, it was a problem that had to be dealt with.
To tackle the transmission reliability problem and given that I was playing against a bit of time, I decided to simply add some retransmission logic to the client. A simple loop to send the same frame three times seemed to drastically improve things. On top of that, I also noticed that the makePktFLEN() method could be used to specify the expected amount of bytes in a frame allowing the receiving end to be more clever about the frames it would receive. Tweaking the packet length number landed me on a scientifically and statistically proven™ number of 150 that was the sweet spot to reliably send / receive frames (not really I sucked the number out of my thumb). If you looked closely at the last code snippet, you may have noticed that I ended up actually padding hex encoded data frames with 0’s up to the size of MAX_PACKET_LEN which is the 150 I just mentioned.
So, two new bits of logic was added. The frame retransmission in the sending thread and a simple duplication check in the receiving thread (as there may be 3 duplicate frames ending up in chat clients). The gist of these changes were implemented as follows:
# receiving thread

def listen_for_packet(self):

    try:
        pkt, _ = d.RFrecv(timeout=1000)
        decoded_pkt = binascii.unhexlify(pkt).strip()

        # skip if we have already received this message
        if decoded_pkt in self.received_messages:
            return

        # print the message we got!
        print('{}'.format(decoded_pkt))

    except (rflib.ChipconUsbTimeoutException, TypeError):
        pass
# sending thread

def run(self):

    while True:

        # get the pending messages to send
        messages_to_send = self.state.get_messages_from_queue()

        # send the messages
        for message_data in messages_to_send:
            for _ in range(3):
                d.RFxmit(data=message_data, repeat=1)

        # change back to the receiving state
        self.reverse_state_to_receive()
These optimisations greatly improved the overall speed and reliability of the chat clients. Although not perfect, it was good enough for now. An example run of the chat client can be seen here:
Writing this was a lot of fun, but now it was time to take a look at the challenge server it self.
the challenge server
For the challenge server I was going to use the same “transport” that was just built for the chat clients. The difference though was that the modulation and sync word was different for it, so you have to figure that out. The challenge server would broadcast messages every 30 seconds that would both serve as a hint as well as help those searching for signal to find it. If you did not have kit for sniffing, some clues were also tweeted to get you going. Anyways, the challenge server was in fact just a modified chat client that would respond to specific messages. Changing the syncword, baud rate and modulation would have “connected” you to the challenge server network.
Given that there was more than one puzzle to solve on the challenge server network, I needed to write a little bit of game logic to keep track of who was at what stage of the game, as well as to know what the next hint/step should be. I have never done something like this, so practically everything I tried felt dirty or just failed.
Ultimately, I ended up with two new classes for the game. One for controlling and remembering the state of players that have connected and or interacted with the game server, and another for the actual game logic. The player state class called ChallengePlayers had a thread that would periodically serialise and save the object to disk in case the challenge server crashed and needed to be restored. The game logic itself was part of the GameLogic class. Messages received in the listening thread would be parsed and sent off to a new instance of GameLogic, whereby the return of the process_move() method would be used to update the current progress of the player.
Well, “How were players identified?”, you may ask. Honestly, by whatever identifier they wanted to use. The original idea was to have the badges provide their WIFI MAC addresses to be used for identification, but time never really allowed for that. So it resulted in the player identification (and obvious spoofing capability) being player controlled. No biggie.
From a challenge server perspective though, messages (aka: decoded frames) that were sent were parsed as follows:
- Hex decode a frame and validate that it is in fact a valid frame.
- With the decoded string value, attempt to split the string by
:’s so that the user identifier is stripped and the rest of the message is separate. Yes, if your ‘name’ had a:you would break it. - The user identifier from the previous method was used to determine the current state of the player, as well as have a timestamp with the last time a valid command was sent to the challenge server.
- The players current state as well as message payload parsed in a previous step is then sent to a new instance of the
GameLogic.process_move()method for further processing. - Depending on the return value of
process_move(), update the player’s state and send any responses if needed.
A sample of what process_move() looked like within the GameLogic class:
def process_move(self):
    # first, newly connected players simply get a entry
    # in the games state. They should not have an existing
    # state and therefore are just recorded.
    if not self.player_state:
        return self._new_player_connected()

    if 'status' in self.message.lower():
        return self._get_player_status()

    if any(x in self.message.lower() for x in ['88 miles an hour', 'eighty-eight miles an hour']):
        return self._update_stage_one()

    if 'unlock' in self.message.lower():
        return self._update_stage_two()

    # if we had no idea what to do, default to nothing
    print('GameLogic can\'t do anything with this message: {0}'.format(self.message))

    return False, None, None
The only part that was missing from my perspective now was to add the necessary code to finally unlock the challenge box once you have trigged the unlock method within the GameLogic class.
progressing through the challenge
So assuming you managed to connect to the challenge server, progressing through the challenge to finally unlock the challenge box would have flowed as follows:
- Connect to the challenge server after modifying the provided chat clients RFCat configuration parameters such as the syncword, buad rate and modulation.
- Once connected, a message would be sent which looked like this:
"Welcome <your user_name>! The temporal displacement occurred at exactly 1:20 AM and zero seconds! I just cant remember how fast we went...". - Solving the riddle in the broadcasted hint meant that you had to send the words “88 miles an hour” or “eighty-eight miles an hour”. This would have progressed you to stage 2.
- The challenge server would periodically broadcast a hint for the next stage, which would have showed up as follows:
"hint:LwlVBRFIQwscAQFOAAYCCwkDG1cPSE8dEwYGRRcaTREGGhpPAggLBA1PDwESSVQLSAUHAwACUwAbTggCGBYBEgcQUjIEVRxJLgQeEgoGGg4eQFlIEk8fBwccAAkACg0aUx4AHApC". The fact that the hint starts with…'hint'should have been a… hint ;) - Attempting to base64 decode the string should result in unreadable gook being spewed out. A hint as to the fact that it may be encrypted was supposed to be shared, so during the challenge a simple XOR function was tweeted which revealed the method as well as the key used. The key was
"fourth dimensionally!". - Downloading the sample XOR code, a small modification was needed to decrypt the hint, which was as simple as modifying the decrypt method to take the argument passed onto the command line as the string to decrypt. Successful decryption should have given you the string:
"If we could somehow... harness this lightning; channel it into the Flux Capacitor, it just might work.". - This string was yet another riddle, but also required another hint to understand the format the challenge server was expecting. Unfortunately, I am unsure how this was shared at the con, but the hint should have revealed that the final payload needed to be in the format of
unlock:<xor'd & base64encoded string "<your_user>:1.21 gigawatts">. So in other words,unlock:ExwQAEVSEUpbXEUJGg4OGQAYGAo=if your username wasuser1. - Sending this final payload would have moved you to the final stage, and finally unlock the the challenge box! A confirmation message would have been sent such as: “user1 has progressed to stage 2. The box should unlock!”
Solving the challenge itself, from both a client and the servers perspective would have looked something like this:
20/20 hindsight
I learned a lot while building this. Not just technically but also time management and all of those little “soft skills” needed to pull something like this off. If I had to do this again, I would probably try and make the actual challenges a little smoother (and maybe make more sense). I would also freaking google my idea first, so that I don’t come across similar ideas that have already be implemented! Finally, I would have loved to spend more time on improving the communications protocol used by the chat clients to make it faster and more reliable.
the code
If you want to play with the code, its all available in a simple Github gist here: https://gist.github.com/leonjza/341b850f131e7078508ce2cb7ec23cdc.
Have fun!