introduction
I will start by saying that I am by no means a expert in anything you are about to read. I am also not 100% sure about the correct terminology for this type of patching. Maybe it should have been called binary patching? I don’t know, but I do know that I was quite literally shocked by the ease of getting this job done, and figured its time to make some notes for me to reflect on later again.
Recently I had the opportunity to poke at an Android .apk. My task was a little different from what I am about to blog about, but the fundamental idea remained the same. I wanted to inspect some traffic of an application, but the application had jailbreak detection built in and refused to run if the device its running on is detected as jailbroken. This had to be bypassed first. To play with the apk, I needed to get some tools setup and learn a few things about the Android environment really fast. There are tons of resources available online to describe to you the general idea behind Android, as well as how its all stitched together. You will quickly come to realize that apps can be written in Java. For the purpose of this post, the focus is to bypass the jailbreak detection the apk had and let it continue normal operations.
so what about jailbreaking
While I refer to jailbreaking, there are a number of terms used out there to describe the same thing. In the Android world, rooting seems to be what is more commonly known. However, the premise remains the same. Rooting/Jailbreaking your device means that you escape the OS implemented sandboxing and gain full root access to your device. Many mobile applications are against this as a compromised sandbox may have occurred unknowingly, effectively meaning that the device is compromised. So, as a safety measure, applications check for this and refuse to run because of it.
Jailbreak detection itself is a interesting field. From simple static file existence checks, to checking the exit codes of calls to fork() and su all the way to inspecting loaded dynalibs (in the iOS world), everything is fair game. While a compromised device is a totally legit reason to not run any sensitive applications (think credential theft, traffic redirection etc), there are cases where a jailbroken device occurred on purpose. In these cases, power users may find application jailbreak detection very annoying :)
getting started
The very first thing one would obviously need is the application you want to modify. I already had the apk I wanted to modify at hand. If you don’t have it then there are many ways to get an already installed apk off a device. You just need to Google it :) Like, this.
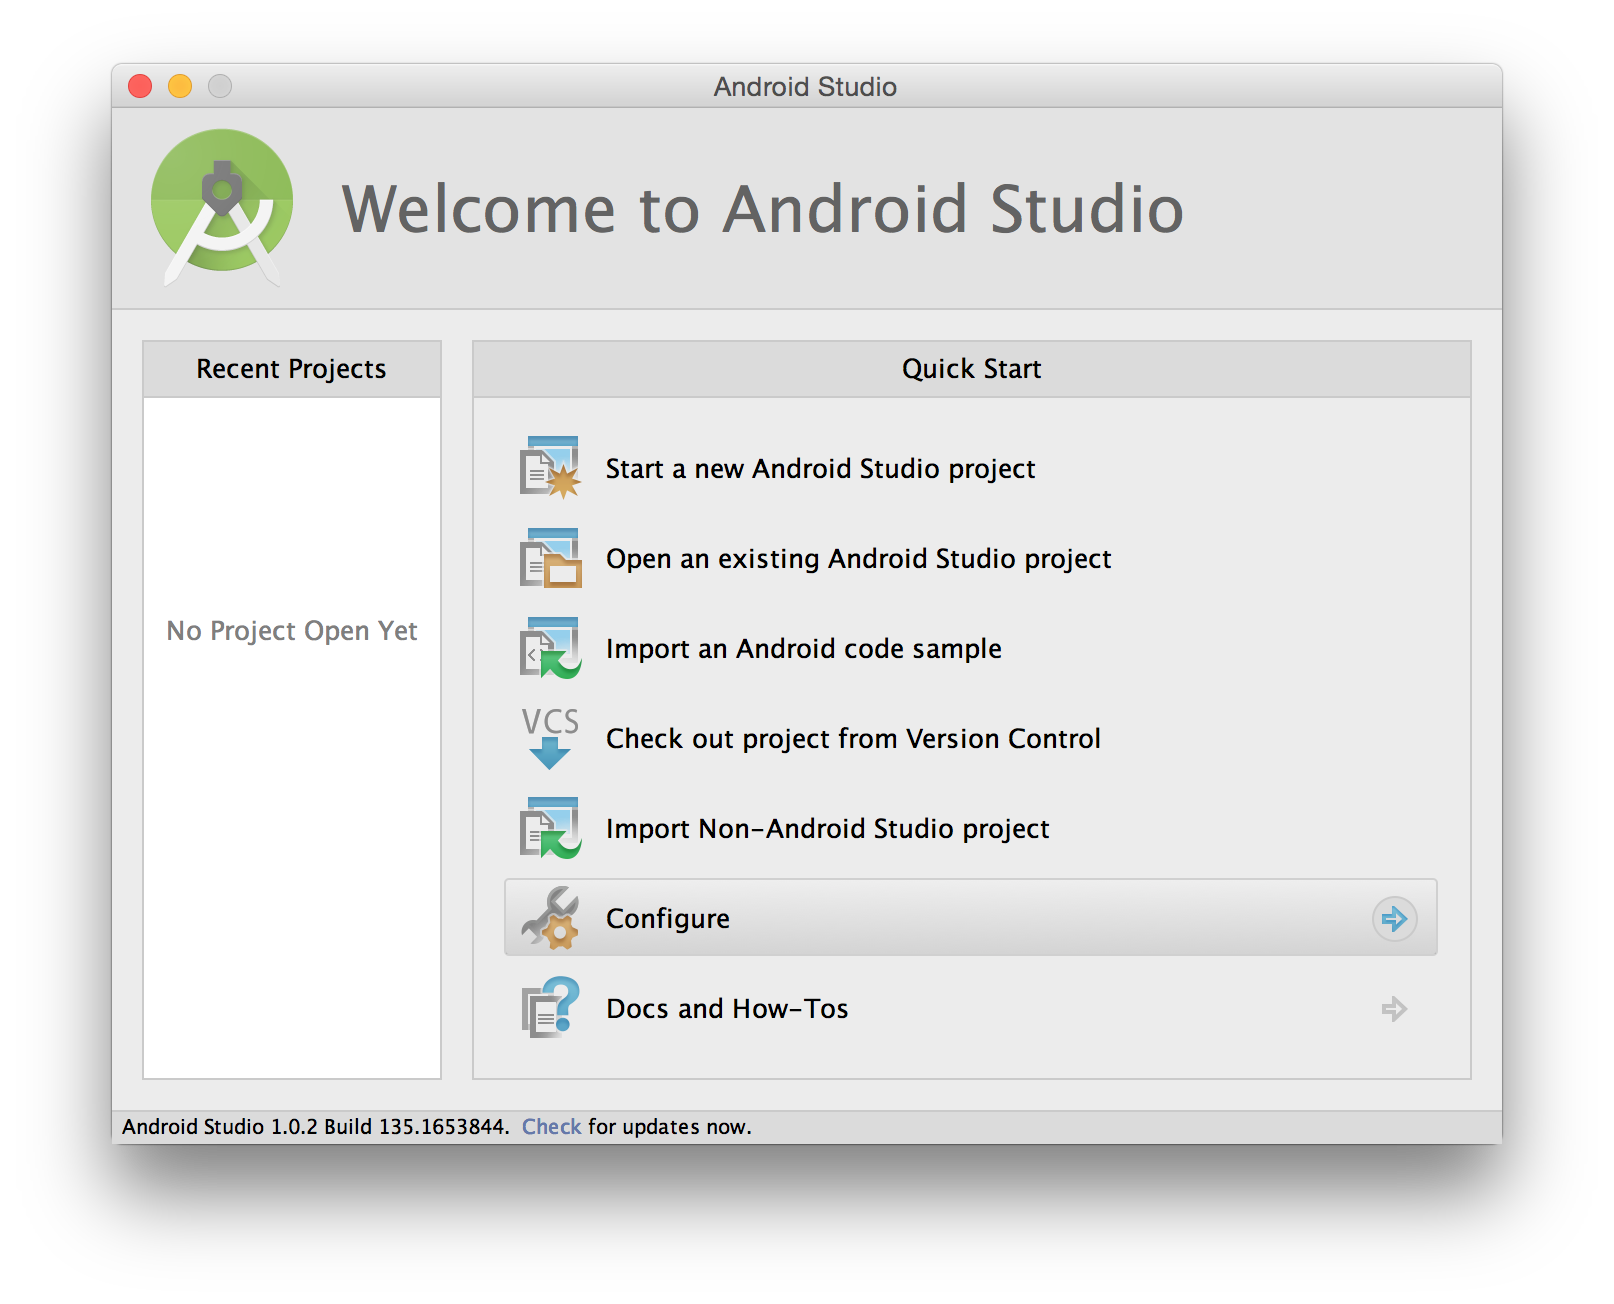
Just having the apk though was not very useful. I needed something to run it on. I don’t have a hardware device handy so in comes the Android Studio, which includes the SDK and a Emulator. I downloaded the Android Studio here and promptly installed it. I fired it up and clicked next furiously, waiting for more crap to download, till finally it looked like it was done.
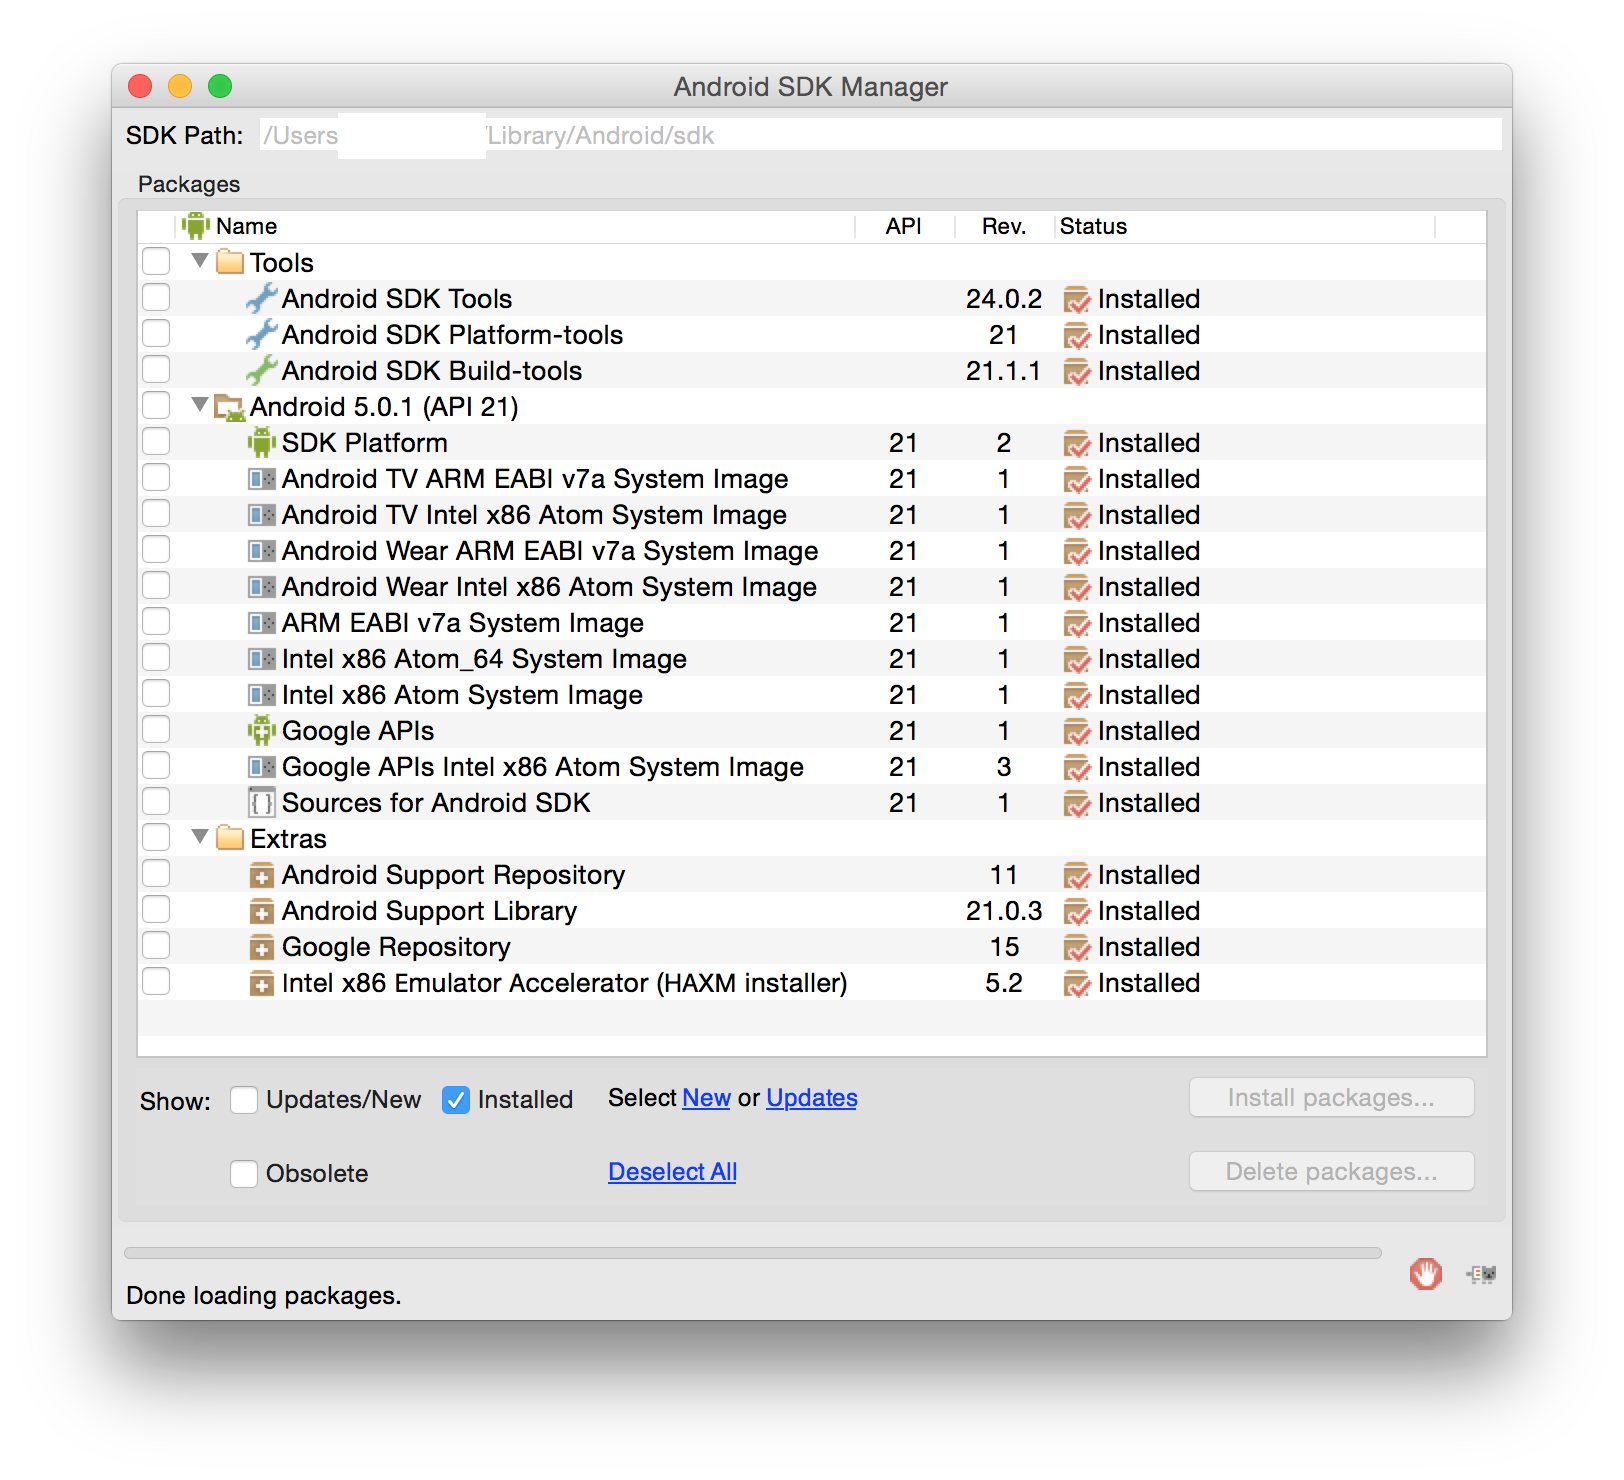
The next daunting task was to find the SDK updater. I wanted to install the x86 Emulator Accelerator amongst other things. Some searching around got me to the directory ~/Library/Android/sdk/tools which had the android and emulator programs I was after. I fired up the SDK updater with ~/Library/Android/sdk/tools/android and updated/installed all the stuff I wanted (yay more downloading). In the end, my installed packages ended up as follows:
preparing an actual emulator
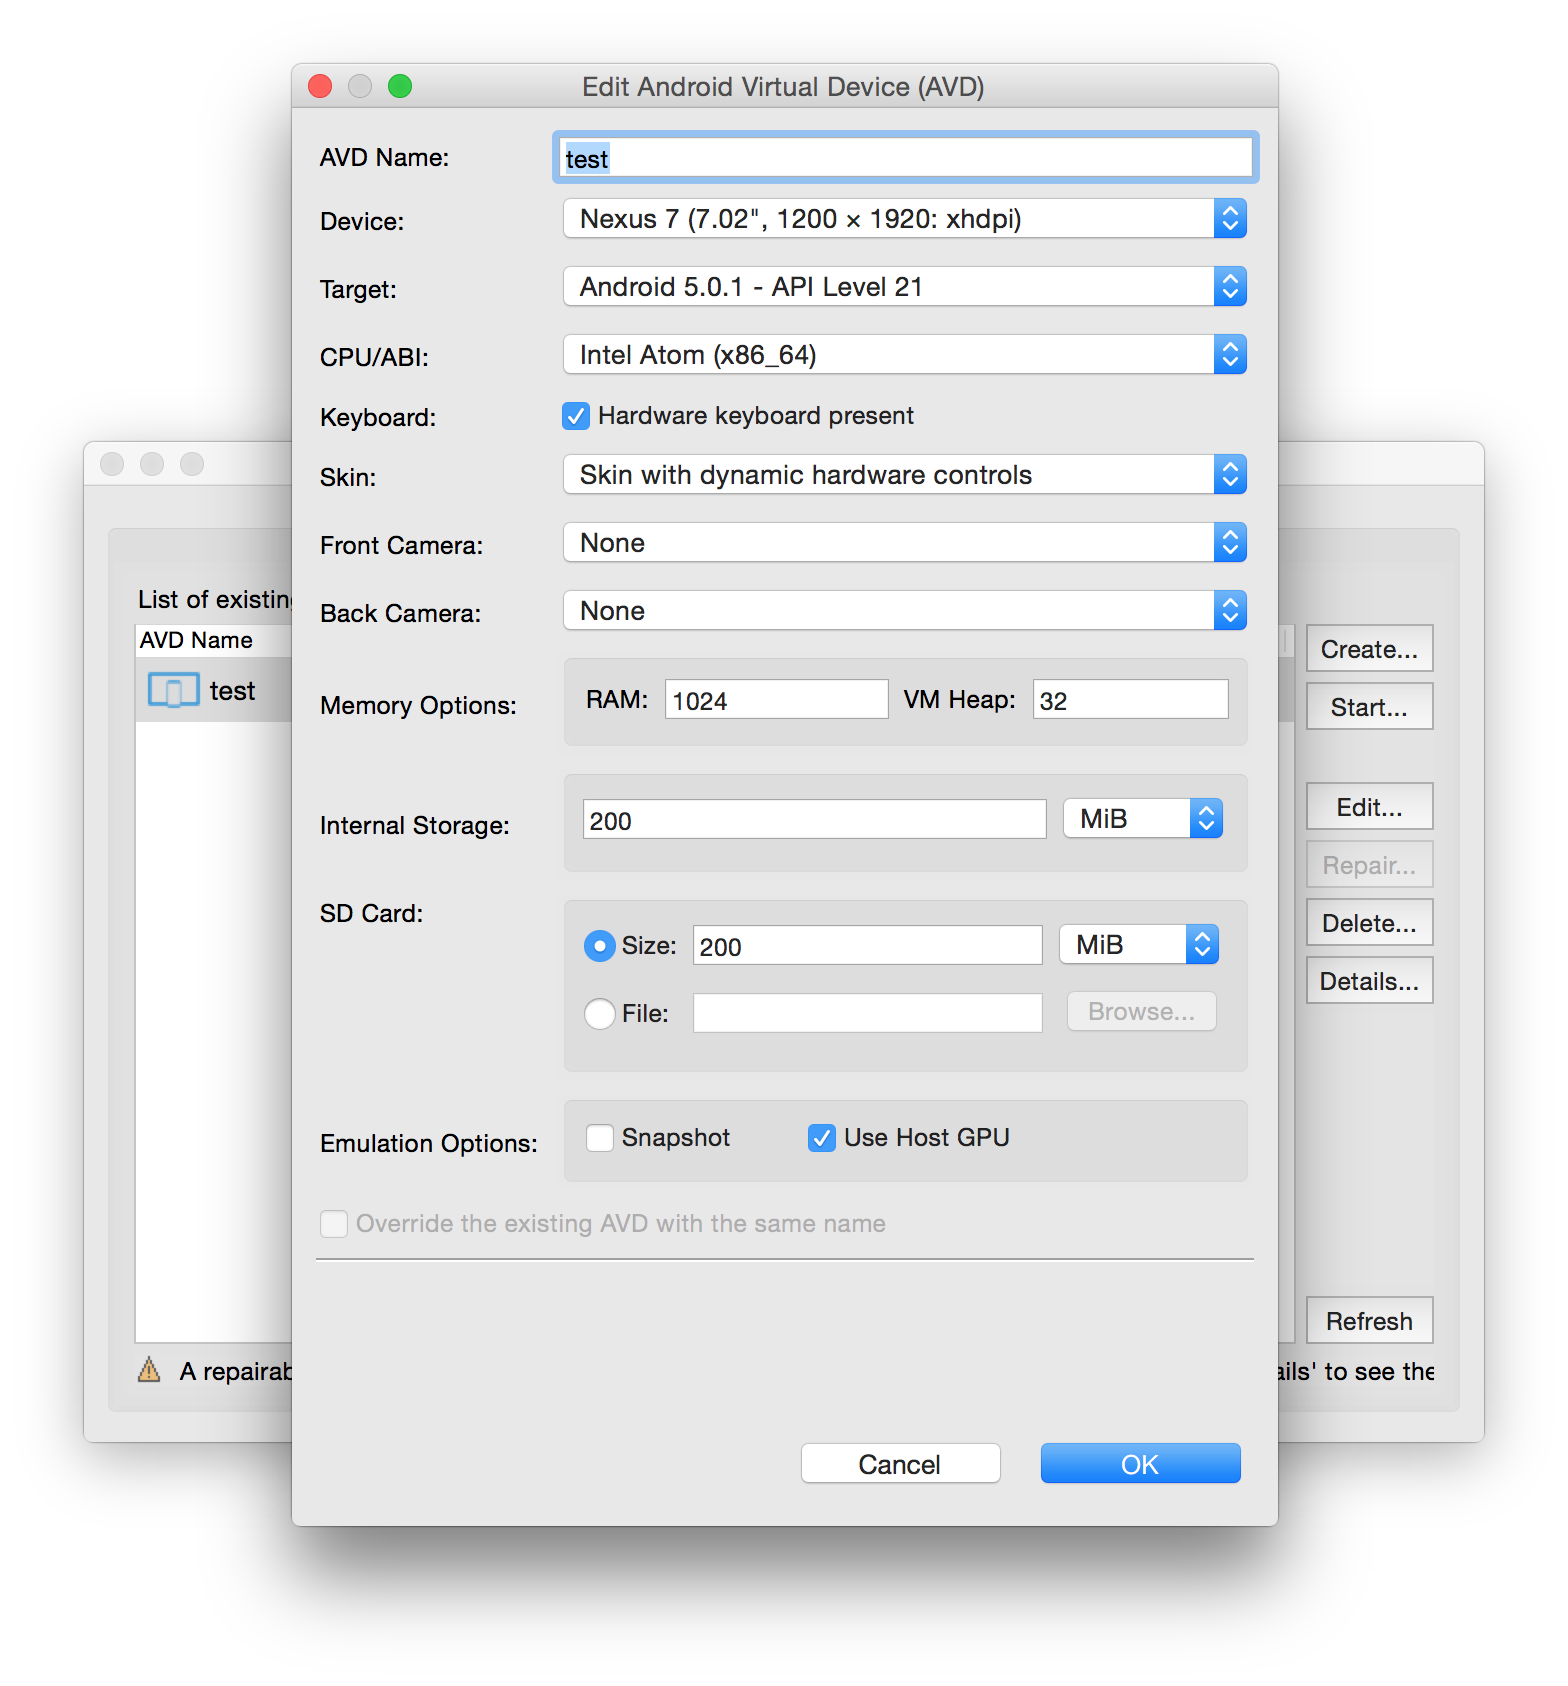
With the software I needed for the emulator downloaded and ready, it was time to configure a avd (Android Virtual Device). I fired up the command ~/Library/Android/sdk/tools/android avd and was presented with the Android Virtual Device Manager. I then proceeded to create a New device as follows:
Saved that and quit the AVD Manager. That is all that I needed for the hardware portion. To test the avd that I have just made, I chose to run it quickly using ~/Library/Android/sdk/tools/emulator -avd test:
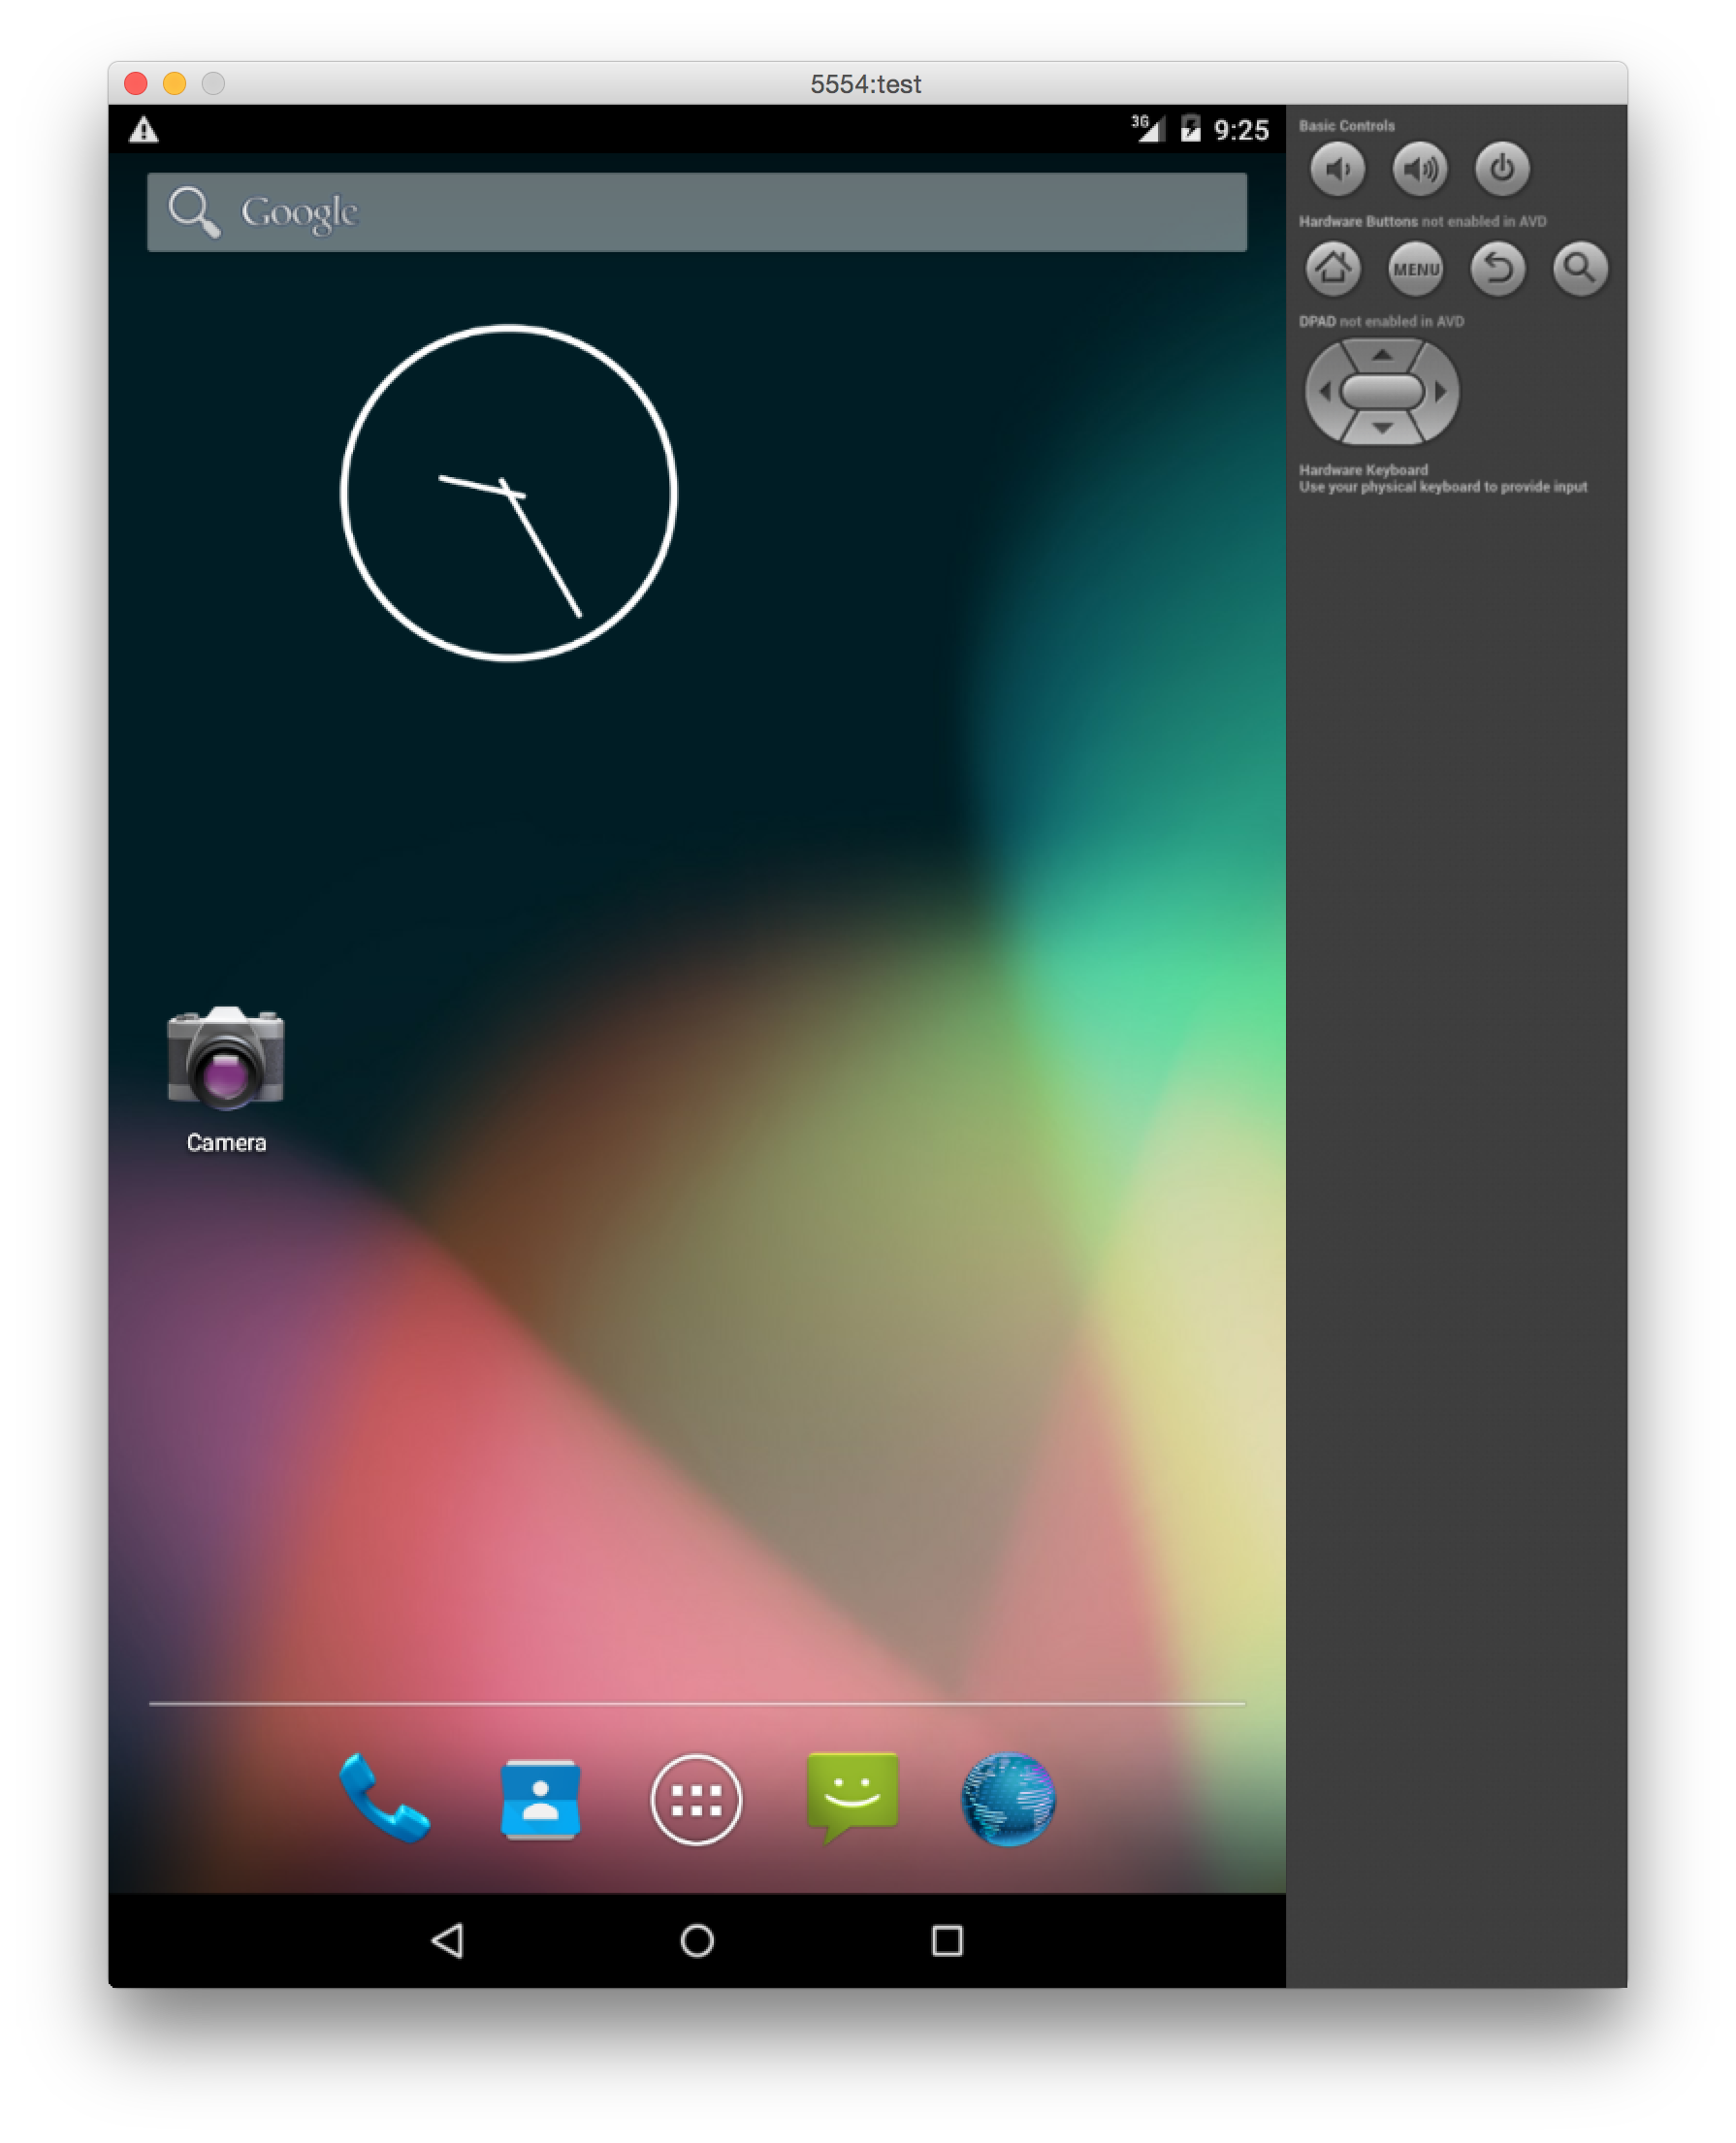
Aaaand it works! I was actually testing network connectivity of the apk in question, so I will add the information for that at the end of the post as a small FYI.
With the emulator running and working, it was time to install the apk to test. To do this, we use a tool call adb. This can be found in ~/Library/Android/sdk/platform-tools/adb. A number of features are available to us using adb, such as pushing files to and from the device and installing applications. The apk I was testing, was installed while the emulator was running:
leonjza@laptop » ~/Library/Android/sdk/platform-tools/adb install ~/MyApplication.apk
* daemon not running. starting it now on port 5037 *
* daemon started successfully *
2383 KB/s (4184313 bytes in 1.714s)
    pkg: /data/local/tmp/MyApplication.apk
Success
The application popped up under the menu on the emulator and I was able to launch it. However, the application sees the Andriod Emulator as a jailbroken device, and refuses to start up. Not a problem :)
Note If you get a error such as INSTALL_FAILED_DUPLICATE_PERMISSION, it usually meant that the application is already installed. Simply uninstall it from the emulator and retry the install. The storage on the emulator was persistent throughout reboots for me which was quite nice too.
looking at the apk, getting the juicy bits
Before I could even begin to think about where to look for the Jailbreak checking code, I first had to understand very quickly how a apk gets to be, and what it contains. Most importantly, the apk can be unzipped and its contents further examined. Wikipedia does a very good of giving you a rundown on a very high level. Just enough to grasp which parts may be of interest. It seemed like the juicy bits I am after will be in classes.dex. This is what looks like to be the compiled logic in the [dex file format](http://en.wikipedia.org/wiki/Dalvik_(software) understandable by the Dalvik virtual machine. Ok. But how do I make that into something I can understand?
In comes dex2jar. A utility that will convert android dex files into Java source. :) I downloaded the latest archive and extracted it. I then extracted classes.dex from the apk too:
leonjza@Laptop » unzip MyApplication.apk classes.dex
Archive:  MyApplication.apk
  inflating: classes.dex
With the classes.dex file ready, I ran it through dex2jar:
leonjza@Laptop » dex2jar-0.0.9.15/dex2jar.sh classes.dex
this cmd is deprecated, use the d2j-dex2jar if possible
dex2jar version: translator-0.0.9.15
dex2jar classes.dex -> classes_dex2jar.jar
Done.
I now have a jar file that I could open up in something like Luyten and examine further. I downloaded the latest Luyten jar and opened the classes_dex2jar.jar file with java -jar luyten-0.4.3.jar classes_dex2jar.jar. This totally looks like Java sources for the application :D
I went through quite a large amount of code, trying to piece together how everything fits into one another. After some time, I finally came across RootDetection.class:
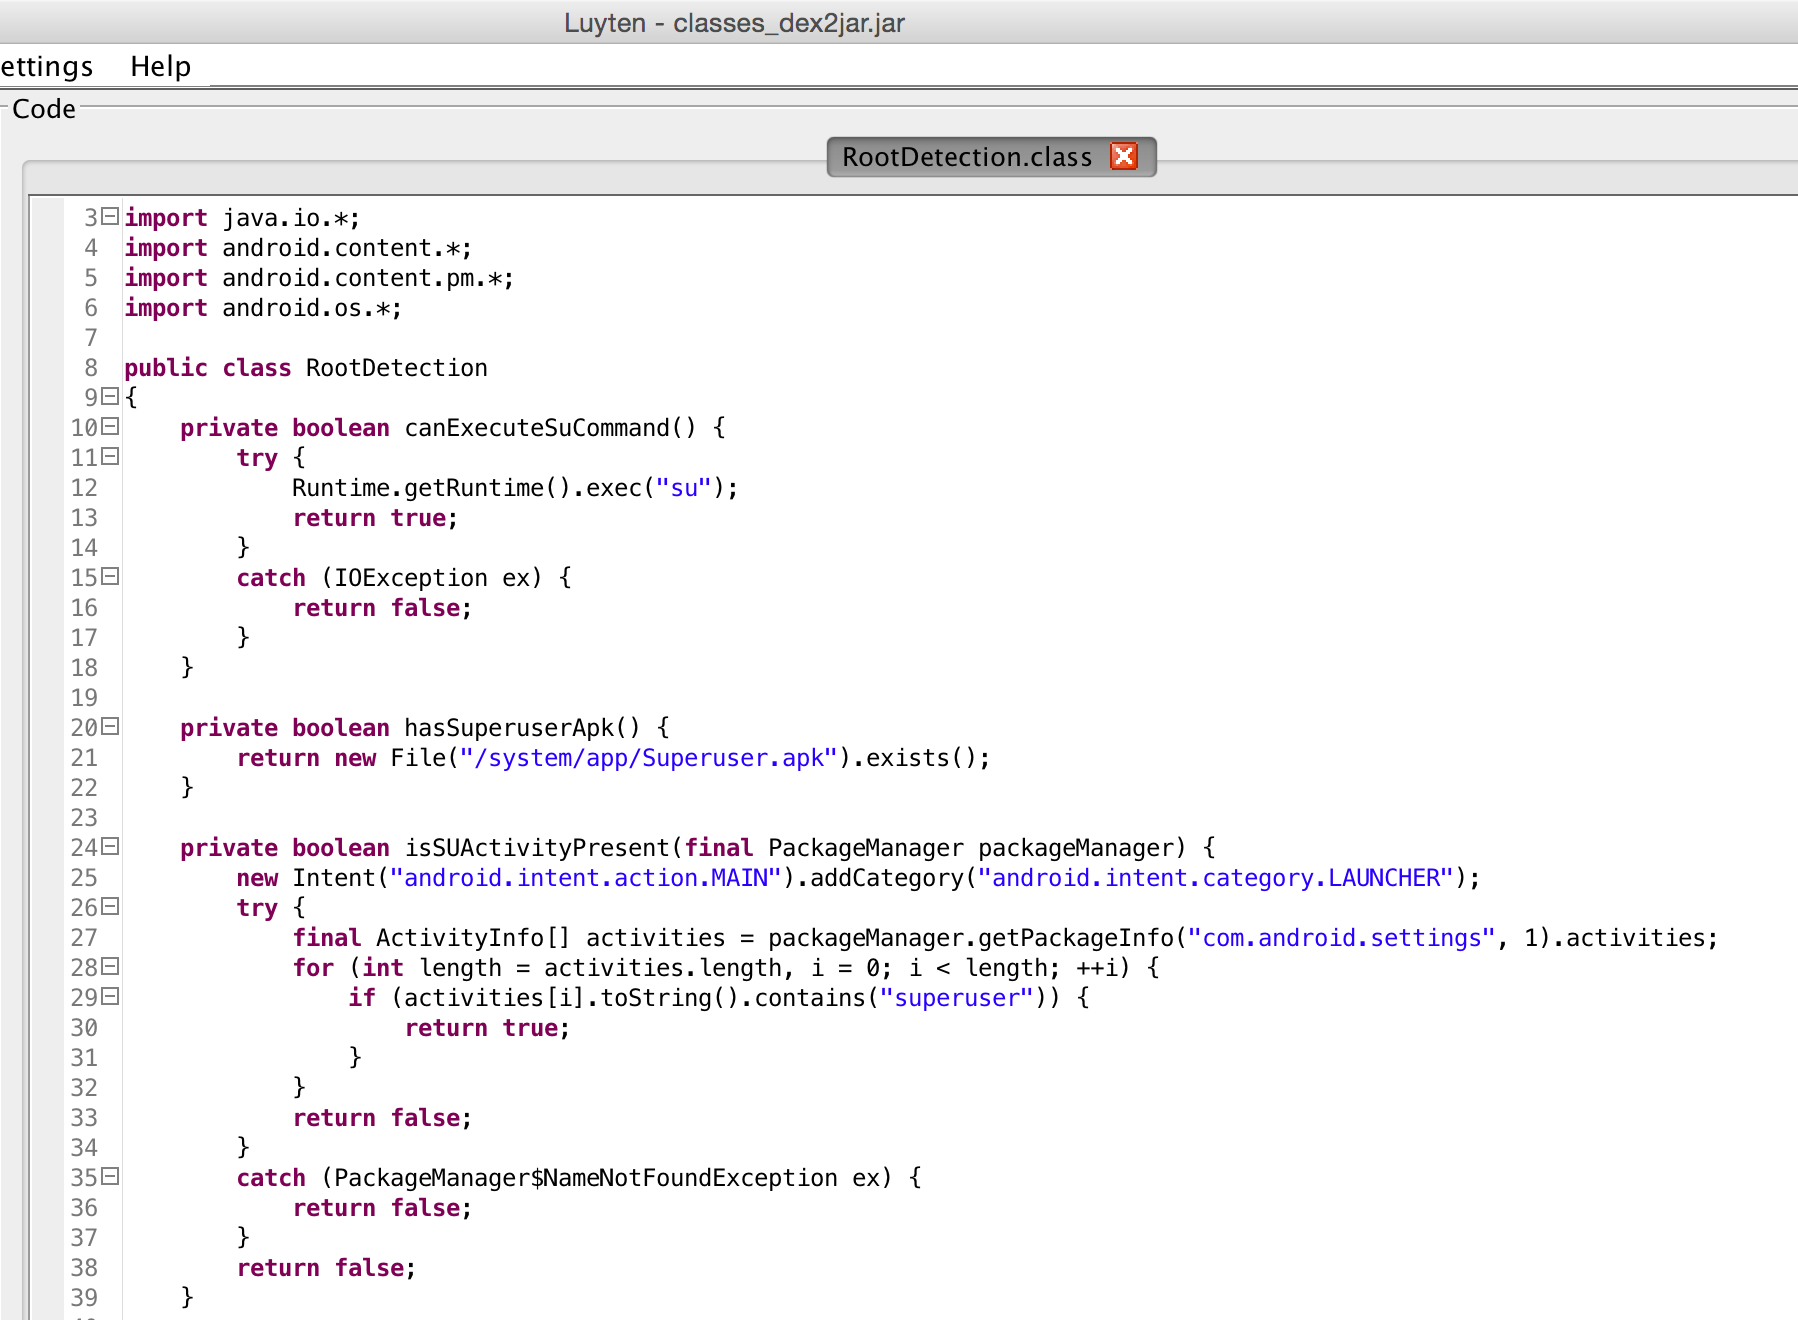
This is only a section of the code that attempts to detect if the device that the application is running on is rooted. Quite a number of checks are present, however the failure comes in where its only 1 method that is being used to return the Jailbreak status. This method was right at the end and was called isRooted. You will see in the next few paragraphs how trivial it is to bypass this.
decompiling the classes.dex
With some knowledge about the code, and knowing what I am after (the RootDetection class, isRooted method), it was time to move on to decompiling the dex to smali. This can be done easily using smali/baksmali which is an assembler/disassembler for Android’s dex format. I downloaded the latest versions of smali and baksmali and prepared to disassemble the classes.dex file that we used earlier to get some Java sources out of.
Using the baksmali tool, I pushed classes.dex through it to a output directory of out with java -jar baksmali-2.0.5.jar classes.dex -o out. This produced the disassembled version of the classes.dex and allowed me to read through it. I don’t really get a lot of this smali, but it is not that hard to find what you may be looking for. A simple grep may reveal all the answers:
leonjza@Laptop » grep -Ri isRooted out/
Binary file out//classes.dex matches
out//com/MyApplication/utils/RootDetection.smali:.method public isRooted(Landroid/content/pm/PackageManager;)Z
Yay. the isRooted method is easily identifiable. Opening the file containing the the isRooted method reveals the smali too:
.method public isRooted(Landroid/content/pm/PackageManager;)Z
    .registers 3
    .param p1, "pm"    # Landroid/content/pm/PackageManager;

    .prologue
    .line 74
    invoke-direct {p0}, Lcom/MyApplication/utils/RootDetection;->isTestKeyBuild()Z

[... snip ...]

    .line 76
    :goto_19
    return v0

    :cond_1a
    const/4 v0, 0x0

    goto :goto_19
.end method
Awesome.
preparing the patch
As we can see, isRooted has quite a bit of logic in it. Referring back to the jar file I created with dex2jar, we can deduce that we want isRooted to return false. Makes sense right? Now, I don’t write smali out of my head, but that did not stop me. How can I see what smali code would look like to just return false? Well, I could just write my own .java code, compile it, and check what the output is like once its disassembled right? Yep!
So I created RootDetection.java:
public class RootDetection
{
    public boolean isRooted() {
        return false;
    }
}
As you can see, isRooted will now just return false as I’d like it to! I had to hack away a bit at it to get the compilation to pass without errors, and this is probably the step that will usually require a bit of intuition. An important thing to note here is that I had to remove the argument from the original isRooted call. I had to keep this in mind when I was going to patch the original method. Anyways, I compiled the file RootDetection.java using the javac command line:
leonjza@Laptop » javac -source 1.6 -target 1.6 RootDetection.java
warning: [options] bootstrap class path not set in conjunction with -source 1.6
1 warning
------------------------------------------------------------
leonjza@Laptop » file RootDetection.class
RootDetection.class: compiled Java class data, version 50.0 (Java 1.6)
You will notice I specified the -source and -target flags for javac. If I did not do this, baksmali would have not been able to decompile the java class :(
With my compiled method ready, it was time to see what this looks like in smali. There was just one more thing stopping me from seeing that though. The compiled java is not in the dex format that Andriod uses. Luckily there is a tool to convert this that comes with the Android sdk and lives in ~/Library/Android/sdk/build-tools/21.1.1/dx. I converted the class to dex format using the command ~/Library/Android/sdk/build-tools/21.1.1/dx --dex --output=RootDetection.dex RootDetection.class. This produced a new file called RootDetection.dex which is recognizable by baksmali. I then proceeded to decompile the generated .dex with baksmali and set the output to RootDetection/ with java -jar baksmali-2.0.5.jar RootDetection.dex -o RootDetection/. Inspecting the generated smali code, I now had a sample of what it would look like if it should simply return false:
# virtual methods
.method public isRooted()Z
    .registers 2

    .prologue
    .line 4
    const/4 v0, 0x0

    return v0
.end method
The plan now was to simply replace the originally generated smali from the apk’s classes.dex and re-assemble it using smali. I opened up the original isRooted code and replaced it with the sample that I had generated myself. Remembering the argument I had to remove from my compiled version, I figured that because the original method defined .registers 3, and mine defined .registers 2, I had to up it to 3 to keep the method argument in mind. This was the last modification that I did.
With the RootDetection class now patched, I re-assembled the classes.dex file from the generated smali code with java -jar smali-2.0.5.jar -o classes.dex out. The Reassembly generated no errors so I assumed it was successful.
repackaging and signing the apk
With the patch applied and the new classes.dex generated, it was time to repackage the apk. The first step was to add the new classes.dex to the apk:
leonjza@Laptop » zip MyApplication.apk classes.dex
updating: classes.dex (deflated 56%)
Next, the package has to be resigned as the classes.dex will no longer have the same hashes in META-INF/MANIFEST.MF as it originally had. Attempts to install the repackeged apk without resigning it may result in a error such as Failure [INSTALL_PARSE_FAILED_UNEXPECTED_EXCEPTION]. I used a tool called ‘sign’ found here to get hold of sign.jar. This would sign my apk using the test keys. I downloaded it using wget https://github.com/appium/sign/raw/master/dist/sign.jar, and ran it to sign my patched apk with java -jar sign.jar MyApplication_no_root.apk. This produced a file called MyApplication_no_root.s.apk.
Excellent. The only thing left for me to do was to install the application using adb and see if my patch worked, which it did! :D The usual error message about the jailbreak no longer displayed and I could continue with the rest of my testing.
notes about traffic interception
I have covered what I originally intended with the jailbreak detection patching, but want to add a few notes about traffic interception using the Emulator.
I used Burp Suite to intercept traffic and had it running locally, with a proxy open on tcp/8080. To redirect the emulators traffic though, I had to add a startup option to the emulator as follows:
~/Library/Android/sdk/tools/emulator -avd test -http-proxy localhost:8080
This proved affective and I was able to see http traffic just fine. However, when it came to https traffic, I wanted to take a spoon and remove my eye. Requests would just ‘hang’, the browser would freak out, the application I was testing would just stall, it was just a mess. Some research into the topic revealed I was not the only one planning some personal surgery and a few bright people have come up with some solutions.
The first pain I had was even though I installed the PortSwagger CA onto the device (via ~/Library/Android/sdk/platform-tools/adb push ~/Downloads/BurpCa.cer /storage/sdcard and then the devices Settings -> Security -> Install form SD Card), the certificate validation would still just fail due to date errors. So, I moved the devices date on by 3 days, and viola! Grr.
The next pain was the fact that the Emulator (or Android OS?) would not attempt to make a request to hostnames, but to the IP’s directly, making it very hard to trace in Burp. Luckily though, I found a script (and lost the original source, but I take no credit for this), that will help with the rewrites to hostnames and pass them to Burp as expected. This was mostly a problem in the application itself and not so much the web browser. The script to help with this was:
# TODO's:
# - Script currently doesn't treat TCP connections a streamed data. Normally we should buffer input
#   untill enough data has been received and then do our checks. However since the connections are
#   local all data is received at once (most of the time) so this code does work :)
import twisted
from twisted.names import server, dns, client
from twisted.internet import reactor, defer
from twisted.internet.endpoints import TCP4ServerEndpoint
from twisted.protocols import portforward
import re
from socket import *
import struct

# symbolic definition of getsockopt parameter
SO_ORIGINAL_DST = 80

# Mapping of domain name to given unique IP
mappings = dict()
# Mapping of given unique IP to domain name
reversemappings = dict()


# --------------------------------------- DNS SERVER ---------------------------------------


# Custom DNS server which assigns a unique IP address to every domain, even if
# in reality two domains share the same IP.
class ProxyResolver(client.Resolver):

        # Start with IP 1.1.1.1
        def __init__(self, servers):
                client.Resolver.__init__(self, servers=servers)
                self.ttl = 10
                self.ip = [1, 1, 1, 1]

        # Helper function: Move to next IP and return it as a string
        def nextIp(self):
                self.ip[3] += 1
                for i in range(3,1,-1):
                        if (self.ip[i] == 255):
                                self.ip[i] = 1
                                self.ip[i-1] += 1
                return str(self.ip[0]) + "." + str(self.ip[1]) + "." +str(self.ip[2]) + "." +str(self.ip[3])

        def lookupAddress(self, name, timeout = None):
                # If it's the first time a DNS lookup is done for this domain, assign it
                # a unique IP and update the mappings
                if (not mappings.has_key(name)):
                        ip = self.nextIp()
                        mappings[name] = ip
                        reversemappings[str(self.ip[0]) + "." + str(self.ip[1]) + "." +str(self.ip[2]) + "." +str(self.ip[3])] = name

                # Get the mapped IP!
                ip = mappings[name]
                print "DNS:", name, "->", ip

                # From the manual: "Defer is useful when you're writing synchronous code to an asynchronous
                # interface: i.e., some code is calling you expecting a Deferred result, but you don't actually
                # need to do anything asynchronous. Just return defer.succeed(theResult)."
                return defer.succeed([(dns.RRHeader(name, dns.A, dns.IN, self.ttl, dns.Record_A(ip, self.ttl)),), (), ()])


# --------------------------------------- HTTP PROXY ---------------------------------------


# Communication between your actual proxy (Burp, WebScarab, ..) and our script.
class ProxyClient(portforward.ProxyClient):
        def __init__(self):
                self.gotestablished = False
                self.requestdata = None

        def setRequestData(self, data):
                self.requestdata = data

        def dataReceived(self, data):
                # TODO: How does this work when proxying a real device?! Connect shouldn't be sent then?!
                if self.gotestablished or self.requestdata == None:
                        # If the connection has been established just forward the data to the emulator
                        # TODO: Check this
                        portforward.ProxyClient.dataReceived(self, data)
                else:
                        # TODO: Check this
                        if not "HTTP/1.0 200 Connection established\r\n\r\n" in data:
                                print "Warning: Unexpected proxy reply:", repr(data[:30])
                        else:
                                print "Proxy CONNECT reply: >", repr(data[:30])

                        self.gotestablished = True
                        # Forward data to Android
                        self.transport.write(self.requestdata)


# TODO: Check this
class ProxyClientFactory(portforward.ProxyClientFactory):
        protocol = ProxyClient


# Custom HTTP proxy. Intercepts the CONNECT <ip> command, looks up the corresponding domain name, and
# forwards the correct CONNECT <domain> command to your actual proxy.
class ProxyServer(portforward.ProxyServer):
        clientProtocolFactory = ProxyClientFactory

        def __init__(self):
                self.receivedfirst = False
                self.connectre = re.compile(r'CONNECT (\d+\.\d+\.\d+\.\d+):\d+ HTTP')
                self.otherre = re.compile(r'\w+ http://(\d+\.\d+\.\d+\.\d+)')
                self.firstdata = None


        def dataReceived(self, data):
                # The first time we recieve data we must check for invisible proxiying and rewrite
                # the CONNECT/GET requests to use the actual domain name.
                if not self.receivedfirst:
                        print "INCOMING TCP CONN: >", repr(data.split("\r")[0][:40])

                        # Of course invisible proxying is unnecessairy if the CONNECT command is actually used!

                        # ------------------------- Invisible Proxying Support ---------------------------

                        # TODO: This is UNTESTED and EXPERIMENTAL code
                        """

                        # TODO: Get ourselves an Android VMWare image and test this :)
                        # Only do invisible proxifying if there is no CONNECT command
                        # TODO: We should actually check if it *START* with CONNECT
                        if not "CONNECT" in data:

                                # We support invisible proxying for real Android devicec, where the computer is configured
                                # as the router, and all HTTP(S) traffic is redirected to our tool. In this scenario we
                                # don't receive a CONNECT request. Instead we get the original destination IP address and
                                # manually construct the CONNECT request.

                                # TODO: Test this on other operating systems than Linux
                                try:
                                        # Ask the OS the original destination of the connection
                                        dst = socket.getsockopt(self.transport.socket, SOL_IP, SO_ORIGINAL_DST, 16)
                                        # Exclamation mark tells unpack that dst is big-endian
                                        # 2x  : two pad bytes
                                        # H   : unsigned short (port)
                                        # 4s  : char string of 4 bytes (ip)
                                        # 8x  : eight pad bytes
                                        srv_port, srv_ip = struct.unpack("!2xH4s8x", dst)

                                        if srv_port == 443:
                                                self.peer.setRequestData(data)
                                                data = "CONNECT " + inet_ntoa(srv_ip) + ":" + str(srv_port) + " HTTP/1.1\r\n\r\n"
                                                print "PROXIFYING HTTPS: " + repr(data.strip())
                                        # NOTE: If you uncomment this elif block, your proxy must support invisible proxying
                                        elif srv_port == 80:
                                                # Rewrite to absolute GET request if info available
                                                if reversemappings.has_key(inet_ntoa(srv_ip)):
                                                        data = re.sub(r'^GET ', "GET http://" + reversemappings[inet_ntoa(srv_ip)] + ":" + str(srv_port), data)
                                                else:
                                                        print "Warning: got redirected HTTP request but unable to find destination hostname:port"

                                except Exception, e:
                                        print "Something went wrong with invisible proxying:", e.getMessage()
                        """

                        # ------------------- Rewrite CONNECT/GET/POST with domain name ---------------------

                        resultconnect = self.connectre.match(data)
                        resultother = self.otherre.match(data)

                        # TODO: We shouldn't use a normal replace after using regular expressions..
                        # Replace IP in CONNECT
                        if (resultconnect != None and reversemappings.has_key(resultconnect.group(1))):
                                data = data.replace(resultconnect.group(1), reversemappings[resultconnect.group(1)])
                                print "REWRITING CONNECT:", resultconnect.group(1), "->", reversemappings[resultconnect.group(1)]
                        # Replace IP in GET, POST, HEAD, etc
                        elif (resultother != None and reversemappings.has_key(resultother.group(1))):
                                data = data.replace(resultother.group(1), reversemappings[resultother.group(1)])
                                print "REWRITING HTTP METHOD:", resultother.group(1), "->", reversemappings[resultother.group(1)]

                        self.firstdata = data
                        self.receivedfirst = True

                        print "OUTGOING TCP: >", repr(data.split("\r")[0][:40])


                # forward data
                portforward.ProxyServer.dataReceived(self, data)


class ProxyFactory(portforward.ProxyFactory):
        protocol = ProxyServer

        def doStart(self):
                print "\t==== Android Proxy Up and Running ====\n"


def main():
        print "AndroidProxy   ---   (C) Mathy Vanhoef"
        print "This program comes with ABSOLUTELY NO WARRANTY."
        print
        print "DNS server will listen on localhost:53"
        print "HTTP Proxy will listen on localhost:8007"
        print
        #print "Physical device: Configure your computer dns server and as router (NOT as proxy) and execute"
        #print "\tiptables -t nat -A PREROUTING -p tcp --dport 80 -j REDIRECT --to-port 8007"
        #print "\tiptables -t nat -A PREROUTING -p tcp --dport 443 -j REDIRECT --to-port 8007"
        #print
        print "Emulator: start it using: emulator @AvdName -http-proxy http://localhost:8007 -dns-server localhost"
        print
        print "Don't forget to start your normal proxy on localhost:8080"
        print

        # Setup custom DNS server
        resolvers = []
        #resolvers.append(ProxyResolver([('8.8.8.8', 53)]))
        resolvers.append(ProxyResolver([('10.0.141.20', 53)]))
        f = server.DNSServerFactory(clients=resolvers)
        p = dns.DNSDatagramProtocol(f)
        reactor.listenUDP(53, p)

        # Setup TCP proxy server
        endpoint = TCP4ServerEndpoint(reactor, 8007)
        endpoint.listen(ProxyFactory('localhost', 8080))

        # Start DNS and TCP server
        reactor.run();


if __name__ == "__main__":
        main()
Run this with sudo python AndroidProxy.py (assuming you saved it as that), and change your Emulators launch options to ~/Library/Android/sdk/tools/emulator -avd test -http-proxy localhost:8007 -dns-server localhost -debug-proxy. Running it with sudo is needed as the script starts a DNS server locally. The -debug-proxy option is optional, but is useful for further debugging of the traffic.
As a final note on the proxy script. At some stage it looked as though names were not being resolved correctly as I was seeing output as DNS: clients3.google.com -> 1.1.1.4. This is just the internal storage key and not the IP it resolved :D
summary
Like I previously mentioned, with limited knowledge about smali and all that jazz, I was able to patch the application to not do the jailbreak detection it is intended to do. Removing jailbreak detection may not be such a big deal, but what else can you change, and how do you protect against that?